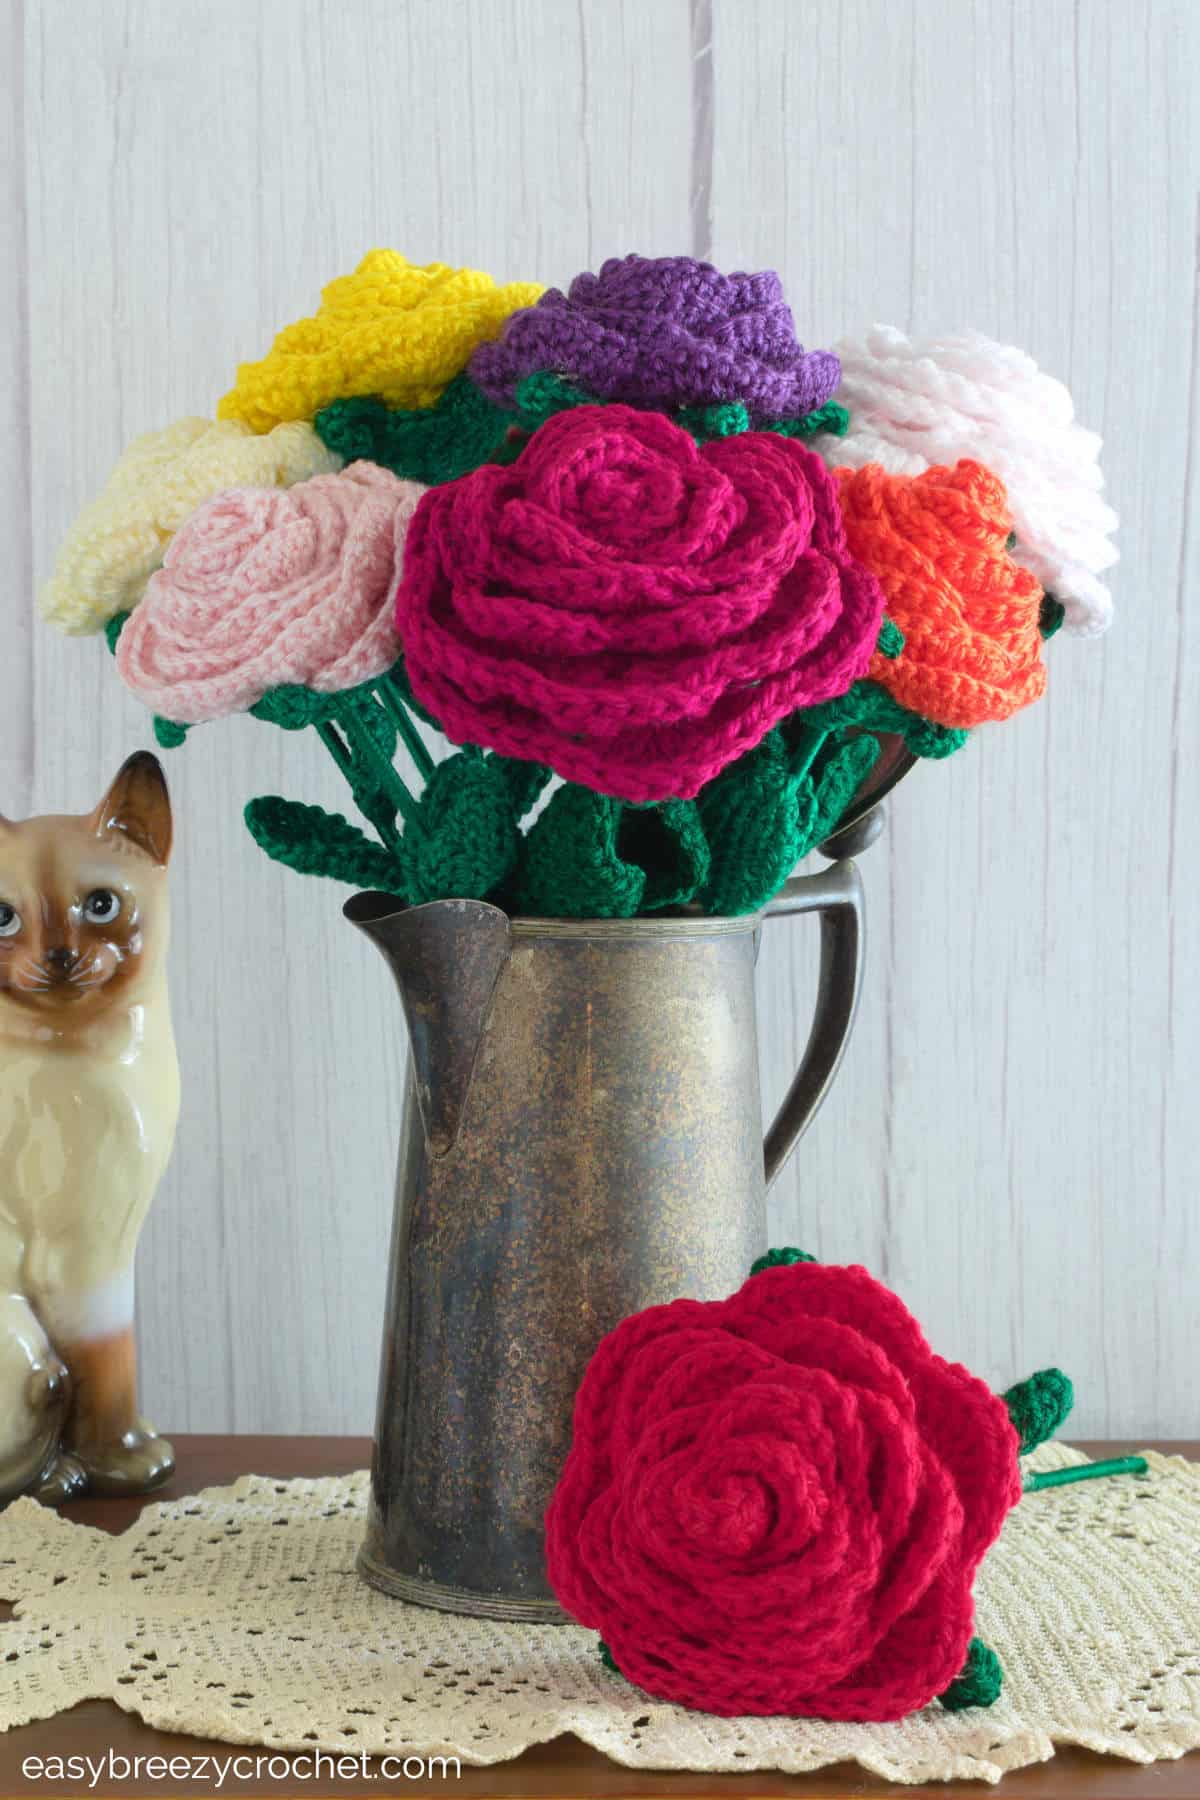
This easy crochet rose pattern is perfect for beginners or anyone looking for a quick and easy project.
This crochet rose with stem pattern has step-by-step instructions and is fast to make, so you could easily make a small bouquet in an afternoon.
Find more floral designs in our crochet flowers and decorative motifs collection.
Table of contents
- About This Rose Crochet Pattern
- Pattern Details
- Crochet Rose Gift Idea
- Stitches Used
- Type Of Yarn and Hook Sizes To Use
- What You Will Need
- Finished Size & Gauge
- Stitches and Abbreviations - US Terms
- Pattern Instructions
- Assembling The Rose
- Finishing The Rose
- Easy Go-To Stitch Guide
- Related Guides
- Stay Connected
- Comments
About This Rose Crochet Pattern
- This crochet rose flower is made in one piece and consists of four rows made up of basic crochet stitches.
- You will need a hot glue gun to shape and join the rose flower head to the stem and leaves.
- You will also need either a bamboo skewer or a length 16 - 18 gauge wire for the stem. Your decision on which to use will depend on how you want to use the flowers or what you have on hand. Skewers are sturdy and firm but do not offer flexibility like wire can.
- You can use almost any type of yarn to make these roses.
- And after making a few and becoming familiar with the pattern you could easily make just over 60 minutes.
Pattern Details
- Skill Level - Intermediate beginner
- Yarn Weight - #3 light worsted weight yarn
- Hook Size - 4mm and 3mm
- Finished Size - Flower heads are about 4.3 inches (11cm) in diameter
- Time To Complete - 1 - 2 hours
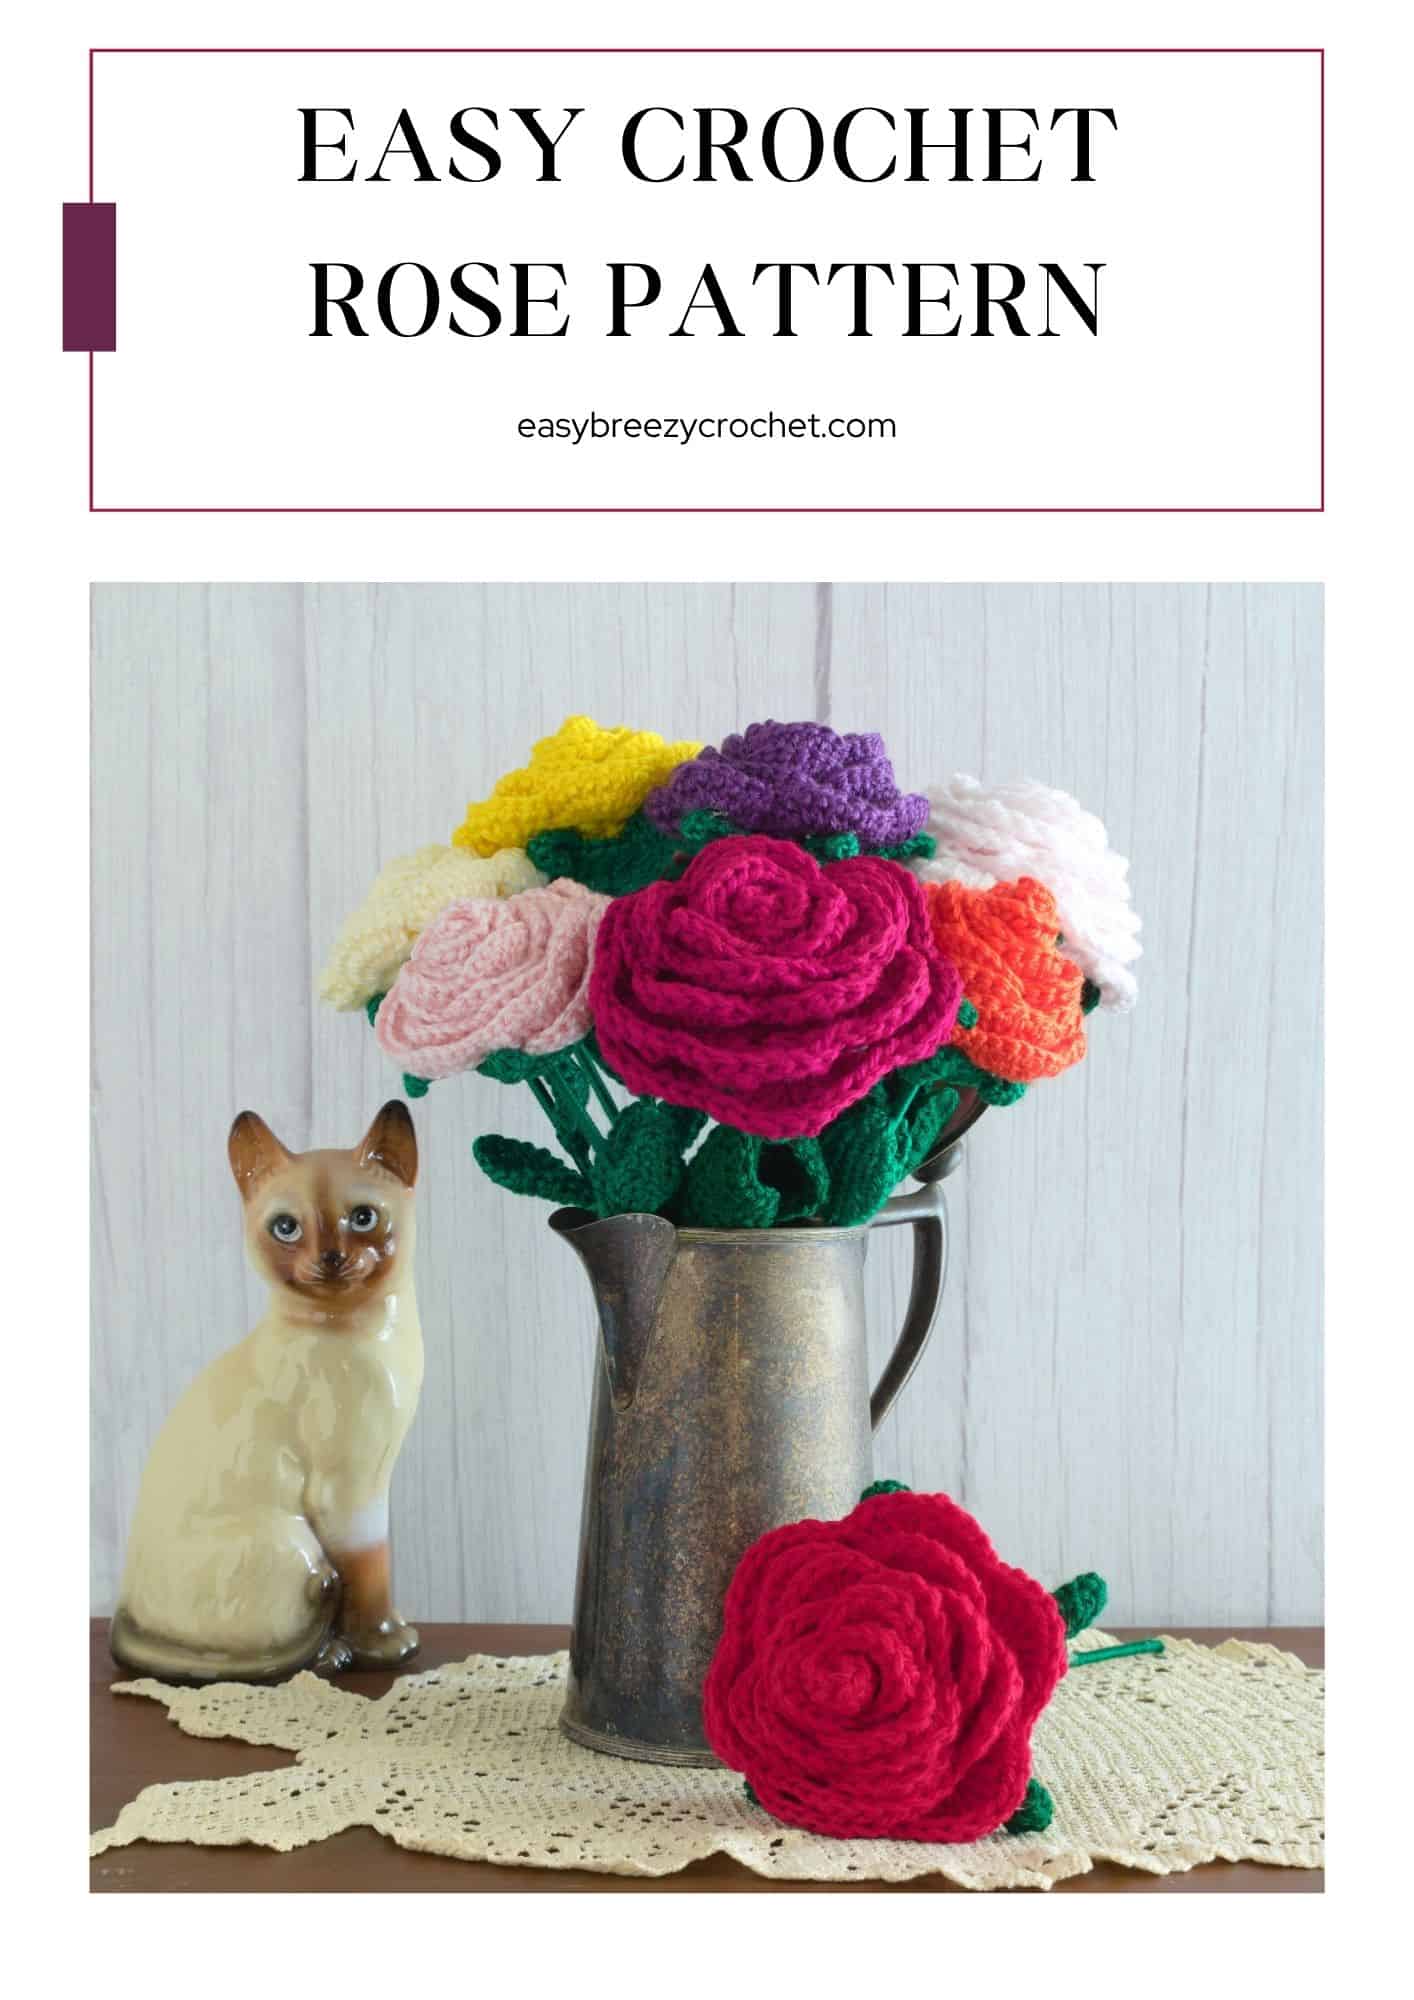
Exclusive Printable Crochet Patterns
Be inspired and keep creating!
Join us in The Pattern Vault, Easy Breezy Crochet's exclusive community.
Connect with other crocheters from all around the world and gain access to an extensive library of printable PDF crochet patterns.
All patterns are ad-free and available to you when you want, allowing you to crochet in your own time. So, if you're stuck on inspiration or on the hunt for you next crochet project, the Pattern Vault is for you!
Crochet Rose Gift Idea
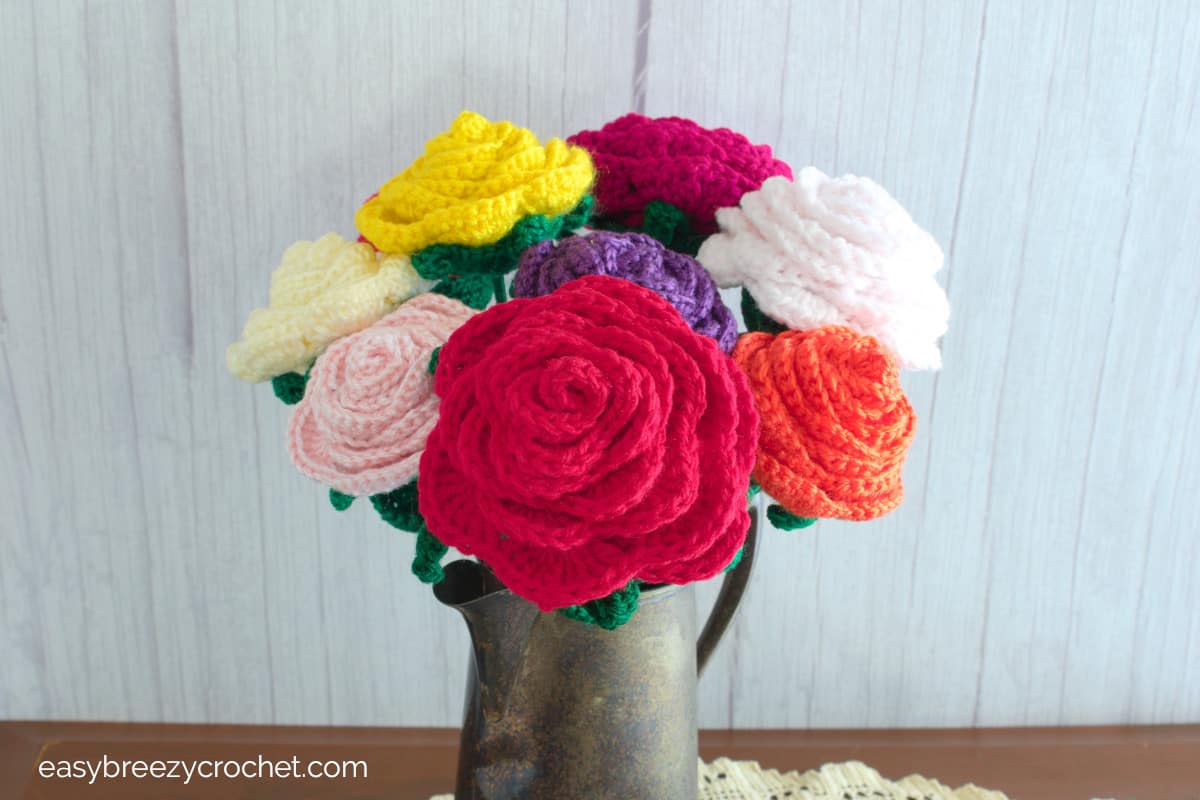
Crocheted roses make a beautiful gift. Making them for someone you love shows your show love and thoughtfulness to the person receiving them.
Make a bunch of these roses at special times like Mother's Day or Valentine's Day or simply to say thank you.
More Easy Crochet Patterns
If you like to see more crochet flower patterns take a look at this free collection of crochet flower patterns or this collection of crochet flower granny square patterns.
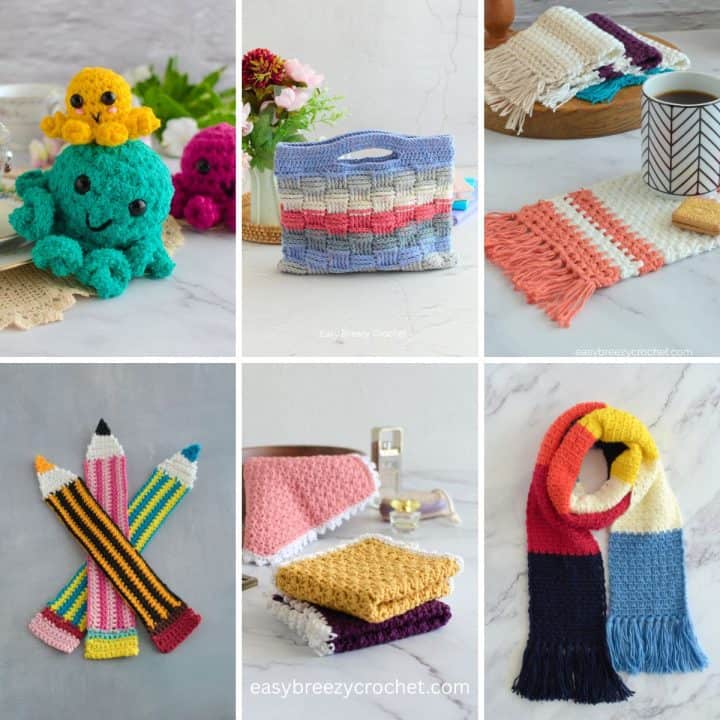
Or, if you are after some other crochet gift ideas check out these ideas:
Stitches Used
To make this crochet flower pattern you will need to know these basic stitches, chain stitch, single crochet, half double crochet, double crochet, treble crochet, and slip stitch.
Type Of Yarn and Hook Sizes To Use
Yarn
You can use just about any yarn for these crochet flowers, but be aware that the thickness of the yarn and hook size you use will affect the size of the finished flowers.
We used 100% acrylic #3 light worsted weight yarn with about 12 WPI (wraps per inch) to make these roses.
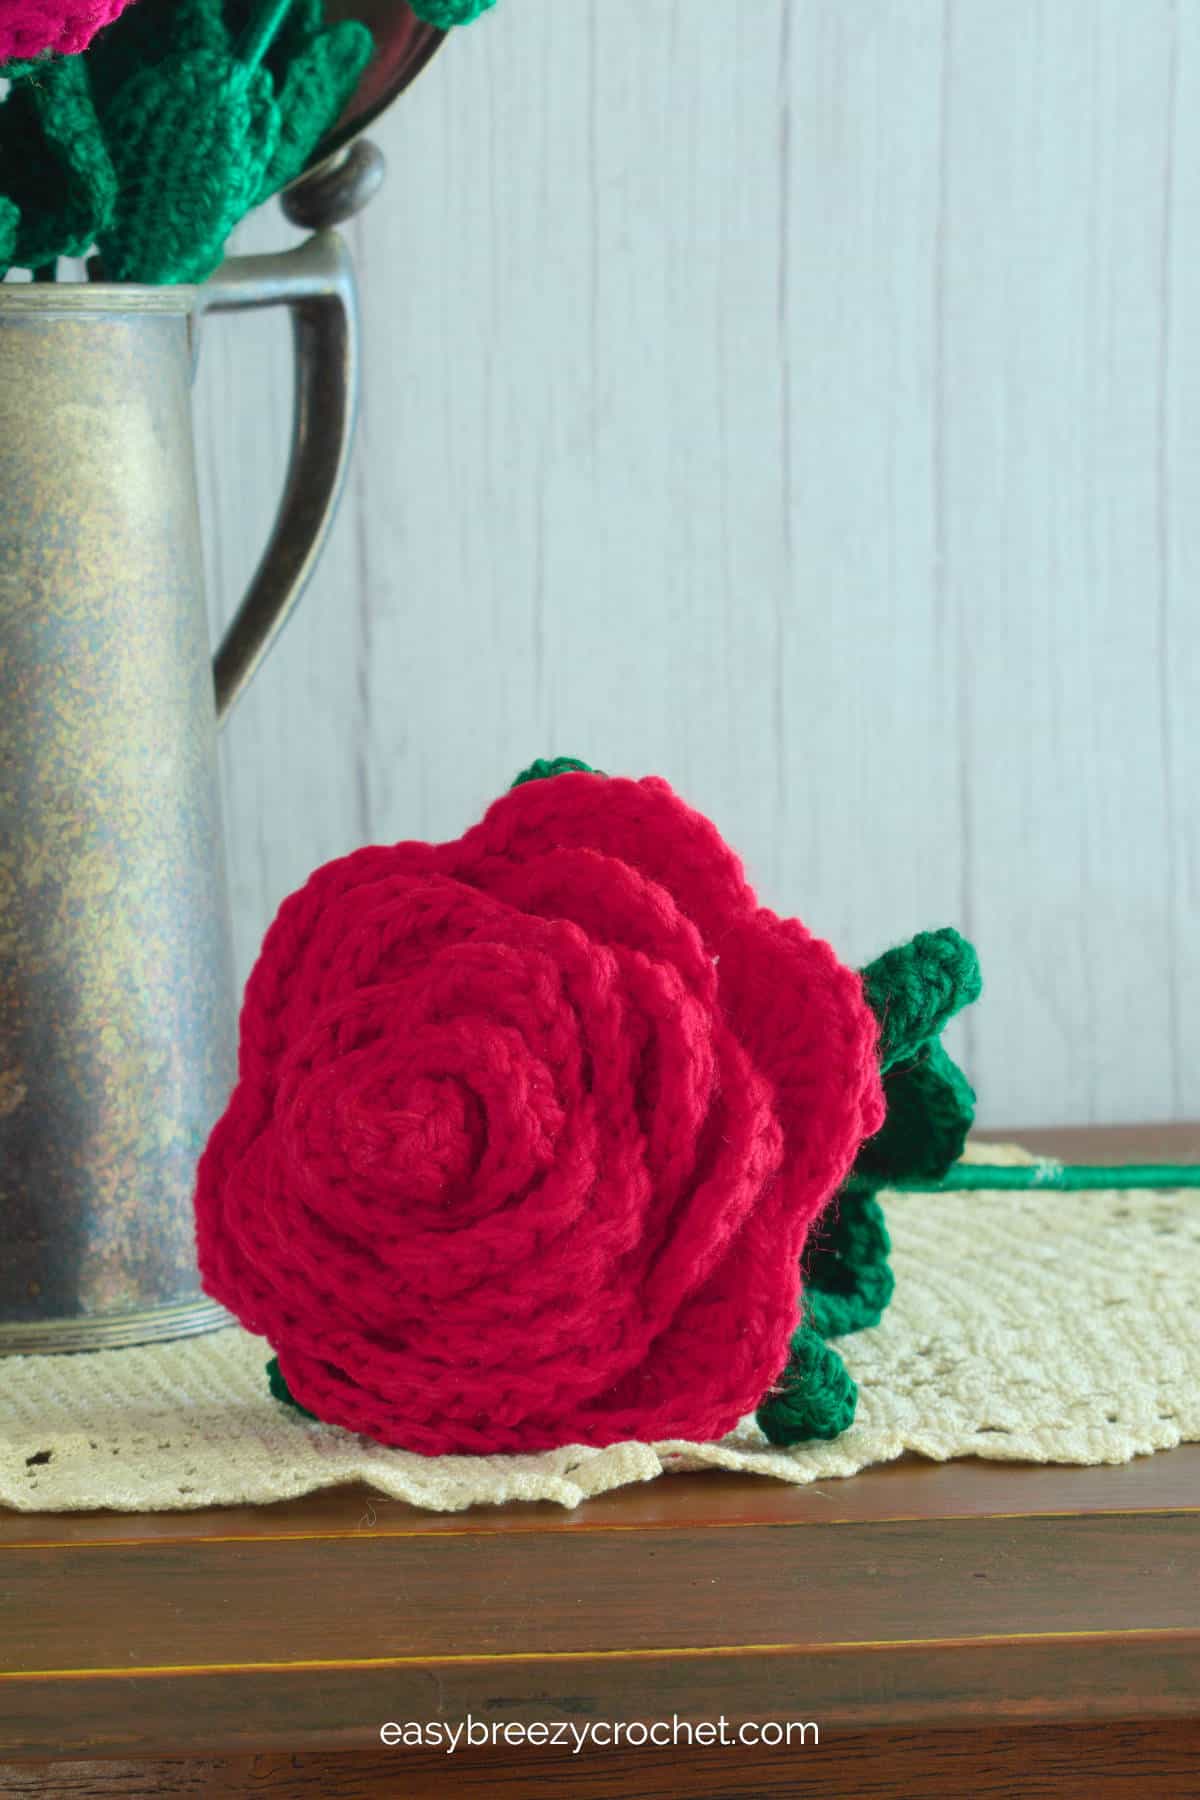
In the images displayed on this page, you will see roses in two different sizes. They were both made using yarn of a similar weight but from two different companies.
Even though they had the same wraps per inch, we could feel a difference in thickness.
To handle this variation, we experimented with different hook sizes to get the best possible-looking rose for each yarn type.
Hook Size
For the thicker yarn, the recommended hook size was 5.5mm (I/9), but after a few trials, we opted to use a smaller 4mm (G/6)hook because it gave a better-looking flower.
For the leaves, we then went down another size and used a 3mm (D/3) hook to create a leaf that holds its shape.
For the slightly thinner yarn, the recommended hook size was 4mm (G/6) but, a 3mm (D/3) hook was used to make the rose flower and a 2.5mm (C/2) hook for the leaves.
What You Will Need
Yarn
We used 100% acrylic #3 light worsted weight yarn (also known as DK or 8ply) with about 12 WPI (wraps per inch) in the following colors:
- Color A (flower), pink - 54 yards (50 meters)
- Color B (calyx, leaves + extra for stem), green - 19.6 yards (18 meters)
Crochet Hook
- 4mm (G/6) for the rose flower, and calyx
- 3mm (D/3) for the leaves, and the last round of the calyx
Notions
- Scissors
- Yarn needle
- Hot glue gun
- Bamboo skewer, 10 inches (25cm) long, or a similar length of about 16 -18 gauge wire
Finished Size & Gauge
Finished Size
The finished size of the large rose is about 4.3 inches (11cm) in diameter and about 10 inches (25cm) from the top of the flower to the bottom of the stem.
The finished size of the small rose is about 3.5 inches (9cm) in diameter and about 9.5 inches (24cm) tall.
The above measurements are based on the yarn weight and hook sizes mentioned above in our section on yarn and hook sizes.
Your flower may come out a different size and this will depend on the yarn weight you use, the hook size, and your tension.
Gauge
The gauge is not a big deal for this pattern, but think about the size of the flowers you want.
For roses that look more natural in size, go for #3 light worsted weight yarn.
But, if you want really big roses, try using thicker yarn or make the starting chain longer to add more stitches in each row. That will help you get those oversized blooms.
Stitches and Abbreviations - US Terms
- Ch - chain stitch
- Dc - double crochet
- Hdc - half double crochet
- Hk - hook
- MR - magic ring
- Prev - previous
- Rnd - round
- Rpt - repeat
- Sc - single crochet
- Sk - skip
- Sl st - slip stitch
- St/sts - stitch/stitches
- Tr - treble stitch
- [ ] - at the end of a round/row, indicates the number of stitches in that round/row
Ready to start crocheting?
Download the ad-free printable PDF and keep the pattern at your fingertips - no scrolling, no ads, no distractions. Get yours in our shop.
Pattern Instructions
Rose Flower
Use a 4mm hook to make the rose flower.
Row One

Row 1, color A, 4mm (G/6) hook - Chain 74, make 1 double crochet in the 2nd chain from the hook, then make 1 double crochet in each of the next 72 stitches, and turn. [You should have 73 double crochet stitches in this round.
Abbreviated version
Row 1, col A, 4mm (G/6) hk - Ch74, 1dc in 2nd ch from hk, then 1dc in each st to end, turn. [73dc]
Row Two

Row 2 - Chain 5 (this counts as double crochet and chain 2), make 1 double crochet in the same space as chain 5, then * skip 2 stitches and make 1 double crochet, chain 2, and another double crochet in the next stitch, repeat from * 23 more times, turn. [There should be 50 double crochet stitches and 25 x chain 2 spaces in this round.]
Abbreviated version
Row 2 - Ch5 (counts as dc and ch-2), dc in same sp as ch-5, * sk 2-sts (1dc, ch2, 1dc) in next st, rpt from * 23 more times, turn. [50dc, 25 x ch-2 sps]
Row Three
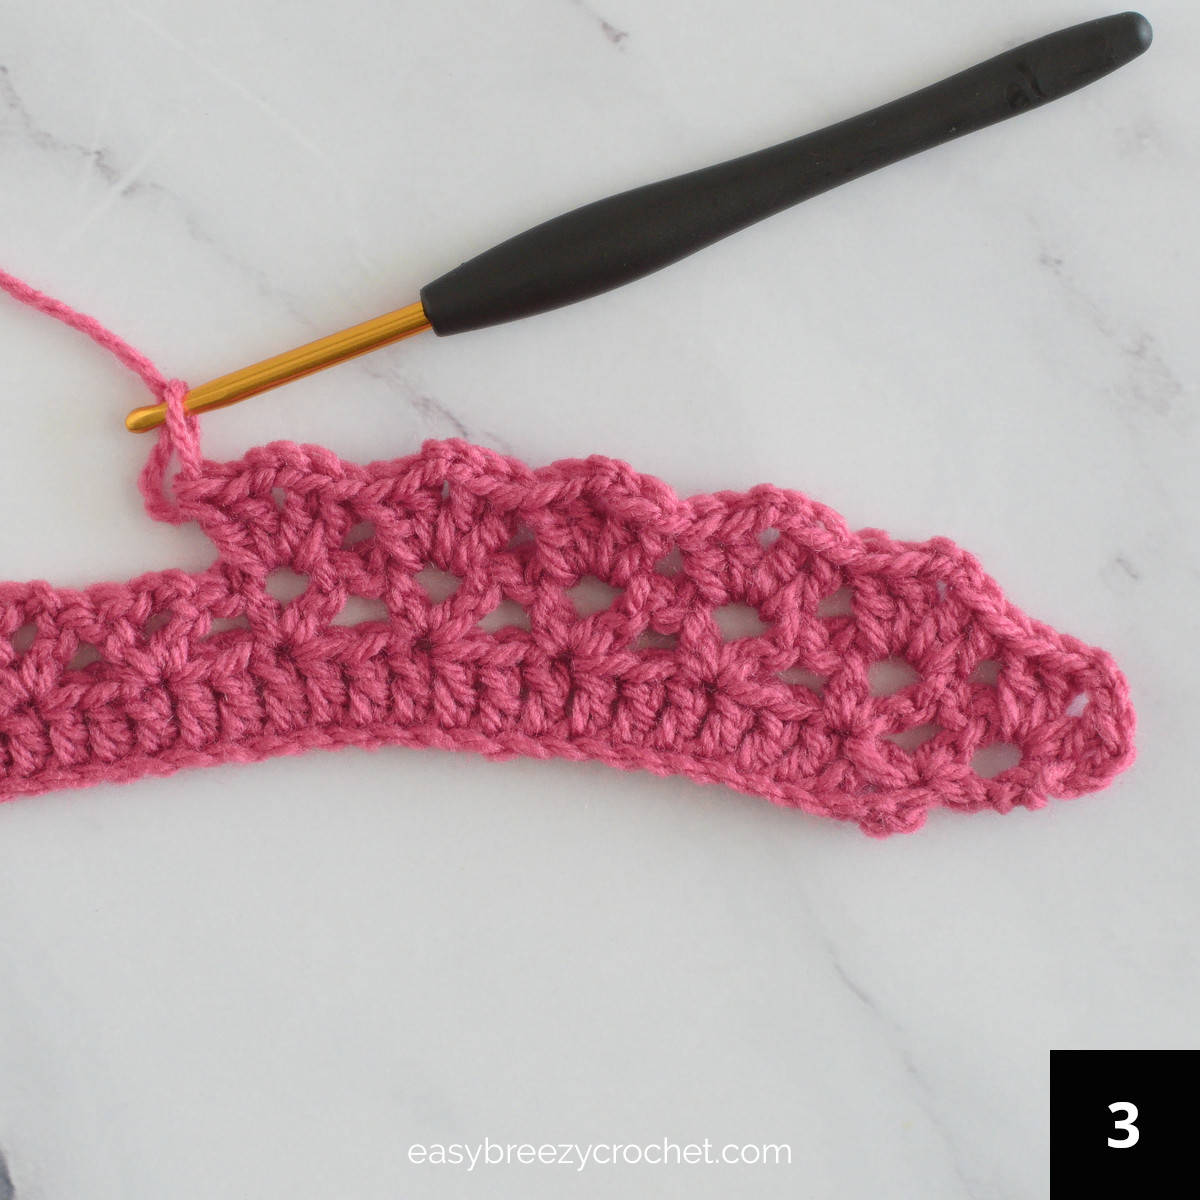
Row 3 - Slip stitch into the chain 2 space, then chain 3 (this counts as double crochet, make 1 double crochet and chain2 and another 2 double crochets in the same space as the chain 3, then make * (2 double crochet, chain 2 and 2 double crochet) in the next chain 2 space, repeat from * 23 more times, turn. [50 double crochets and 25 chain 2 spaces in the round.]
Abbreviated version
Row 3 - Sl st into ch-2 sp, ch3 (counts as dc), (1dc, ch2,2dc) in same space as ch-3, * (2dc, ch2, 2dc) in next ch-2 sp, rpt from * 23 more times, turn. [50dc, 25 x ch-2 sps]
Row Four
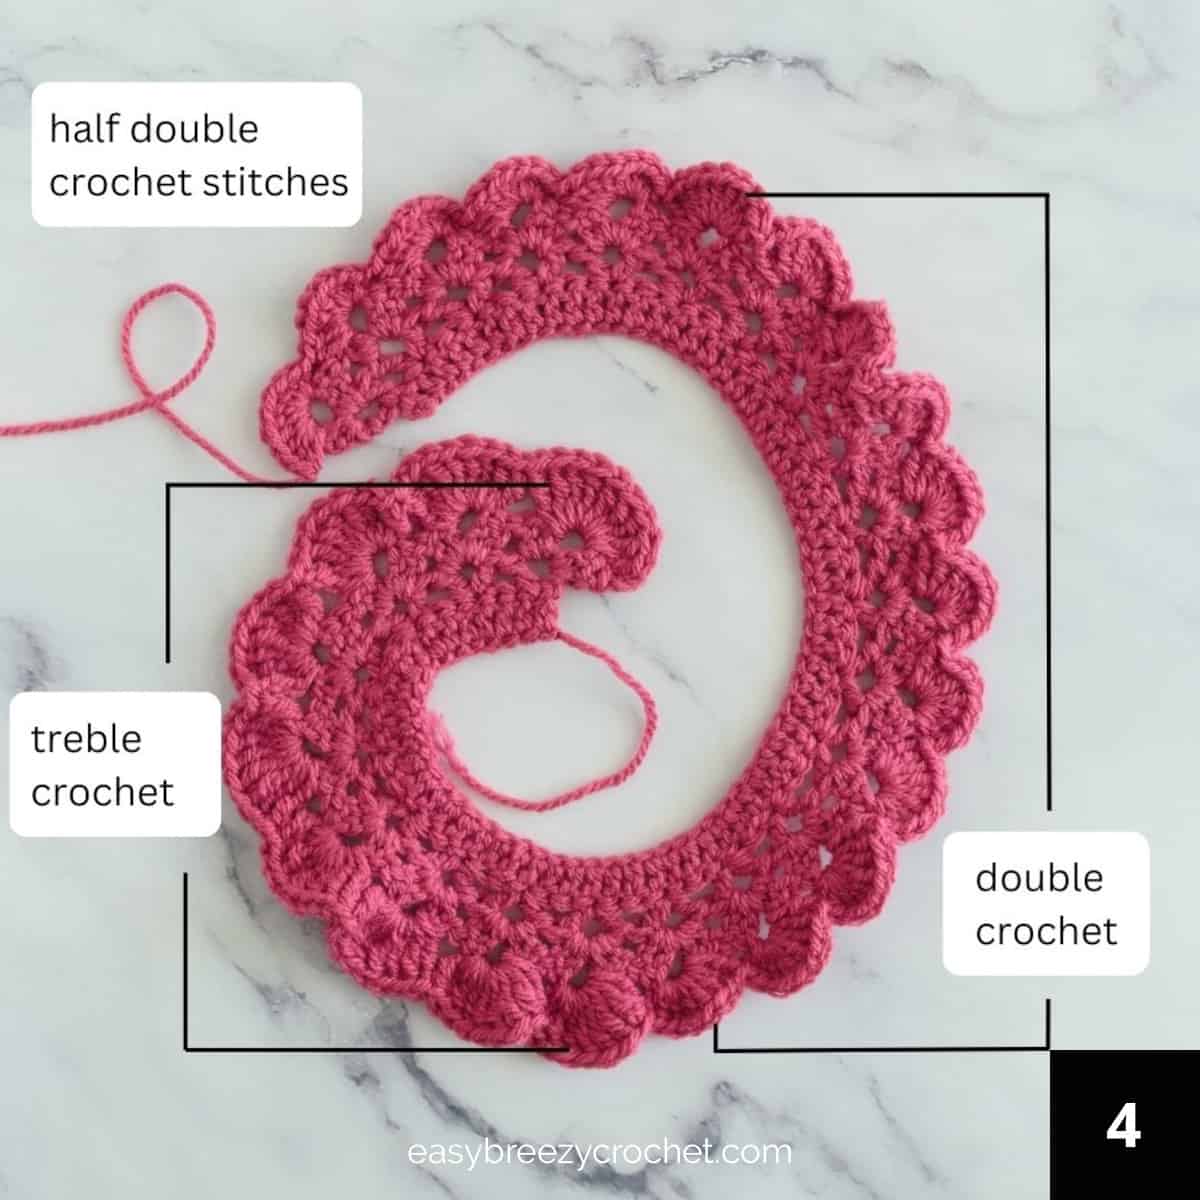
Row 4 - Chain 3, make 9 treble stitches in each of the next 9 chain 2 spaces, then make 9 double crochet stitches in each of the next 11 chain 2 spaces, then make 9 half double crochet stitches in each of the next 4 chain 2 spaces and make 9 double crochet stitches in the last chain 2 space, chain1, cut yarn, fasten off and weave in ends. [There should be 81 treble stitches, 108 double crochets, 36 half double crochets, and 1 x chain 3 in this round.]
Abbreviated version
Row 4 - Ch3, 9tr in each of the next 9 ch-2 sps, then make 9dc in each of the next 11 ch-2 sps, then make 9hdc in each of the next 4 ch-2 sps, and 9dc in the last ch-2 sp, ch1, cut yarn, fasten off and weave in ends. [81tr, 108dc, 36hdc, 1 x ch3]
✨ You're almost there! ✨
To unlock the final steps and complete your pattern, create a free account with Grow.me. below.
Make sure to tick the box to subscribe to our newsletter and stay up to date with the latest patterns, tips, and more!
Once you're signed up, you'll get instant access to finish your project and enjoy exclusive content in the future.
Already signed up? Hit the button below and select 'Switch to Log In' to pick up where you left off and finish your project!
Calyx
4mm hook for rounds 1-3, change to a 3mm hook for round 4 to make the sepals (the green extensions on the calyx).
Round One
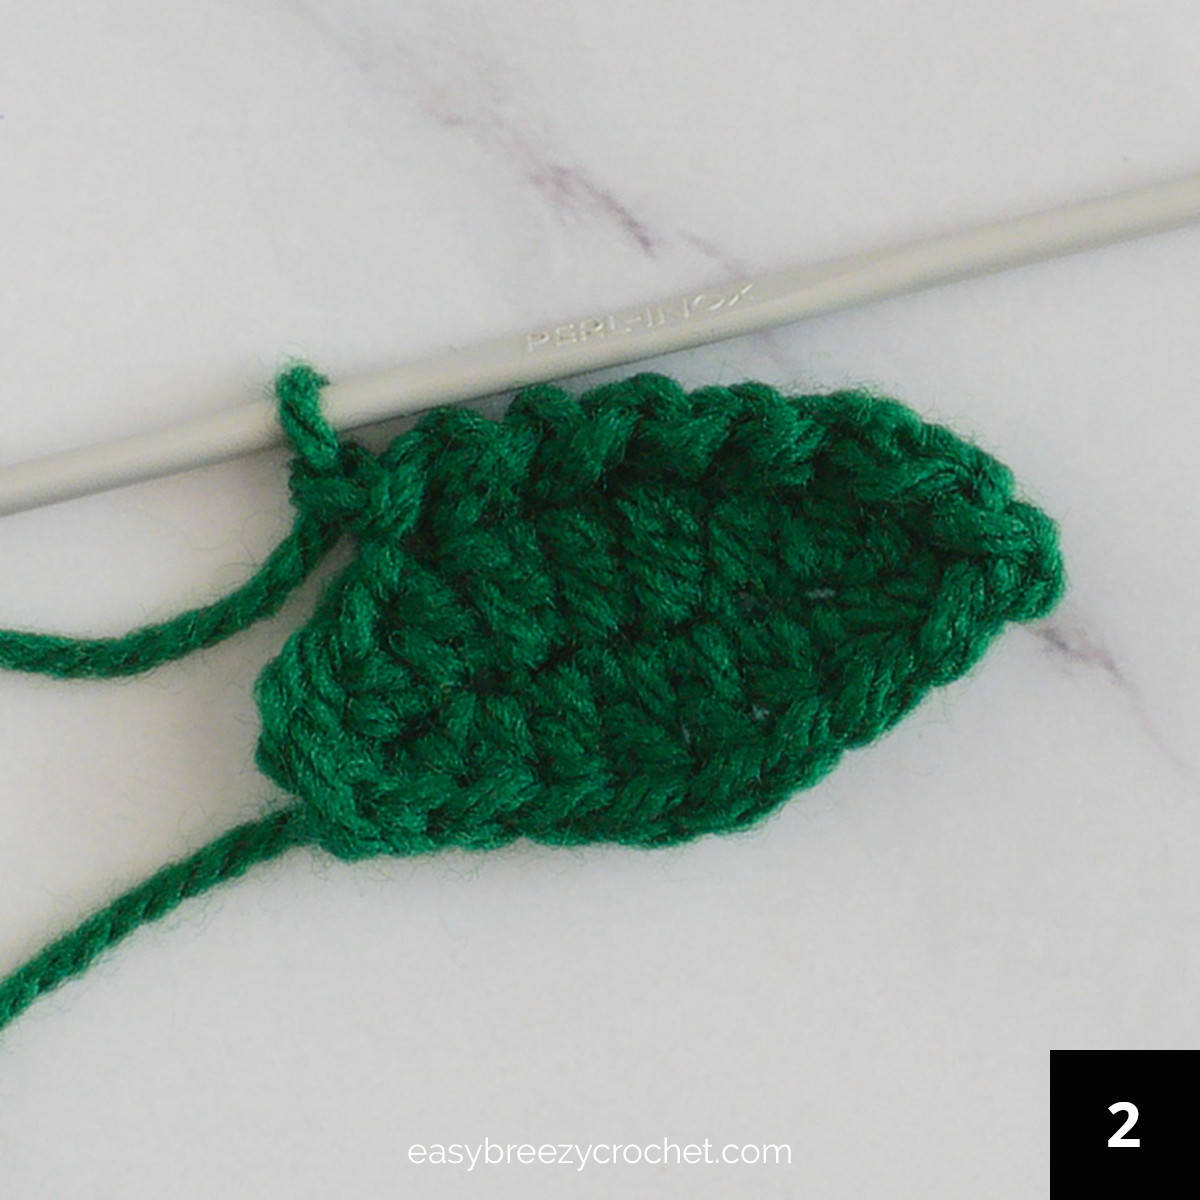
Round 1, color B, 4mm (G/6) hook - Into a magic ring, chain 2 (this does not count as a stitch), and then make 10 double crochets into the ring, slip stitch into the 1st stitch to join, pull the ring tight but only tight enough to fit snuggly around a bamboo skewer. Do not turn. [You should have 10 double crochet in this round.]
Abbreviated version
Rnd 1, col B, 4mm (G/6) hk - Into a MR, ch2 (this is not counted as st), and make 10dc, then sl st into 1st to join, pull ring but only tight enough to fit snuggly around a bamboo skewer. Do not turn. [10dc]
Round Two

Round 2 - Chain 2 (this is not counted as a stitch), make 2 double crochet in the same space as chain 2, then make 2 double crochet in each of the next 9 stitches, slip stitch into the 1st to join, do not turn. [20 double crochet stitches in this round.]
Abbreviated version
Rnd 2 - Ch2 (not counted as a st), 2dc in same sp as ch-2, 2dc in next 9 sts, sl st into 1st to join, do not turn. [20dc]
Round Three
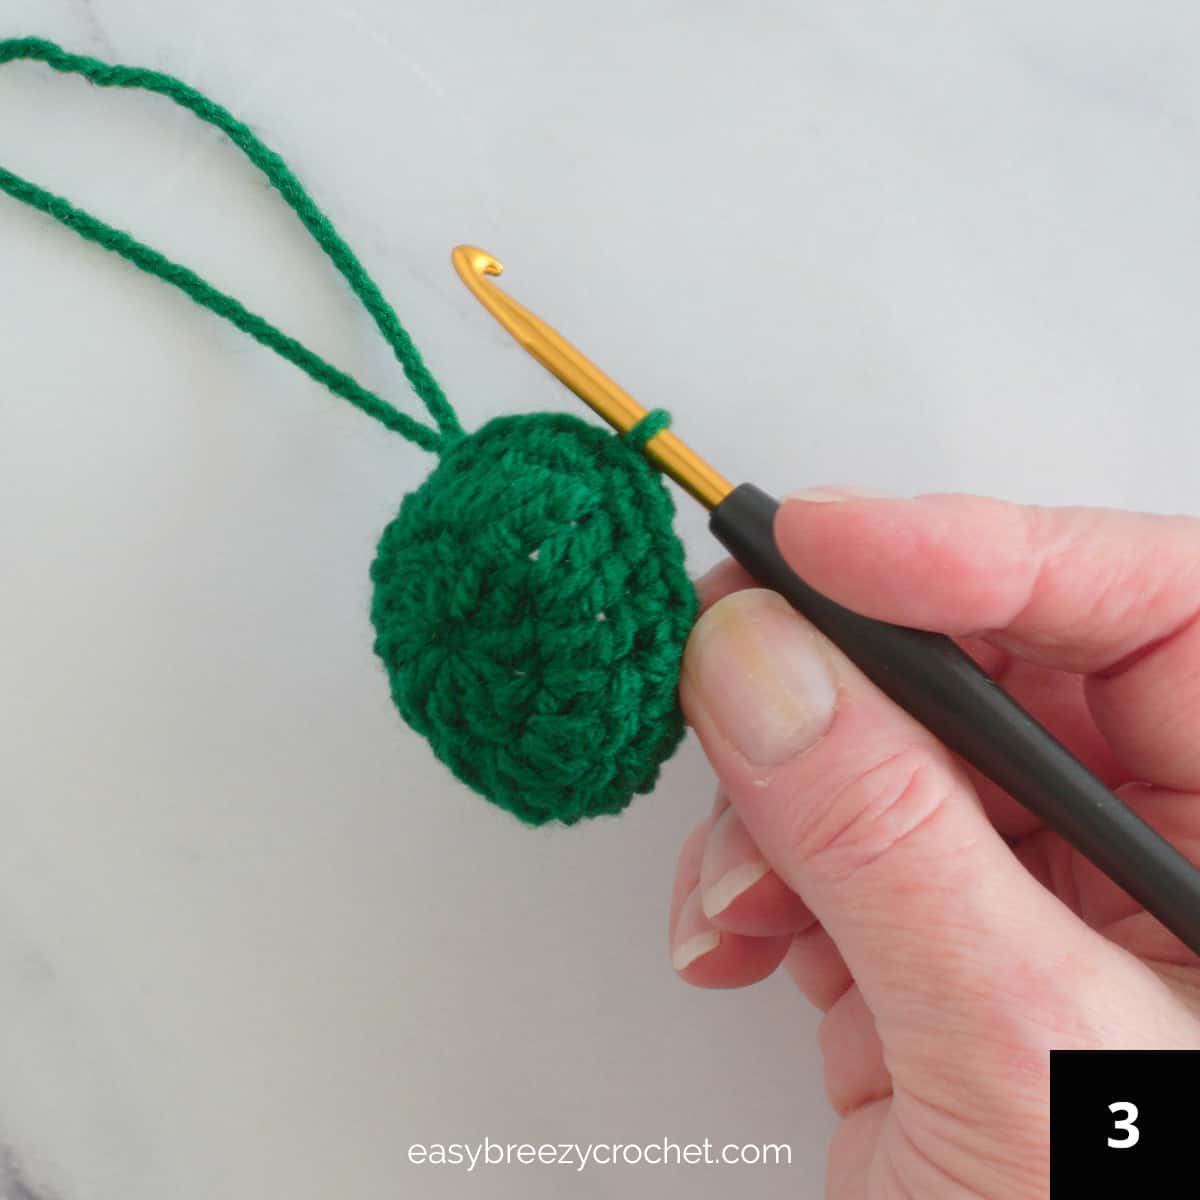
Round 3 - Chain 1 (this is not counted as a stitch), make 1 single crochet into the same space as chain 1, then make 1 single crochet into each of the next 19 stitches, then slip stitch into the 1st stitch to join, do not turn.
Abbreviated version
Rnd 3 - Ch1 (not counted as a st), 1sc in same sp as ch-1, 1sc in next 19 sts, sl st in 1st st to join, do not turn. [20sc]
Round Four

Round 4, 3mm (D/3) hook - * Chain 9, make 1 single crochet into the 2nd chain from the hook, then make 1 single crochet in the next stitch, then make 1 half double crochet into each of the next 2 stitches, then make 1 double crochet in each of the next 4 stitches, skip 1 double crochet stitch of the previous round, and make 1 single crochet into each of the next 3 stitches, repeat from * 4 more times, chain 1, cut yarn, fasten off and weave in end.
Abbreviated version
Rnd 4, 3mm (D/3) hk - * Ch9, 1sc in 2nd ch from hk, 1sc in next st, 1hdc in next 2-sts, 1dc in next 4-sts, sk-1dc of prev rnd, sc in next 3-sts, rpt from * 4 more times, ch1, cut yarn, fasten off and weave in end.

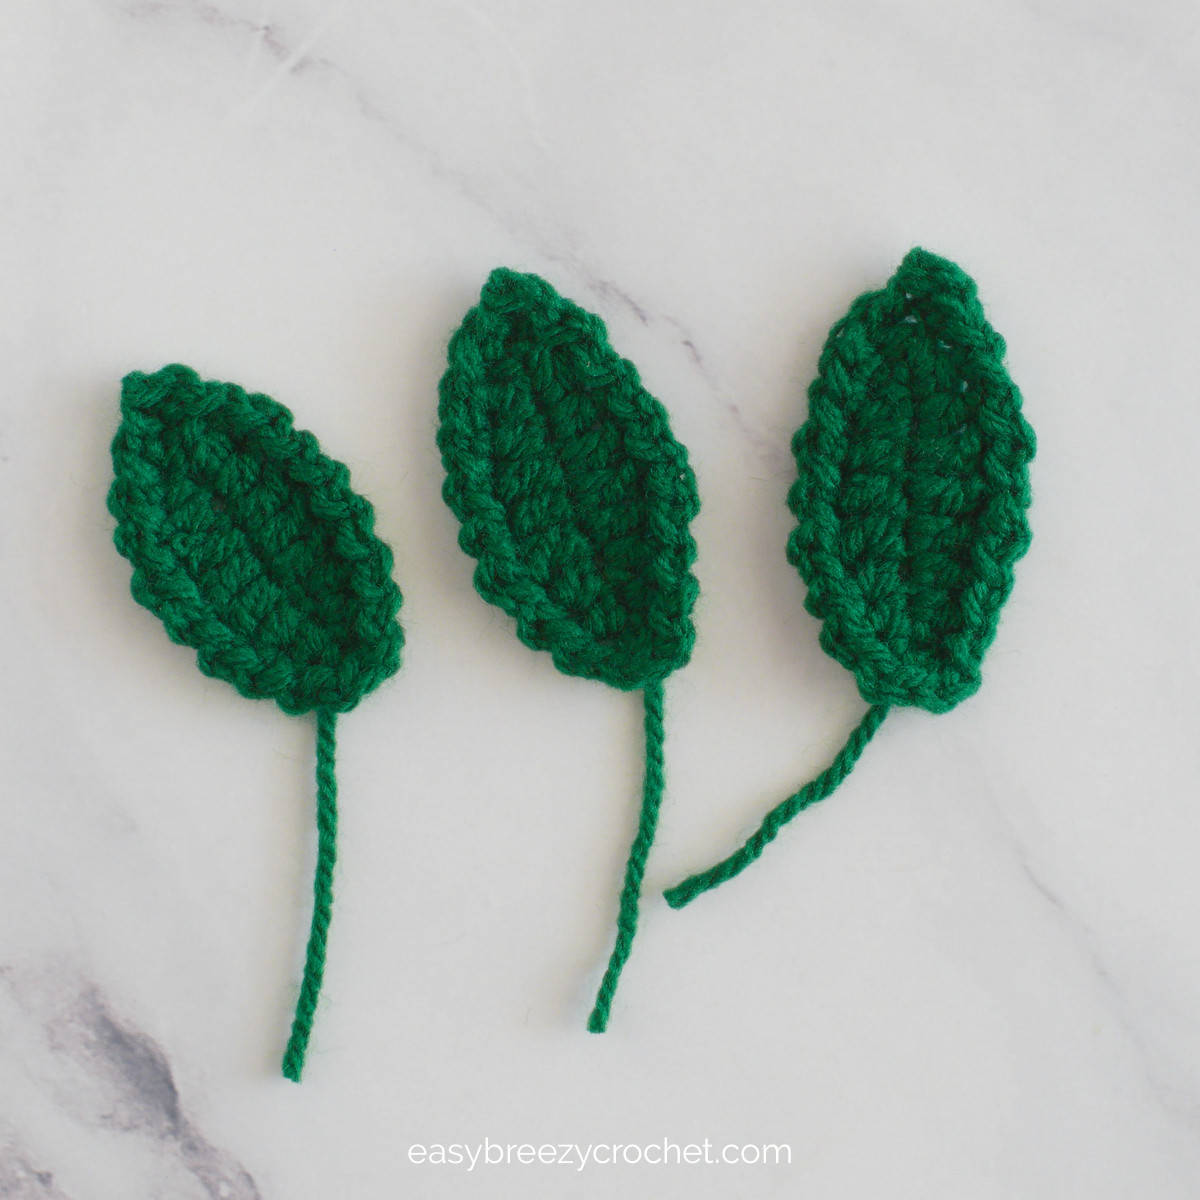
Leaf (make 2-3)
Crochet the leaves using a 3 mm hook and make two, three or more leaves if you like for each rose.
Round One

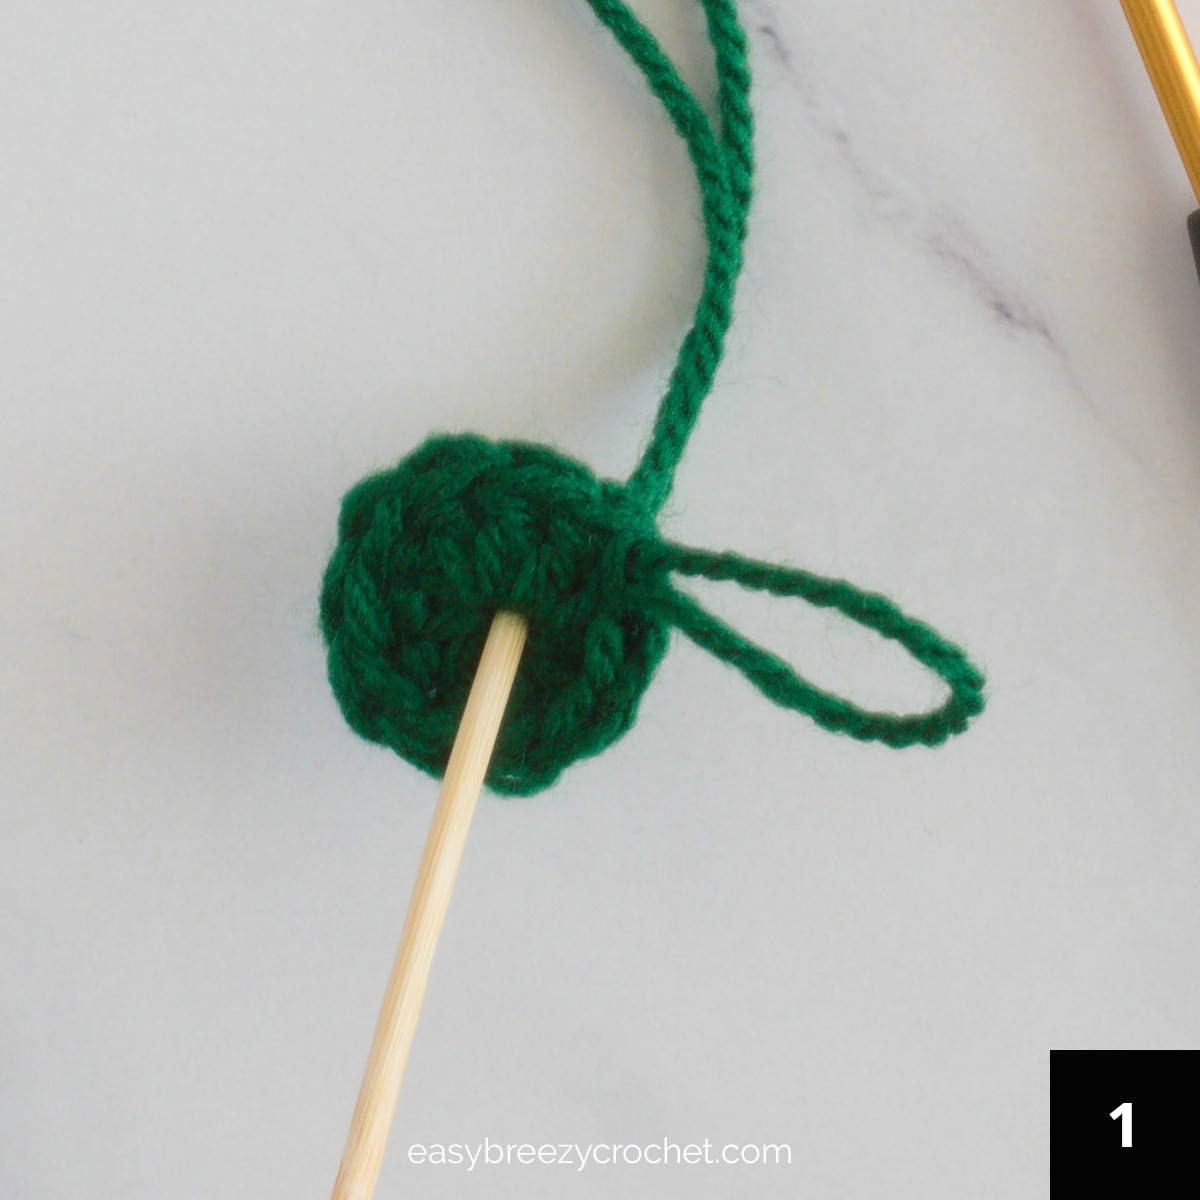
Round 1, color B, 3mm (D/3) hook - Chain 10, make 1 single crochet into the 2nd chain from the hook, then make 1 half double crochet into each of the next 2 stitches, then 1 double crochet in each of the next 3 stitches, half double crochet in the next 2 stitches, and make 2 single crochet in the last stitch. Continue around the foundation chain. Don't crochet over the starting yarn tail, this will be used for attaching to the stem. Make 1 half double crochet in the next 2 stitches, 1 double crochet in the next 3 stitches, then make 1 half double crochet in the next 2 stitches, then slip stitch into 1st to join.
Abbreviated version
Rnd 1, col B, 3mm (D/3) hk - Ch10, 1sc in 2nd ch from hk, 1hdc in next 2-sts, 1dc in next 3-sts, 1hdc in next 2-sts, 2sc in last st. Continue around the foundation chain, (don't crochet over the starting yarn tail, this will be used for attaching to the stem. Then make 1hdc in next 2-sts, 1dc in next 3-sts, 1hdc in next 2-sts, sl st into 1st to join.
Round Two
Round 2 (crochet into stitches around the leaf edge) - Chain 1, * slip stitch into next stitch, chain 1, repeat from * around, slip stitch into the 1st stitch made to join, chain 1, cut yarn, fasten off, and weave in the end.
Abbreviated version
Rnd 2 (crochet into stitches around the leaf edge) - Ch1, * sl st into next st, ch1, rpt from * around, sl st into 1st st made to join, ch1, cut yarn, fasten off, and weave in end.
Assembling The Rose
Attaching the Rose to the Skewer

- Use a hot glue gun to stick the rose onto the skewer.
- Arrange the rose crochet piece onto a work surface, with the half double crochet stitches on the left side with the right side facing up.
- Apply glue along the edge of rows 1-3 of the crochet piece.
- While the glue is wet, place the skewer on the glued area, and align the top of the skewer to row three. Let the glue dry to fix the skewer in place.

- Roll the crochet piece onto the skewer gradually by applying glue along the bottom edge (row 1) in small sections at a time.
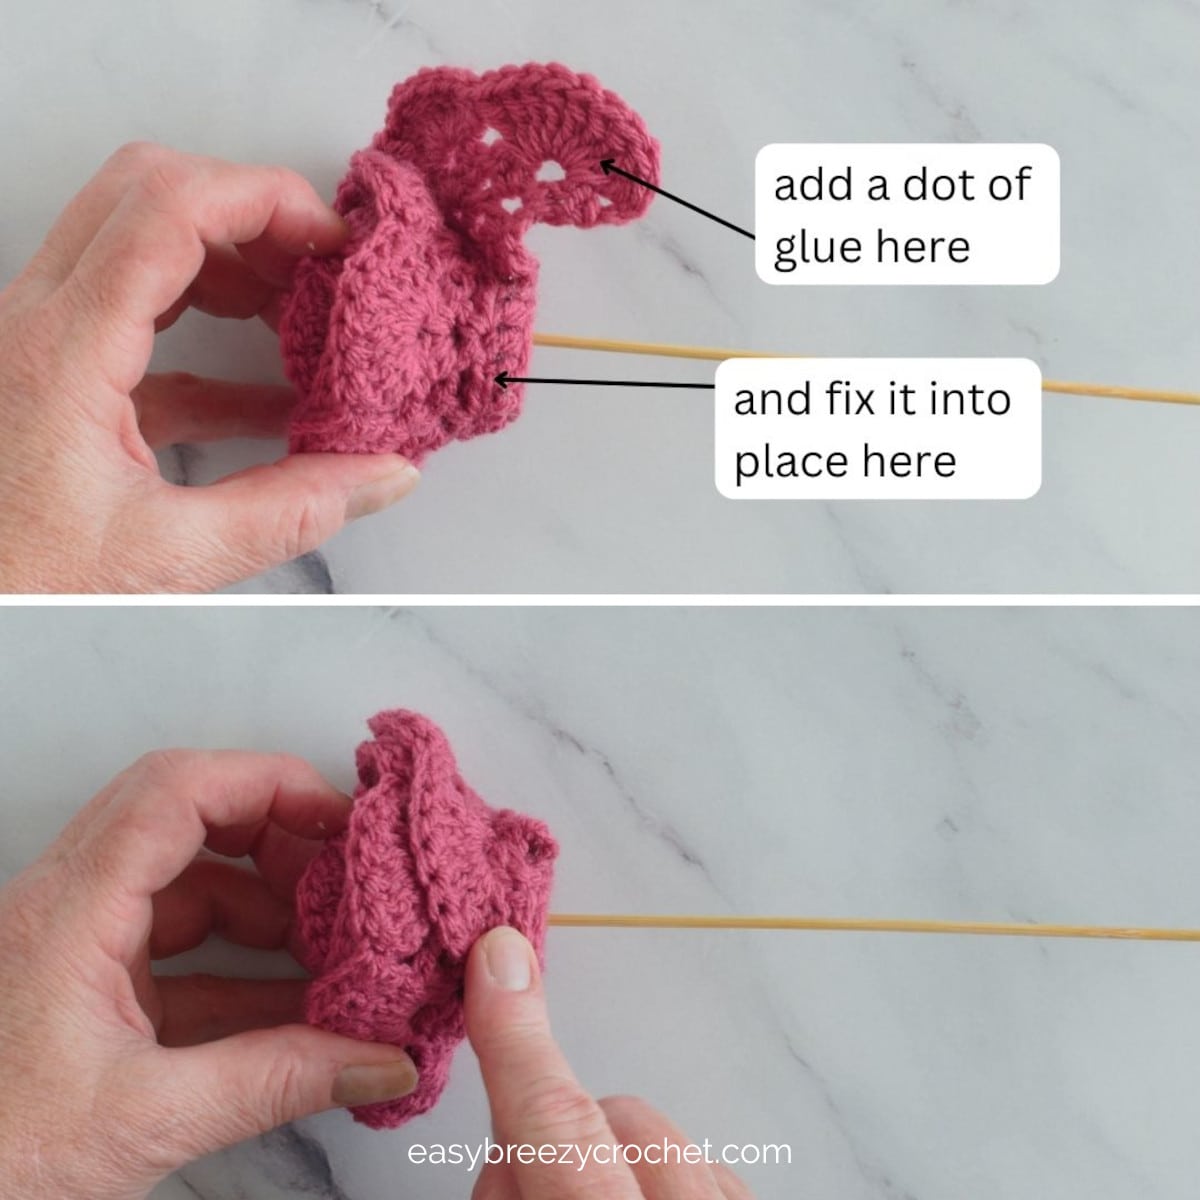
- Apply a bit of glue to the last petal and press it under the rose to secure it.
Glue The Calyx to the Rose

- With the right side facing up slip the calyx onto the skewer, passing it through the magic ring hole (and pull the ring tight if necessary to close it).
- Attach the calyx to the flower base, by applying some glue between the flower head and the calyx.
- While the glue is still wet arrange the calyx so that one sepal will cover the the join of the last petal of the rose.
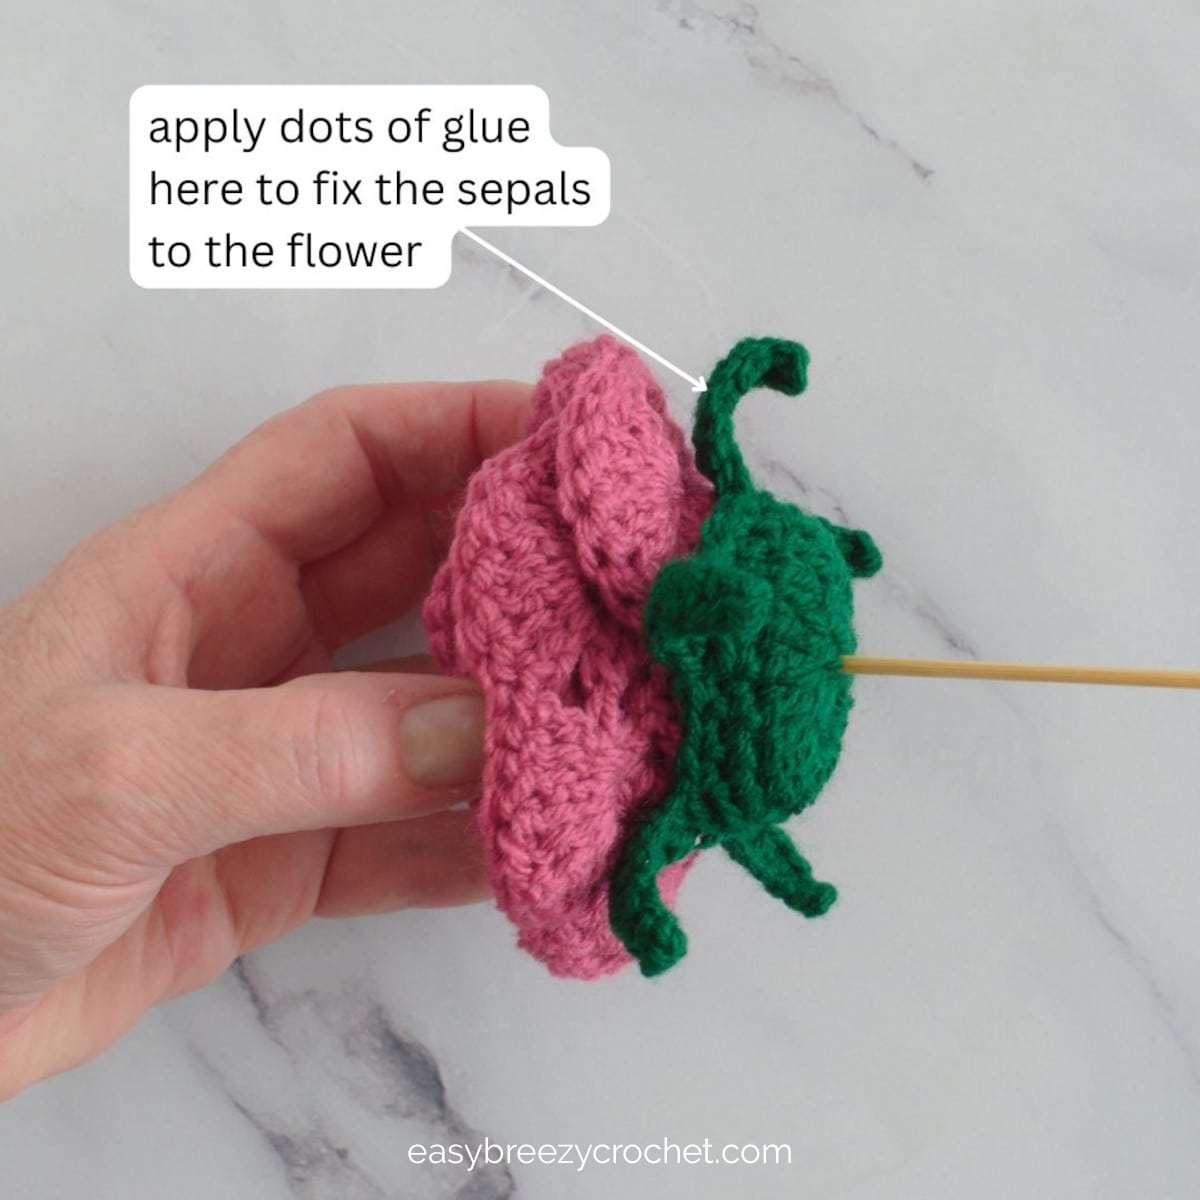
- Next, apply a small amount of glue to each sepal to fix them to the rose.
Wrapping the Stem and Adding Leaves
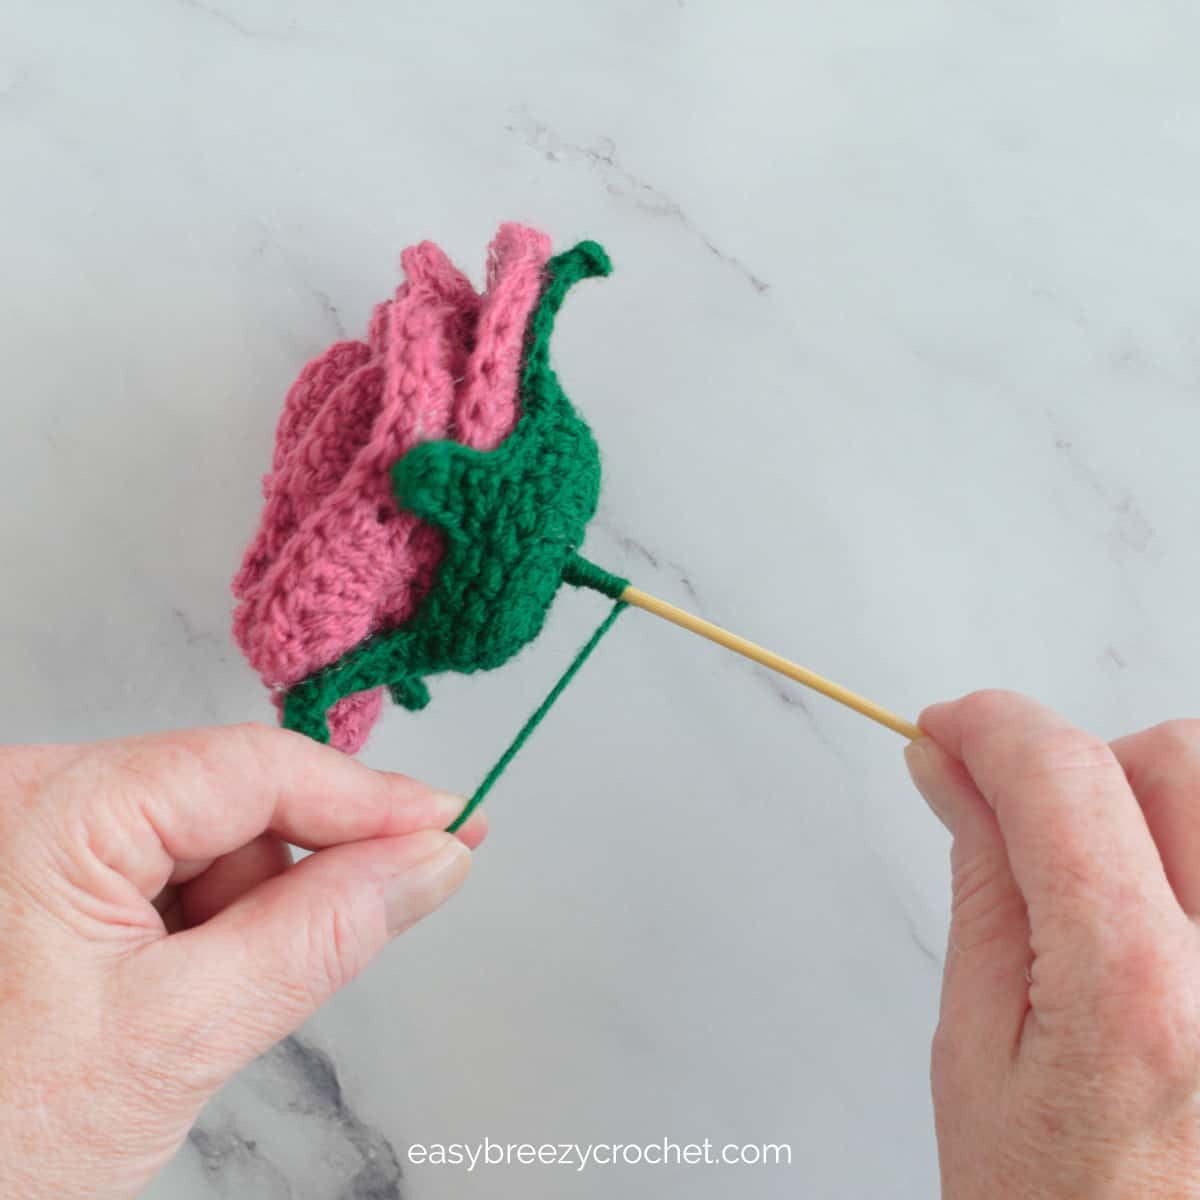
- Put a tiny dot of glue near the calyx's base on the skewer. Press the end of the green yarn into the glue and let it dry.
- Wrap the yarn tightly down the skewer for about 2.5 to 3 inches. Secure the yarn with a small dot of glue without cutting it.
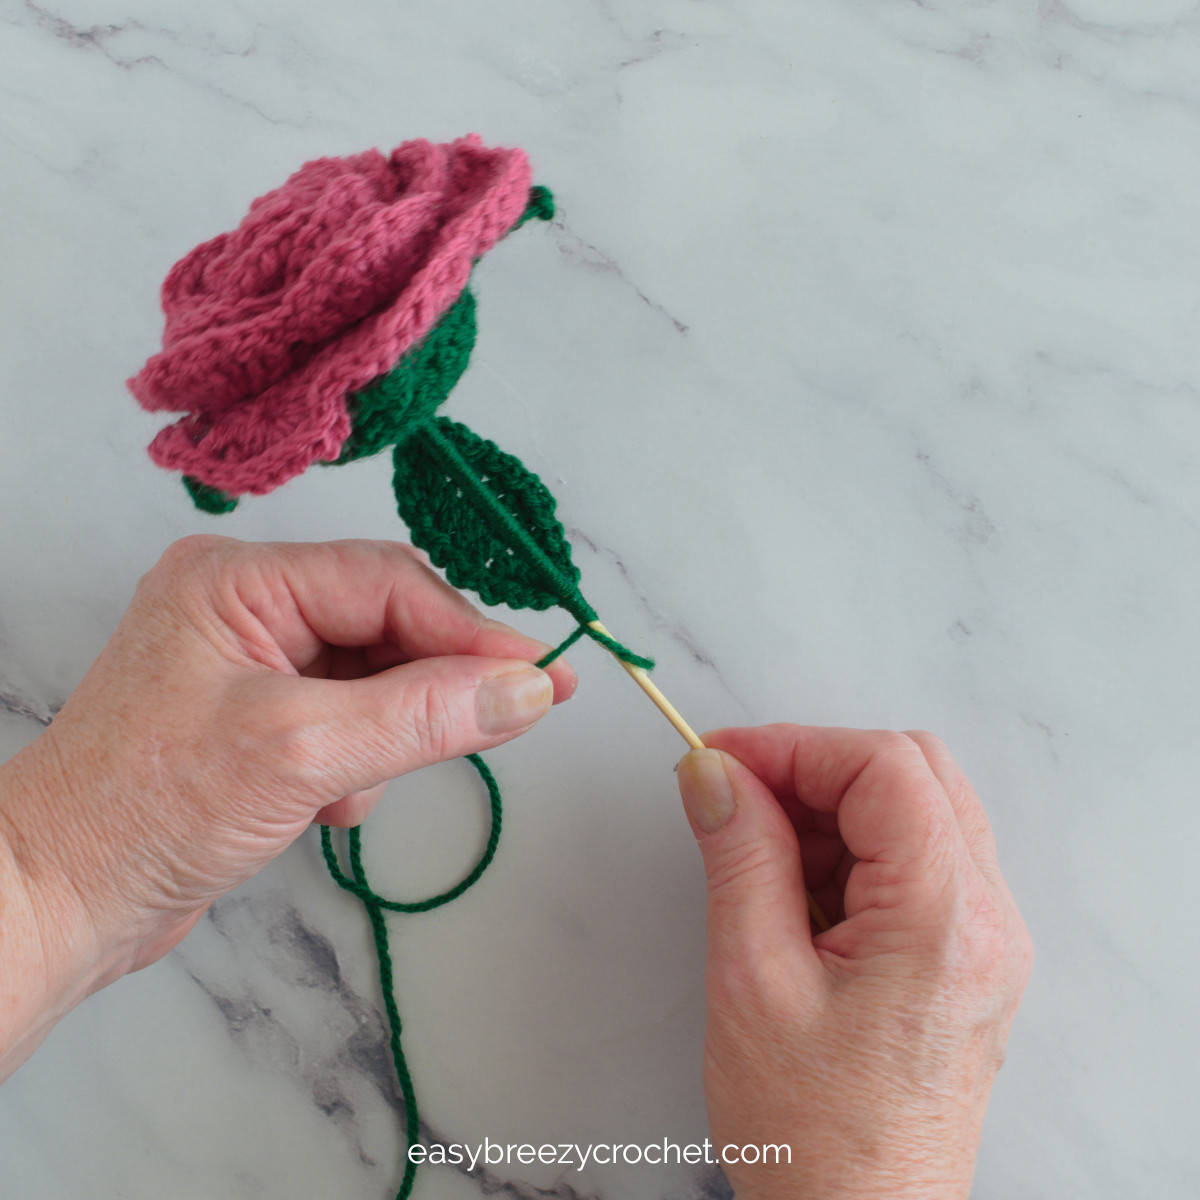
- Now, it's time to attach the leaves one by one to the stem.
- Remember, when attaching a leaf, make sure the right side faces the skewer, and the leaf tip points towards the flower head.
- Apply a bit of glue about 1 inch (2.5cm) down the skewer from where you stopped wrapping.
- Lay the leaf's yarn tail and a bit of the leaf's base into the wet glue on the skewer. Let it dry, then trim the excess yarn.
- Continue wrapping the yarn around the skewer, covering a bit of the leaf's base. Make a few wraps to hide the yarn tail and secure the yarn with glue.
- Repeat these steps to attach the rest of the leaves.
- After attaching all the leaves, keep wrapping the stem with green yarn, occasionally using glue to hold it in place.
- When you reach the end, cut the yarn and glue it down securely.

Finishing The Rose
Gently pull on each petal to shape the flower head and make it look more natural.
Optional Tip:
If you have yarn and it looks fuzzy, you can remove the fuzz.
Carefully pass the rose over a candle flame, ensuring it is about ¼ - ½ inch (½ - 1 cm) away from the flame, and let the heat make the fuzz curl up and vanish.
This method can also help eliminate any loose hot glue strands. But do be careful not to get too close to the flame because you will scorch the yarn.
Don't stop here...
Your next 50 crochet projects are ready inside the Pattern Vault - all printable, ad-free, and ready to download instantly.
Easy Go-To Stitch Guide
New to crochet? Make every stitch count! Grab this free crochet cheat sheet with easy-to-follow guides for basic stitches (US terms) and more-perfect for tackling any pattern with confidence.
Download your free Crochet Cheat Sheet (printable PDF)
Print it, save it on your phone, or keep it right next to you while crocheting.
Related Guides
- Discover decorative ideas in our crochet home and lifestyle hub.
- Explore giftable projects in our crochet gifts and small projects hub.
Stay Connected
Pin this post - Pin now to and take your skills to the next level.
Leave a comment - We're excited to hear your thoughts! Leave a comment below and let us know what you think.
Share on Instagram or Facebook - Capture the beauty of your finished crochet projects and share it on Instagram or Facebook! Tag us @easybreezycrochet or #ebcrochetcreations so we can see your work!
Copyright Notice - This pattern and its contents are protected by copyright law. It may not be copied, altered, redistributed, resold, translated, or used to produce video tutorials in any format, either in whole or in part.
You are permitted to sell finished items made using this pattern. However, the written pattern itself may not be sold, shared, or distributed in any form. When marketing or displaying your finished items, please photograph your own work and refrain from using any of my original images.
Sharing Guidelines For Roundups - Bloggers you are welcome to include this pattern in roundup posts, as long as you use one photo and link directly back to the original post. For full details, please refer to my Terms of Use page.
Comments
No Comments