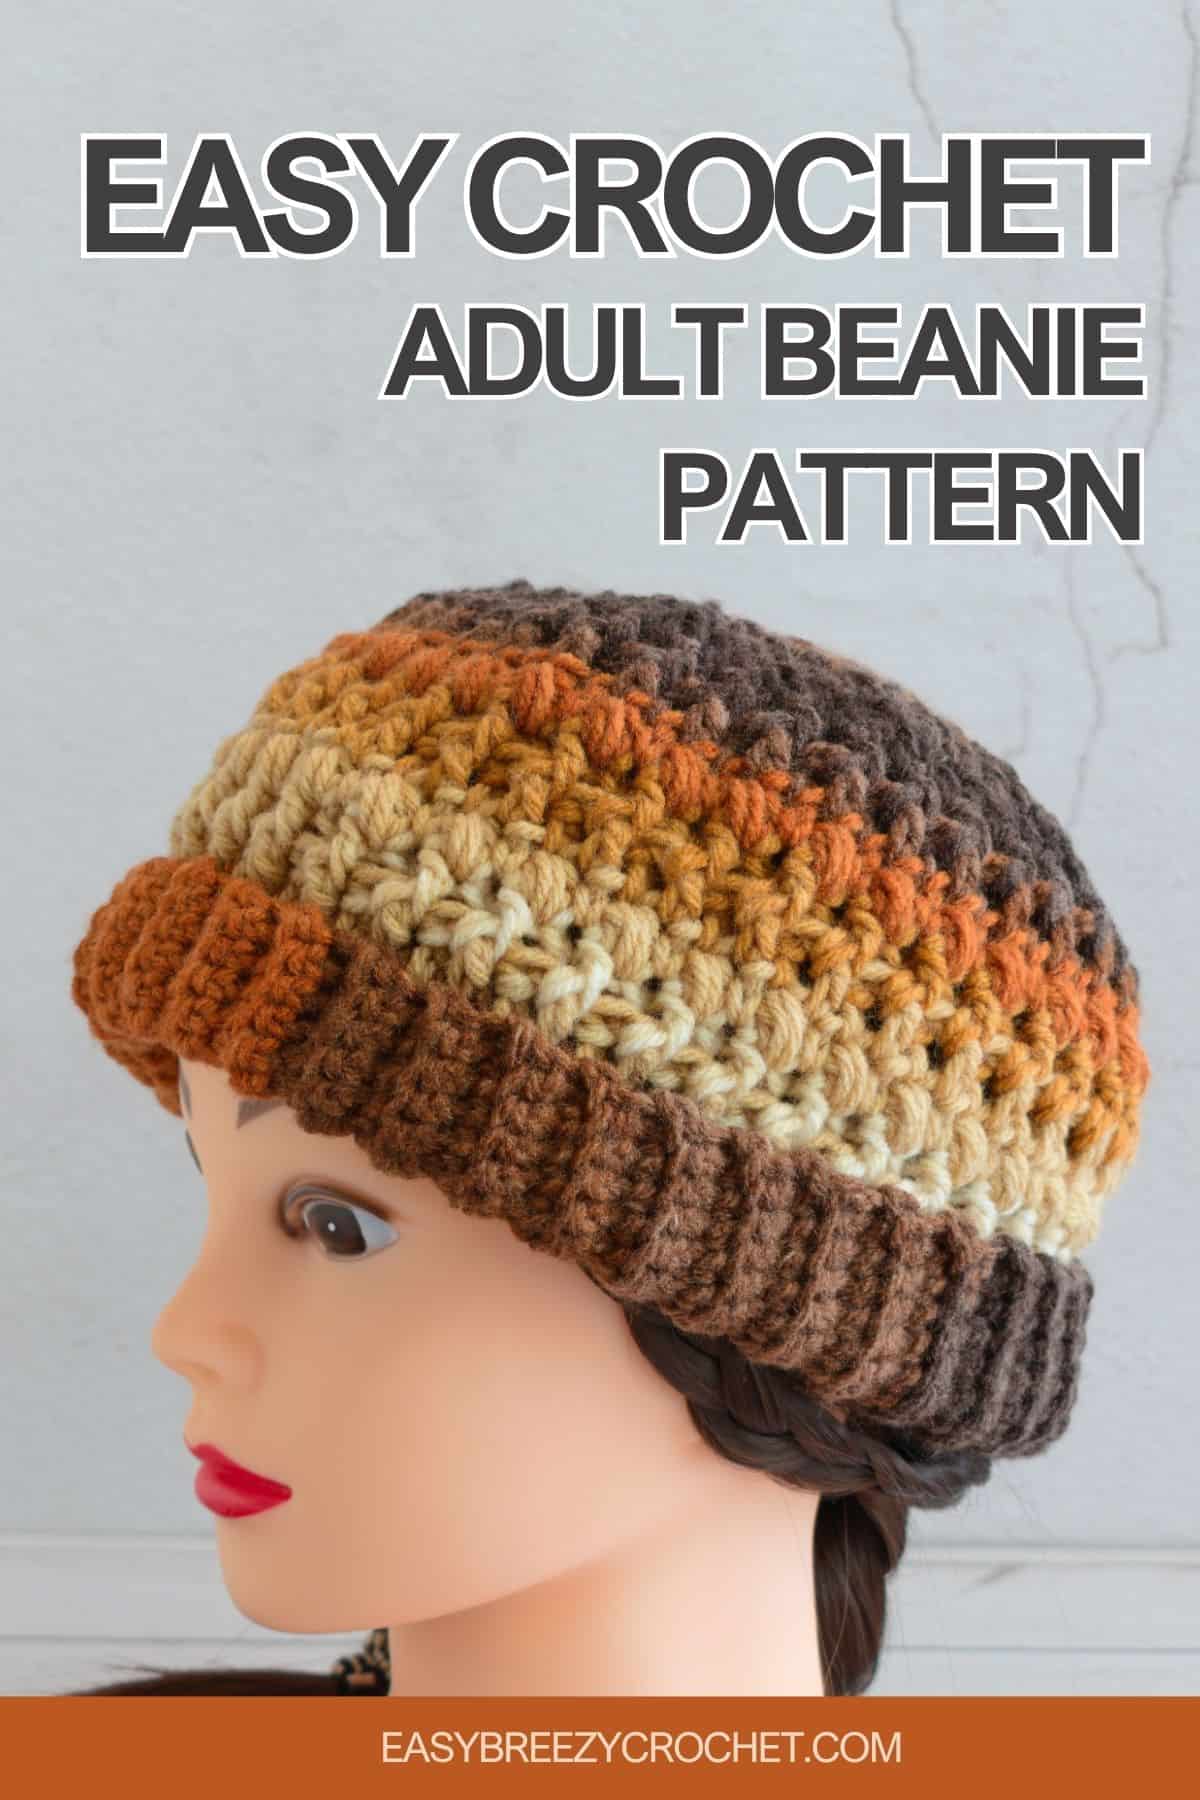
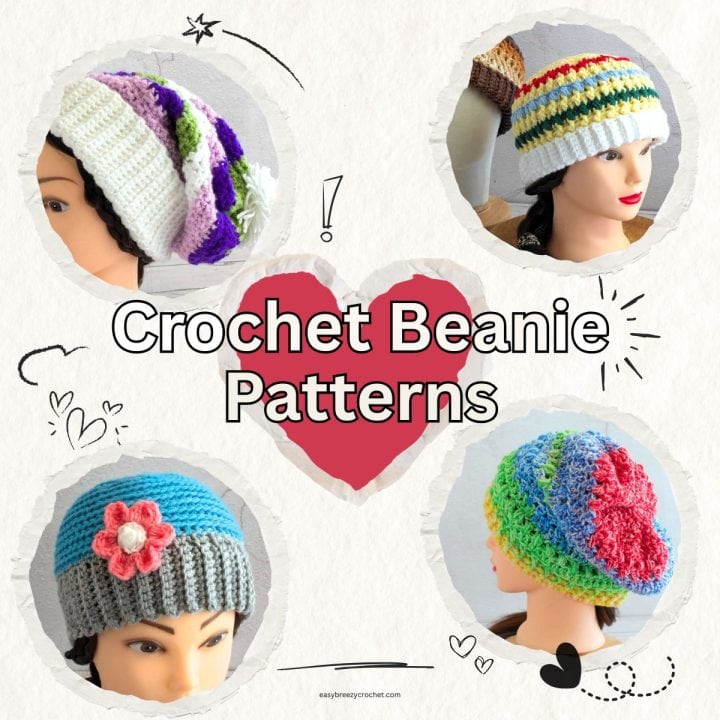
Looking for a cozy and stylish project? This easy crochet adult beanie is soft, textured, and completely no-sew!
Made with worsted weight yarn, it features a fold-up brim, gentle puff stitches, and alternating front and back post double crochet for a snug, stretchy fit.
You'll work the hat from the brim up, so it's easy to customize the length or add a fun pom-pom. There's even a simple way to turn it into a Christmas beanie for the holidays!
Easy Beanie Pattern
A good beanie is a must-have for the cooler months - and when you can crochet one yourself in just an evening, that's even better!
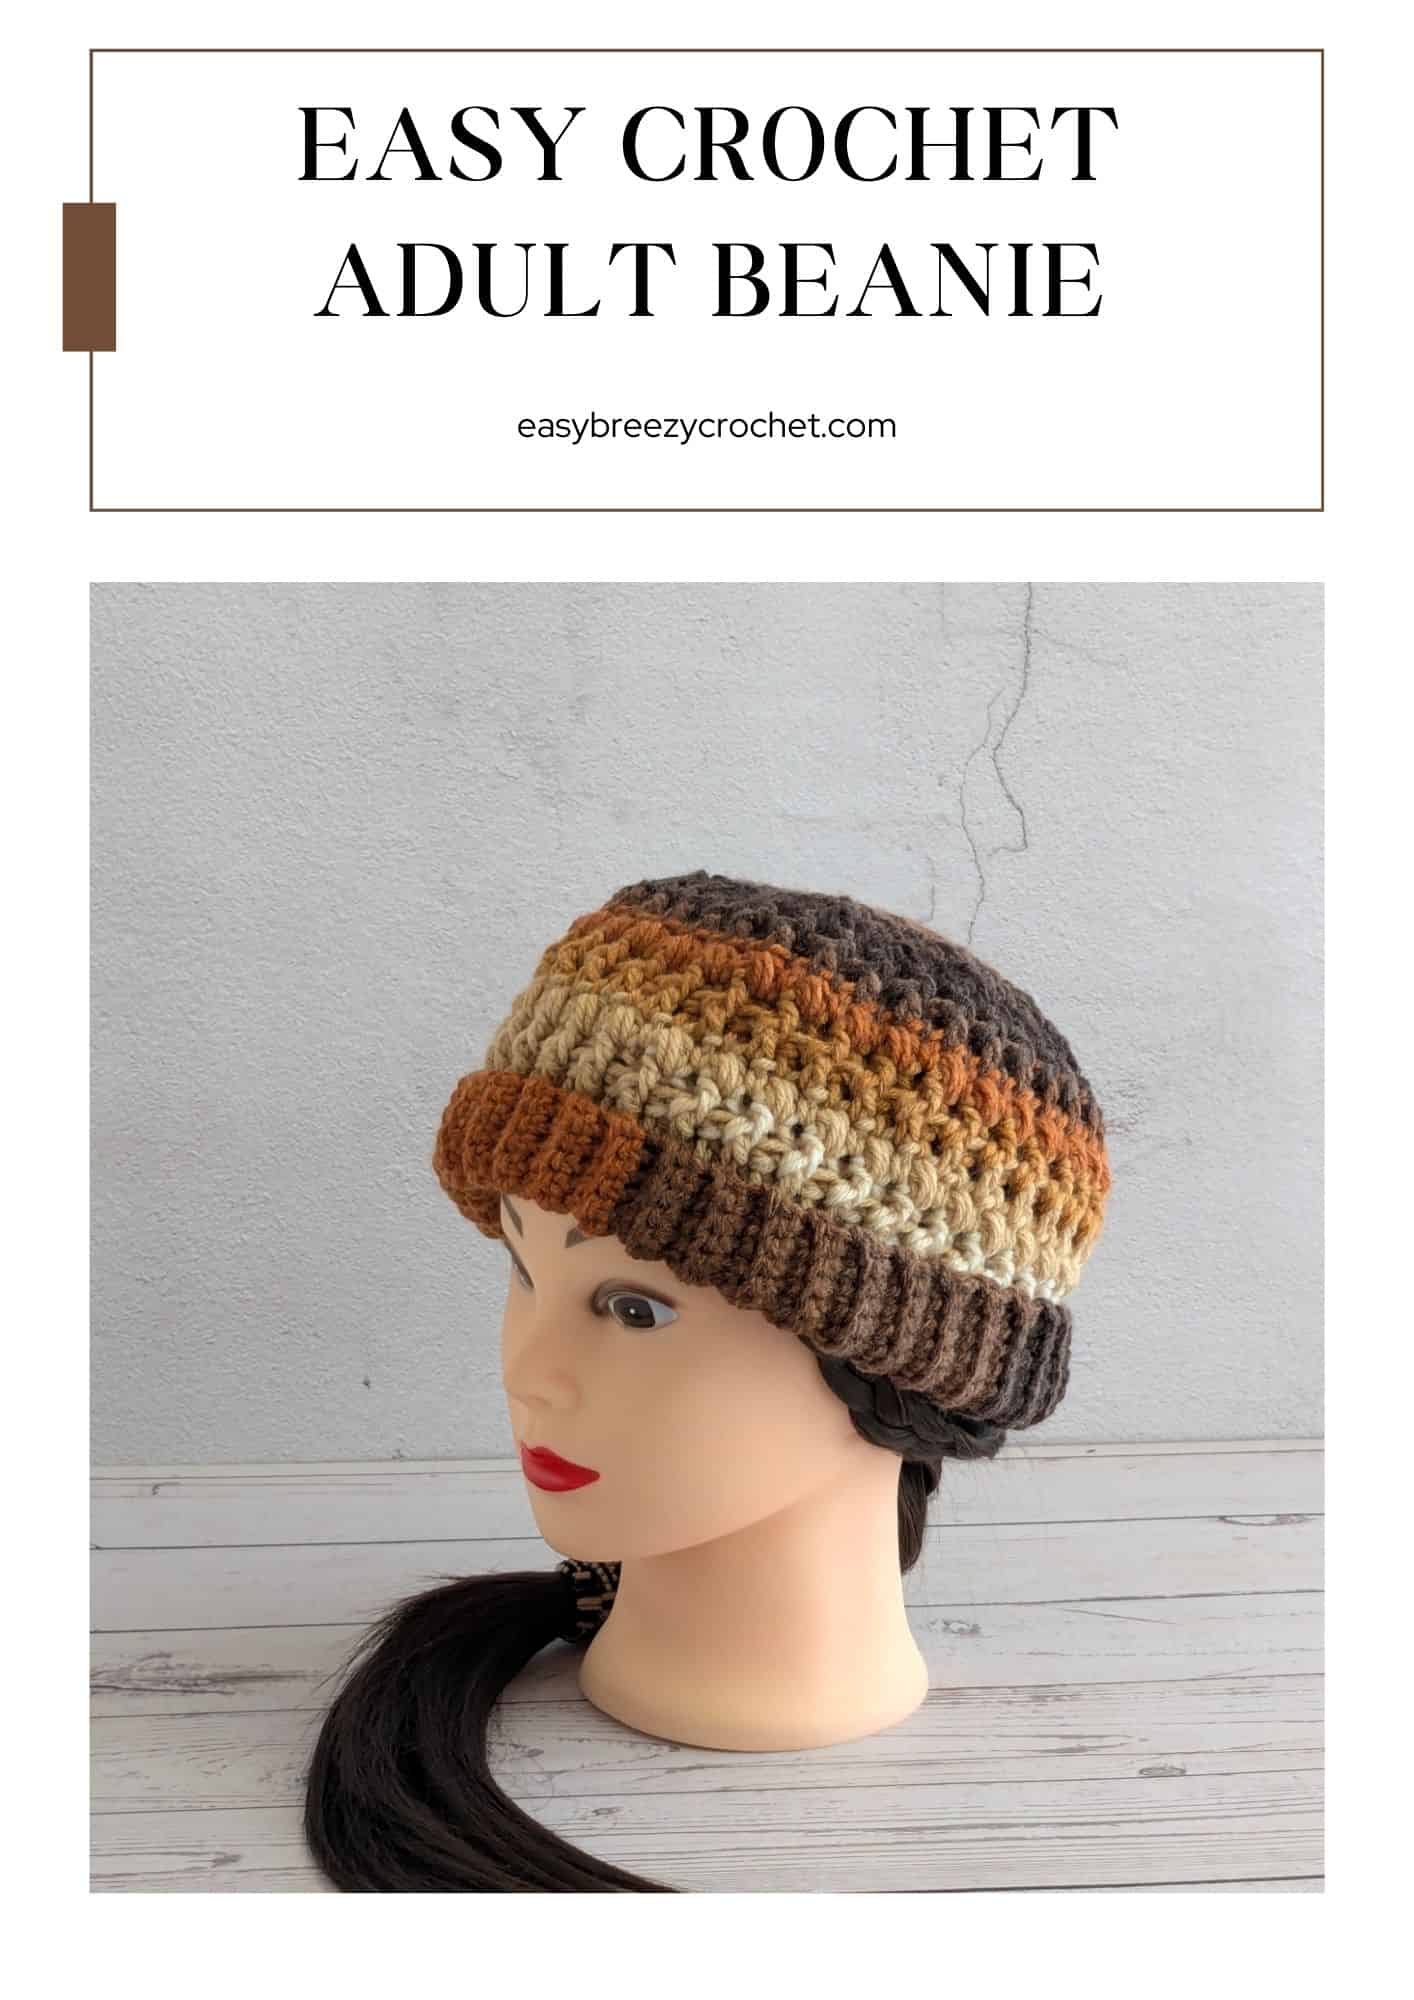
This easy crochet beanie pattern is perfect for adults who want a hat that's both cozy and stylish.
It's made with worsted weight yarn and worked from the bottom up, starting with a fold-up brim that adds both warmth and a clean, finished look.
The body of the hat combines puff stitches and front and back post double crochet stitches to create a soft, textured fabric that stretches comfortably around your head.
The mix of stitches gives the beanie a unique look without being complicated to make.
Best of all, this is a no-sew pattern-you'll work the whole thing in one piece. When you finish, just close up the top and you're done! You can leave it as-is for a simple, everyday look or top it with a fluffy pom-pom for something extra fun.
This pattern makes a medium-sized adult beanie that fits most heads comfortably. Because it's worked in the round, it's easy to adjust if you'd like a slouchier fit or a tighter hat.
And if you're feeling festive, I've also included a few easy tips for turning this pattern into a Christmas beanie-great for gifts or cozy winter photos!
Why You Will Love This Beanie Pattern
- Beginner-Friendly Texture - Puff stitches and post stitches look fancy but are easy to learn.
- No Sewing Needed - Work from start to finish in one piece-no separate brim or panels.
- Fold-Up Brim - Adds warmth and gives the hat a neat, polished edge.
- Custom Fit - Easy to adjust for different sizes or styles.
- Worsted Weight Yarn - Soft, durable, and available in tons of colors.
- Quick to Make - You can finish one in just a few hours!
Pattern Details
- Skill Level - Intermediate Beginner
- Yarn Weight - #4 medium (worsted, Afghan, Aran, 10ply)
- Hook Size - 5mm
- Finished Size - Suitable for head sizes 19-21 inches.
- Time To Complete - 2-3 hours
Prefer a printable, ad-free pattern? Members can download this pattern as a clean, easy-to-print PDF.
Table of contents
- Easy Beanie Pattern
- Why You Will Love This Beanie Pattern
- Pattern Details
- Stitches Used
- Yarn and Hook Information
- How To Make A Crochet Beanie
- Helpful Hat-Sizing Chart
- Make A Christmas Beanie
- What You Will Need
- Finished Size & Gauge
- Stitches and Abbreviations - US Terms
- Pattern Instructions
- Finishing
- More Easy Wearable Crochet Patterns
- Learn To Crochet
- Stay Connected
- Comments
Stitches Used
For this pattern you will need to know single crochet, double crochet, make puff stitches, double crochet 2 stitches together and how to work stitches in the front post, back post and back of loop.
Yarn and Hook Information
This pattern works best with medium worsted weight yarn - something soft but with a little structure, like acrylic or a wool blend. We used worsted weight yarn and the recommended hook size of 5mm.
Because the fold-up brim adds a double layer, the hat feels warm and snug around the ears. Choose colors that match your wardrobe-or make a few in different shades to match the season!
How To Make A Crochet Beanie
This crochet hat starts with the brim, made with single crochet stitches worked in the back loops.
This make a ribbed, stretchy texture - perfect for folding up and keeping your ears warm. Once you've joined the brim into a loop, you'll work the main body of the hat directly onto it.
The body of the hat is made with rows of front post and back post double crochet stitches and puff stitches that create soft little clusters that make the hat extra cozy.
Together, they give the beanie a lovely mix of texture and stretch. You'll gradually work fewer stitches near the top to shape the crown, then close it up to finish. No extra sewing is needed!
If you want to personalize your hat, you can easily adjust the height or width:
To make it smaller or larger, adjust your hook size slightly or reduce/increase your stitch count by a few.
For a slouchier hat, add a few more rounds to the main body.
For a shorter hat, stop a couple of rounds earlier.
Helpful Hat-Sizing Chart
Not sure what size hat to crochet? This free crochet hat size guide has you covered, with sizes from newborn to adult - perfect for planning your next crochet hat project with confidence.
Download your free Crochet Hat Size Guide (printable PDF)
Print it, save it on your phone, or keep it right next to you while crocheting.
You might also like these easy patterns:
Make A Christmas Beanie
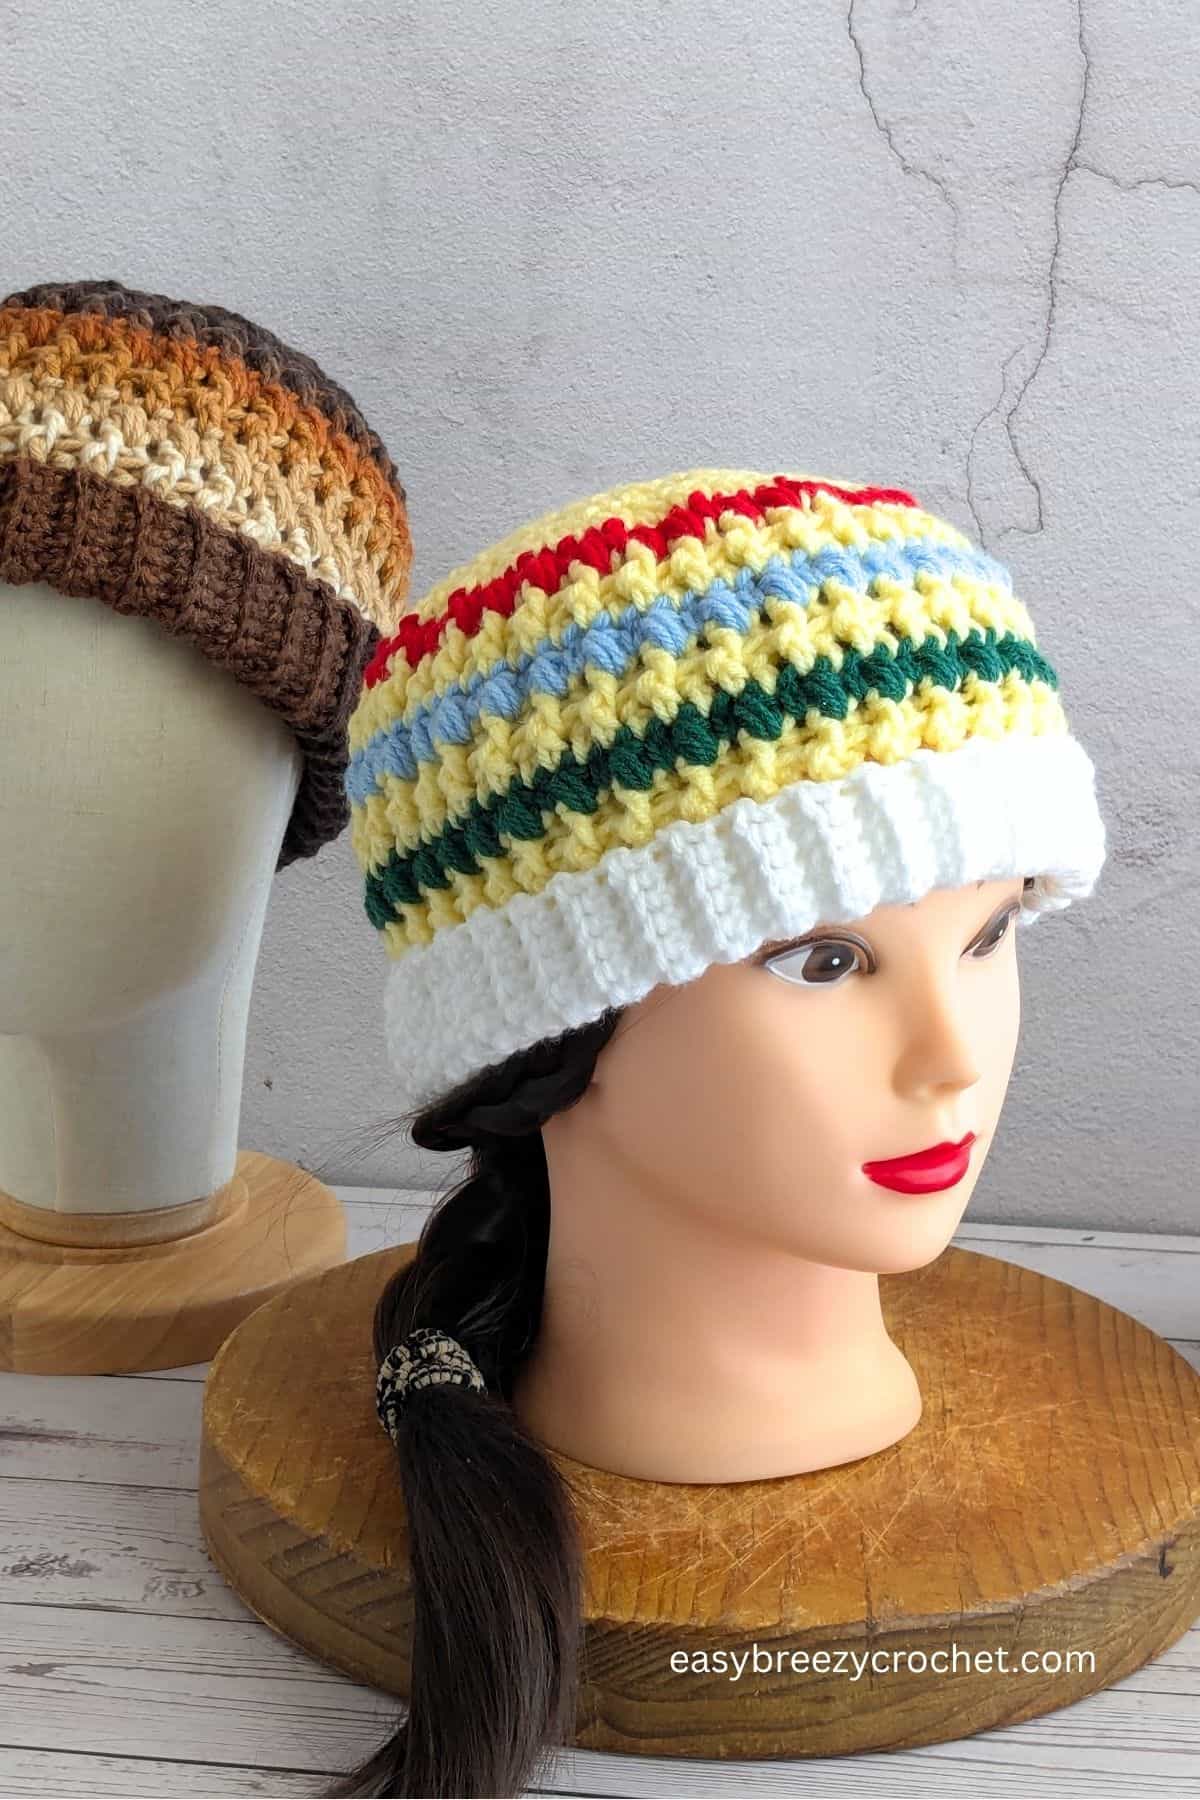
Want to add a festive touch to this pattern? It's simpler than you might think! Start by switching up your yarn colors.
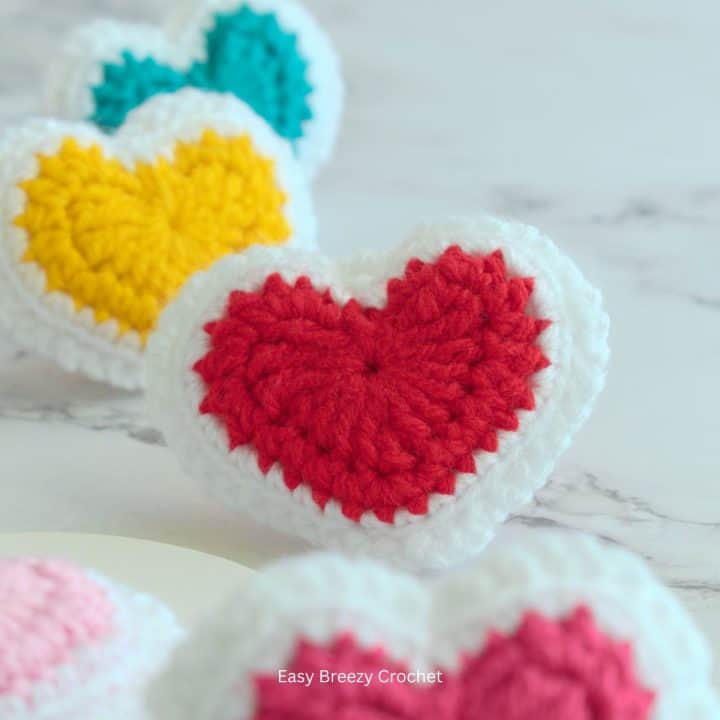
I opted for white yarn for the brim, paired with light yellow for the main body of the hat. For the puff stitch rounds, I alternated between green, light blue, and red.
Other Color Combinations to Try:
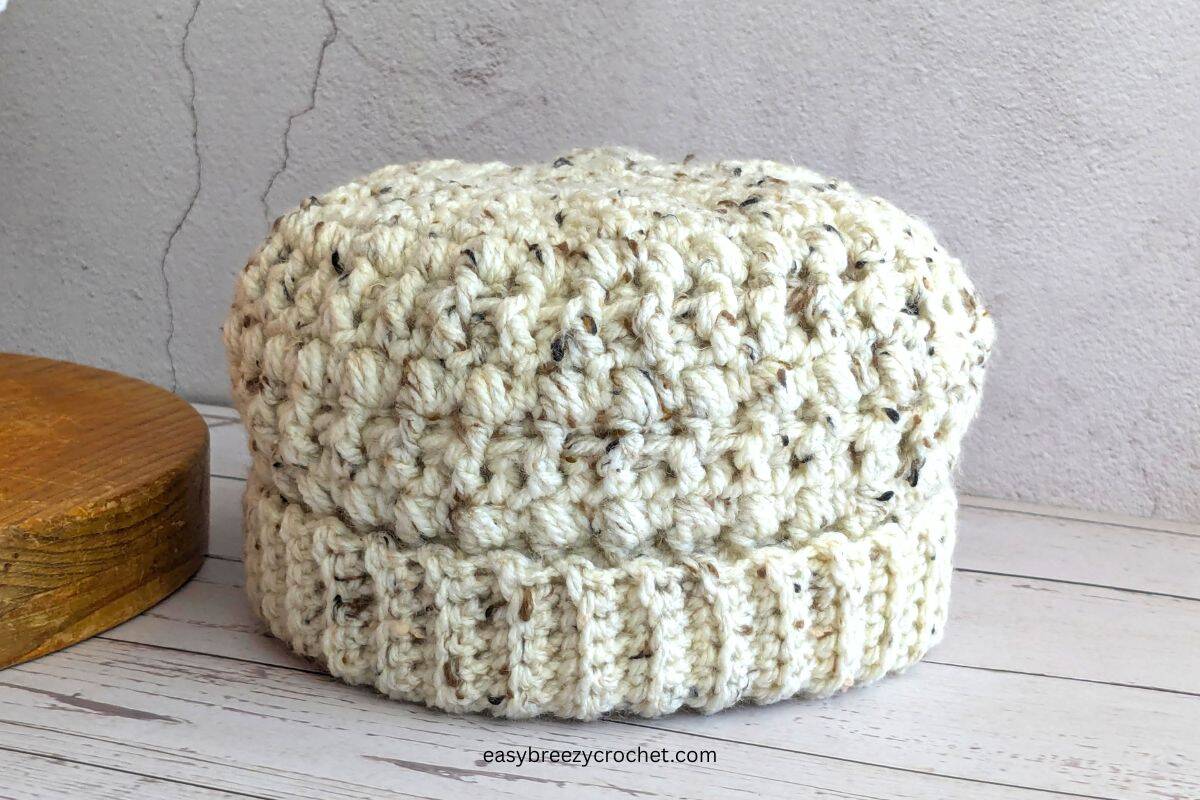
- Classic Christmas Colors - Red brim, green body, and a white pom pom.
- Snowy Neutrals - White and soft grey for a cozy winter look.
- Santa-Inspired - Red body, white brim, and a fluffy white pom-pom on top.
- Metallic Twist - Use a yarn with a little sparkle or gold thread for a holiday shimmer.
What You Will Need
Yarn
#4 medium (worsted, Afghan, Aran, 10ply) yarn with about 10 wraps per inch (WPI)
- You will need about 193 yards (177 meters)
Crochet Hook
- 5mm
Notions
- Scissors
- Yarn needle
Finished Size & Gauge
Finished Size
Suitable for head sizes 19-21 inches.
Top of beanie down to the brim is about 8.5 inches (22cm), when laid flat brim measures about 10 inches (26cm).
Gauge
4x4 inch (10x10cm) = 12 double crochet stitches and 8 rows
Stitches and Abbreviations - US Terms
- BLsc - single crochet worked in the back loop
- BPdc - back post double crochet - see below
- ch - chain stitch
- dc - double crochet
- dc2tog - double crochet two stitches together - see below
- FPdc - front post double crochet - see below
- hk - hook
- lp/lps - loop/loops
- puff - puff stitch - see below
- rnd - round
- rpt - repeat
- sc - single crochet
- sk - skip
- sl st - slip stitch
- st/sts - stitch/stitches
- YO - yarn over
- [ ] - at the end of a row/round indicates the number of stitches in that row/round
Special Stitches
Puff - YO, insert hk into st, YO, pull yarn through st (3lps on hk). YO, insert hk in the same stitch, YO, pull up lp (5lps on hk). YO, insert hk in same st, YO, pull up lp (7lps on hk). YO and pull through all lps on hk.
To start the first puff - pull the loop up slightly before making the first yarn over.
dc2tog - YO insert hk into next st, YO, pull up a lp (3lps on hk), YO, pull through 2lps (2lps on hk), YO, insert hk into next st, pull up a lp (4lps on hk), YO, pull through 2lps (3lps on hk), YO, pull through 3lps (1lp on hk).
Front and Back Post stitches in crochet are worked around the post of a stitch from the previous row, rather than into the top two loops. These stitches create texture by pushing the stitch forward or backward in the fabric.
- Front Post stitches are made by inserting your hook from the front of the work to the back on the right-hand side of the stitch post. Bring the hook around the back of the post and back out to the front on the left-hand side of the post. The post will be in front of your hook. Complete the stitch as usual.
- Back Post stitches are made by inserting your hook from the back of the work to the front on the right-hand side of the stitch post. Bring the hook around the front of the post and insert it back into the fabric on the left-hand side, returning the hook to the back of the work. The post will be behind your hook. Complete the stitch as usual.
Printable PDF Pattern
Want an ad-free printable version of this crochet pattern?
Join the Easy Breezy Crochet Pattern Vault to get this printable pattern (and more)!
The Pattern Vault is Easy Breezy Crochet's newest exclusive community where you can access a growing library of ad-free printable crochet patterns, and join a community of crocheters around the world.
Pattern Instructions
Ribbing
Foundation, 5mm hk - chain 12
Abbreviated version
Foundation, 5mm hk - ch12
Row One
Row 1 - Make 1 single crochet in the 2nd chain from the hook, then make 1 single crochet in each stitch to the end, turn. [11 stitches in this row]
Abbreviated Version
Row 1 - 1sc in 2nd ch from hk, then 1sc in each st to end, turn. [11sts]
Row Two
Row 2 - chain 1 (do not count this as a stitch), make 1 single crochet in the back loop of the 1st stitch (the same space as the chain 1), then make 1 single crochet in the back loops of the next 10 stitches, turn. [11 stitches in this row]
Abbreviated Version
Row 2 - ch1 (not a st), BLsc in same st as ch1, then BLsc in each st to end, turn. [11sts]
Rows Three - Seventy Two
Rows 3-72 - Repeat row 2 until the piece measures about 19-20 inches in length - or a length to suite your head circumference. You must end with an even number of rows. I end up making 72 rows and the piece measured about 19.5 inches (49.5cm) long.
Abbreviated Version
Rows 3-72 - rpt row 2 until piece measures about 19-20 inches in length - or a length to suit your head circumference. Ending with an even number of rows. I ended up making 72 rows and measured about 19.5 inches (49.5cm) long.
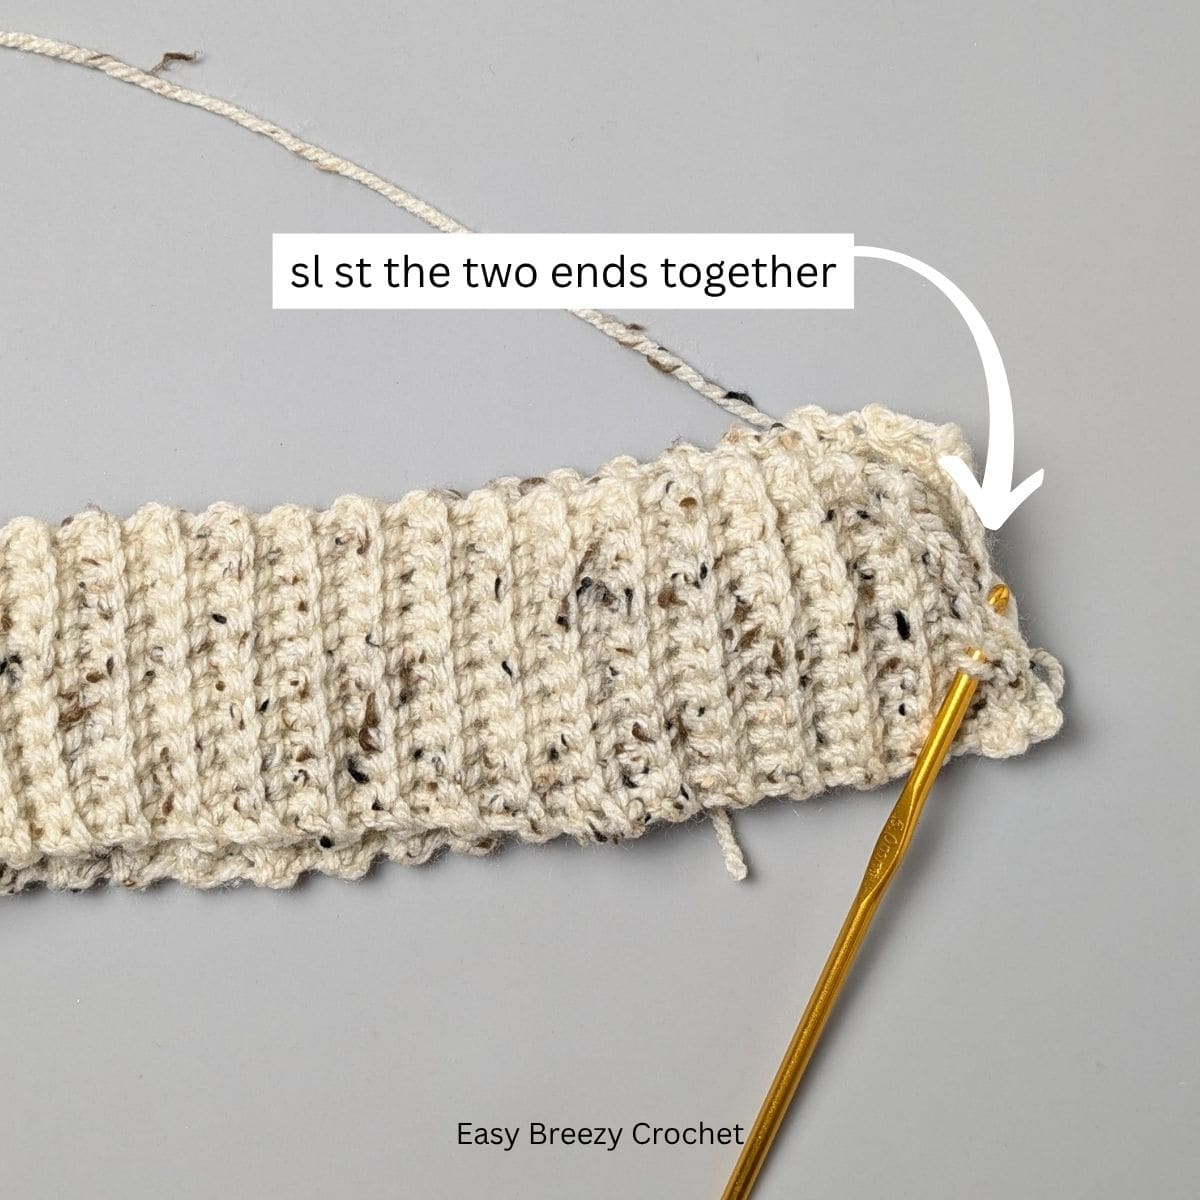
Joining
Join the two short ends together by chaining 1 then evenly work 11 slip stitches along the edge going through both layers. Do not cut yarn.
Hat
Round One
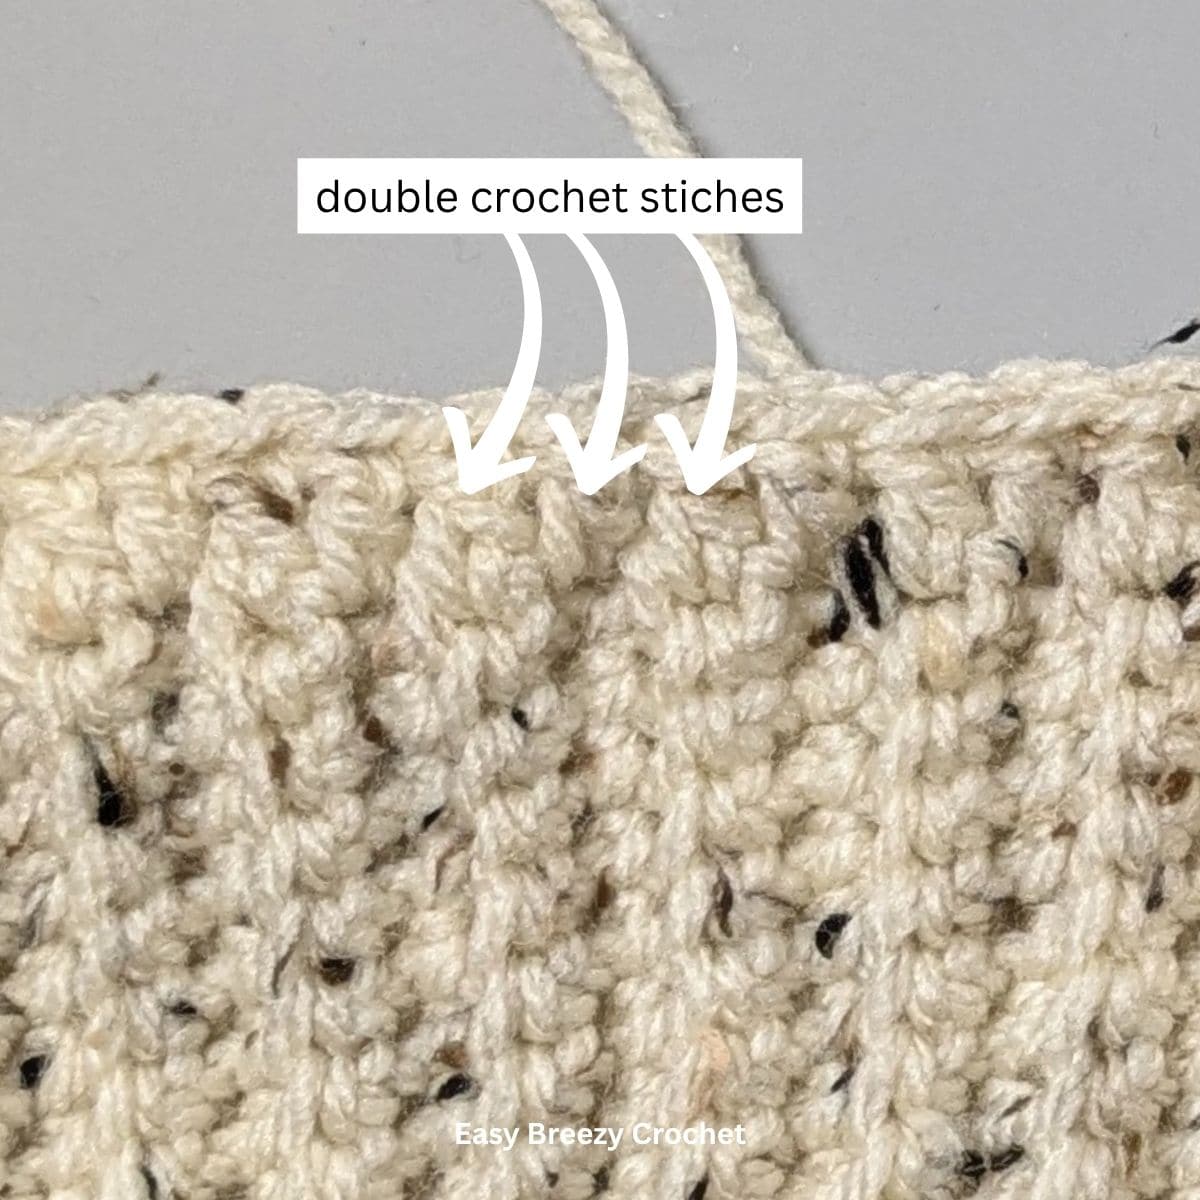
Round 1 - Turn the band right side out. Chain 2 (do not count this as a st), make 1 double crochet in the same space as the chain 2, then make 1 double crochet in each stitch around, slip stitch into the top of the 1st double crochet to join. The stitch count for this round should equal the number of even rows you made in the ribbing e.g. if you made 72 rows of ribbing your stitch count should be 72 stitches.
Abbreviated Version
Rnd 1 - Turn the band right side out. Ch2 (not a st), 1dc in same sp as ch-2, then make 1dc in each st around, sl st into top of the 1st dc to join. The stitch count for this round should equal the number of even rows you made in the ribbing e.g. if you made 72 rows of ribbing your stitch count should be 72 stitches.
Round Two
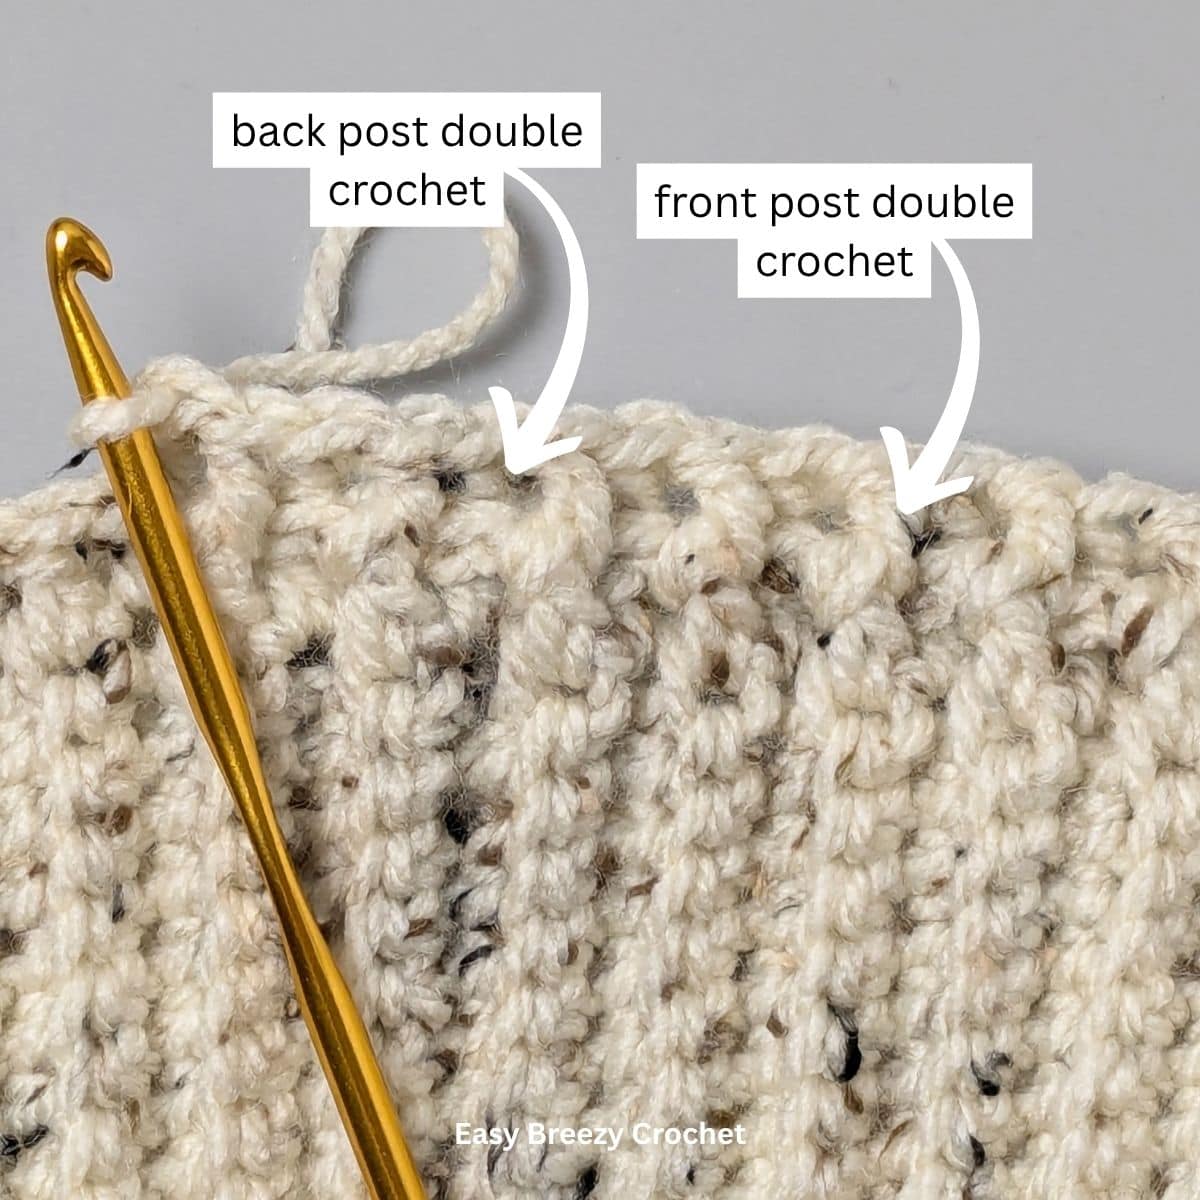
Round 2 - Chain 2 (do not count this as a stitch), make a front post double crochet around the 1st stitch, then make 1 back post double crochet around the next, * then front post double crochet around the next, and back post double crochet around the next, repeat from * all the way around, slip stitch into the top of the 1st double crochet to join. [72 stitches in this round]
Abbreviated Version
Rnd 2 - ch2 (not a st), FPdc around next st, BPdc around next st, * FPdc around next st, BPdc around next st, rpt from * all the way around, sl st into top of 1st dc st join. [72sts]
Round Three
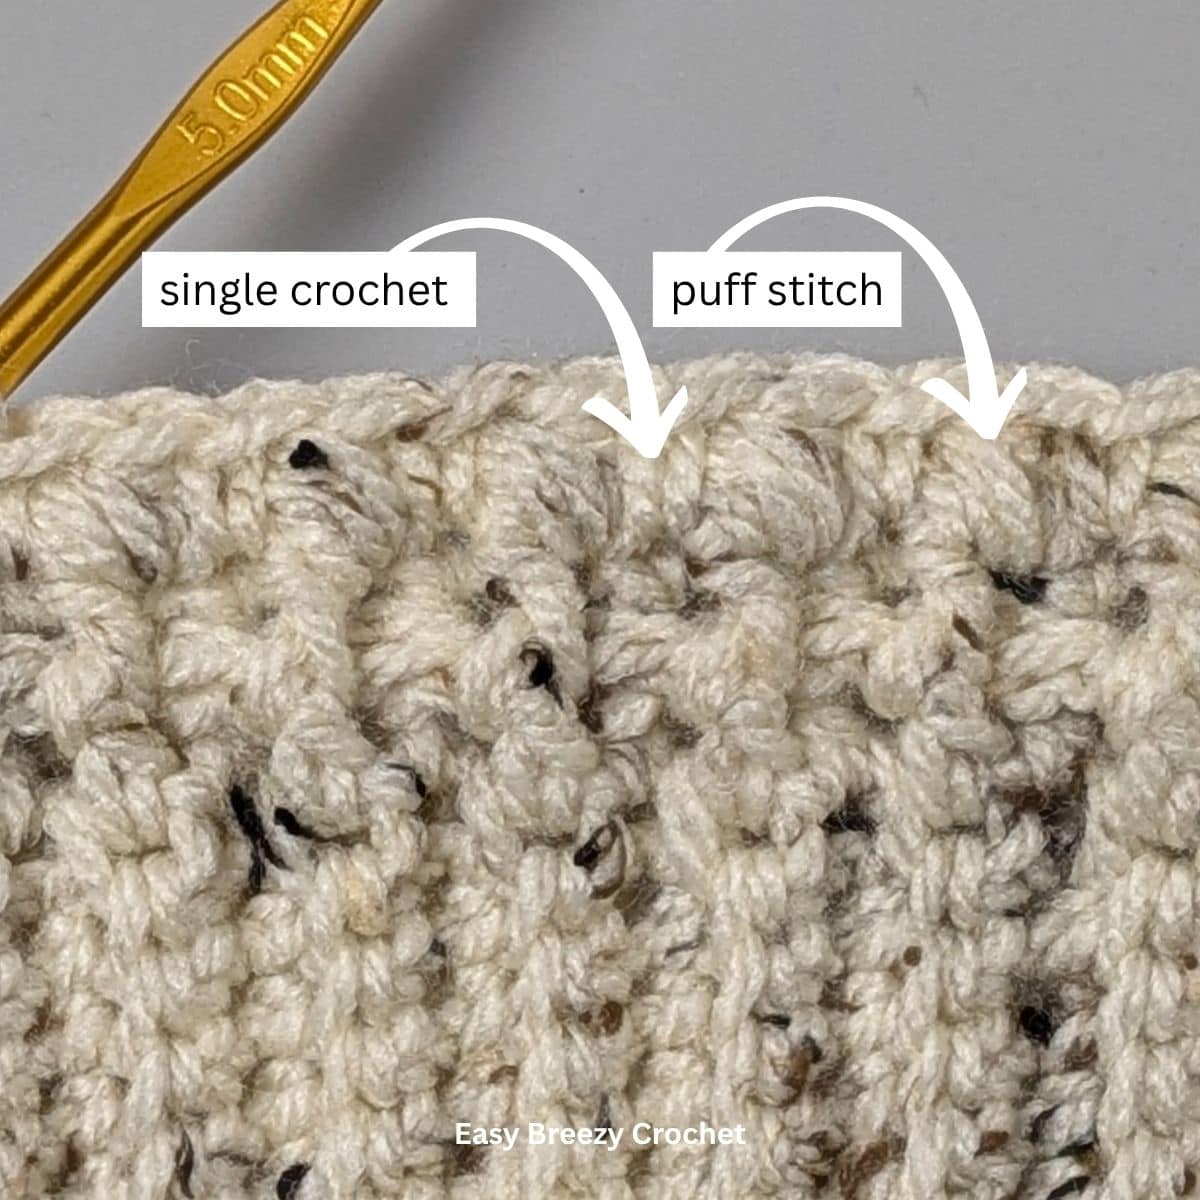
Round 3 - Make a puff stitch in the same space as the slip stitch, then make 1 single crochet in the next stitch, * puff stitch in the next stitch, 1 single crochet in the next, repeat from * all the way around, slip stitch into the top of the 1st puff stitch to join. [72 stitches in this round]
Abbreviated Version
Rnd 3 - puff st in same sp as sl st, 1sc in next st, *puff in next st, 1sc in next st, rpt from * all the way around, sl st into top of 1st puff to join. [72 sts]
Round Four
Round 4 - Chain 2 (do not count this as a stitch), make 1 double crochet in the same space as the chain 2, then make 1 double crochet in each stitch around, slip stitch into the top of the 1st double crochet to join. [72 stitches in this round]
Abbreviated Version
Rnd 4 - ch2 (no counted as a st), 1dc in same sp as ch-2, 1dc in each st around, sl st into top of 1st dc to join. [72sts]
✨ You're almost there! ✨
To unlock the final steps and complete your pattern, create a free account with Grow.me. below.
Make sure to tick the box to subscribe to our newsletter and stay up to date with the latest patterns, tips, and more!
Once you're signed up, you'll get instant access to finish your project and enjoy exclusive content in the future.
Already signed up? Hit the button below and select 'Switch to Log In' to pick up where you left off and finish your project!
Finishing
Thread the yarn tail onto a needle and use this to sew the opening closed at the top, weave in all ends.


Learn To Crochet
If you are new to crochet and would like to learn more. You might like these:
- Basic crochet stitches for beginners
- How to crochet for beginners
- Crochet terms and abbreviations
- How to read a crochet pattern for beginners
- How to read a yarn label
- How to hold yarn when crocheting
Stay Connected
Pin this post - Pin now to and take your skills to the next level.
Leave a comment - We're excited to hear your thoughts! Leave a comment below and let us know what you think.
Share on Instagram or Facebook - Capture the beauty of your finished crochet projects and share it on Instagram or Facebook! Tag us @easybreezycrochet or #ebcrochetcreations so we can see your work!
Copyright Notice - This pattern and its contents are protected by copyright law. It may not be copied, altered, redistributed, resold, translated, or used to produce video tutorials in any format, either in whole or in part.
You are permitted to sell finished items made using this pattern. However, the written pattern itself may not be sold, shared, or distributed in any form. When marketing or displaying your finished items, please photograph your own work and refrain from using any of my original images.
Sharing Guidelines For Roundups - Bloggers you are welcome to include this pattern in roundup posts, as long as you use one photo and link directly back to the original post. For full details, please refer to my Terms of Use page.
Comments
No Comments