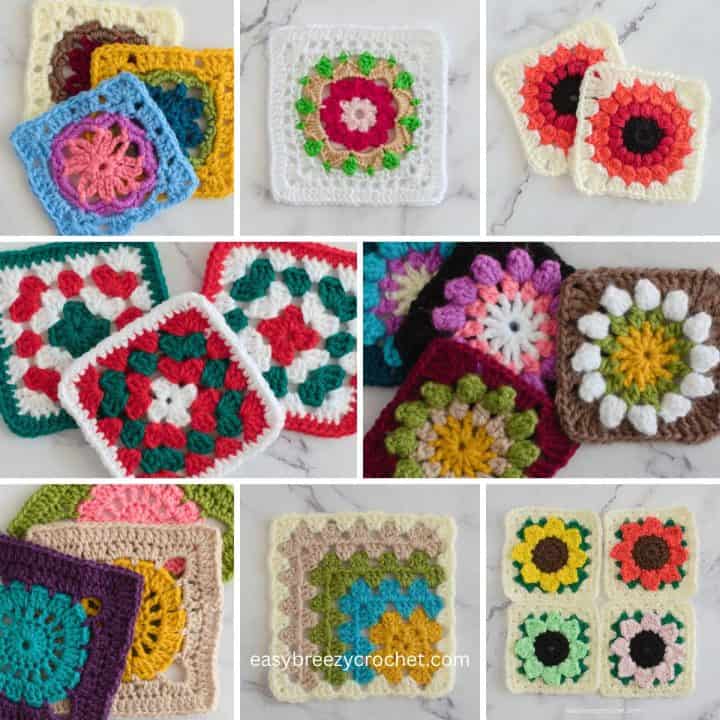
This single line granny square join is modified join-as-you-go method for joining granny squares into a neat, single-row strip. Perfect for creating scarves, headbands, table runners, and other one-square-wide projects.
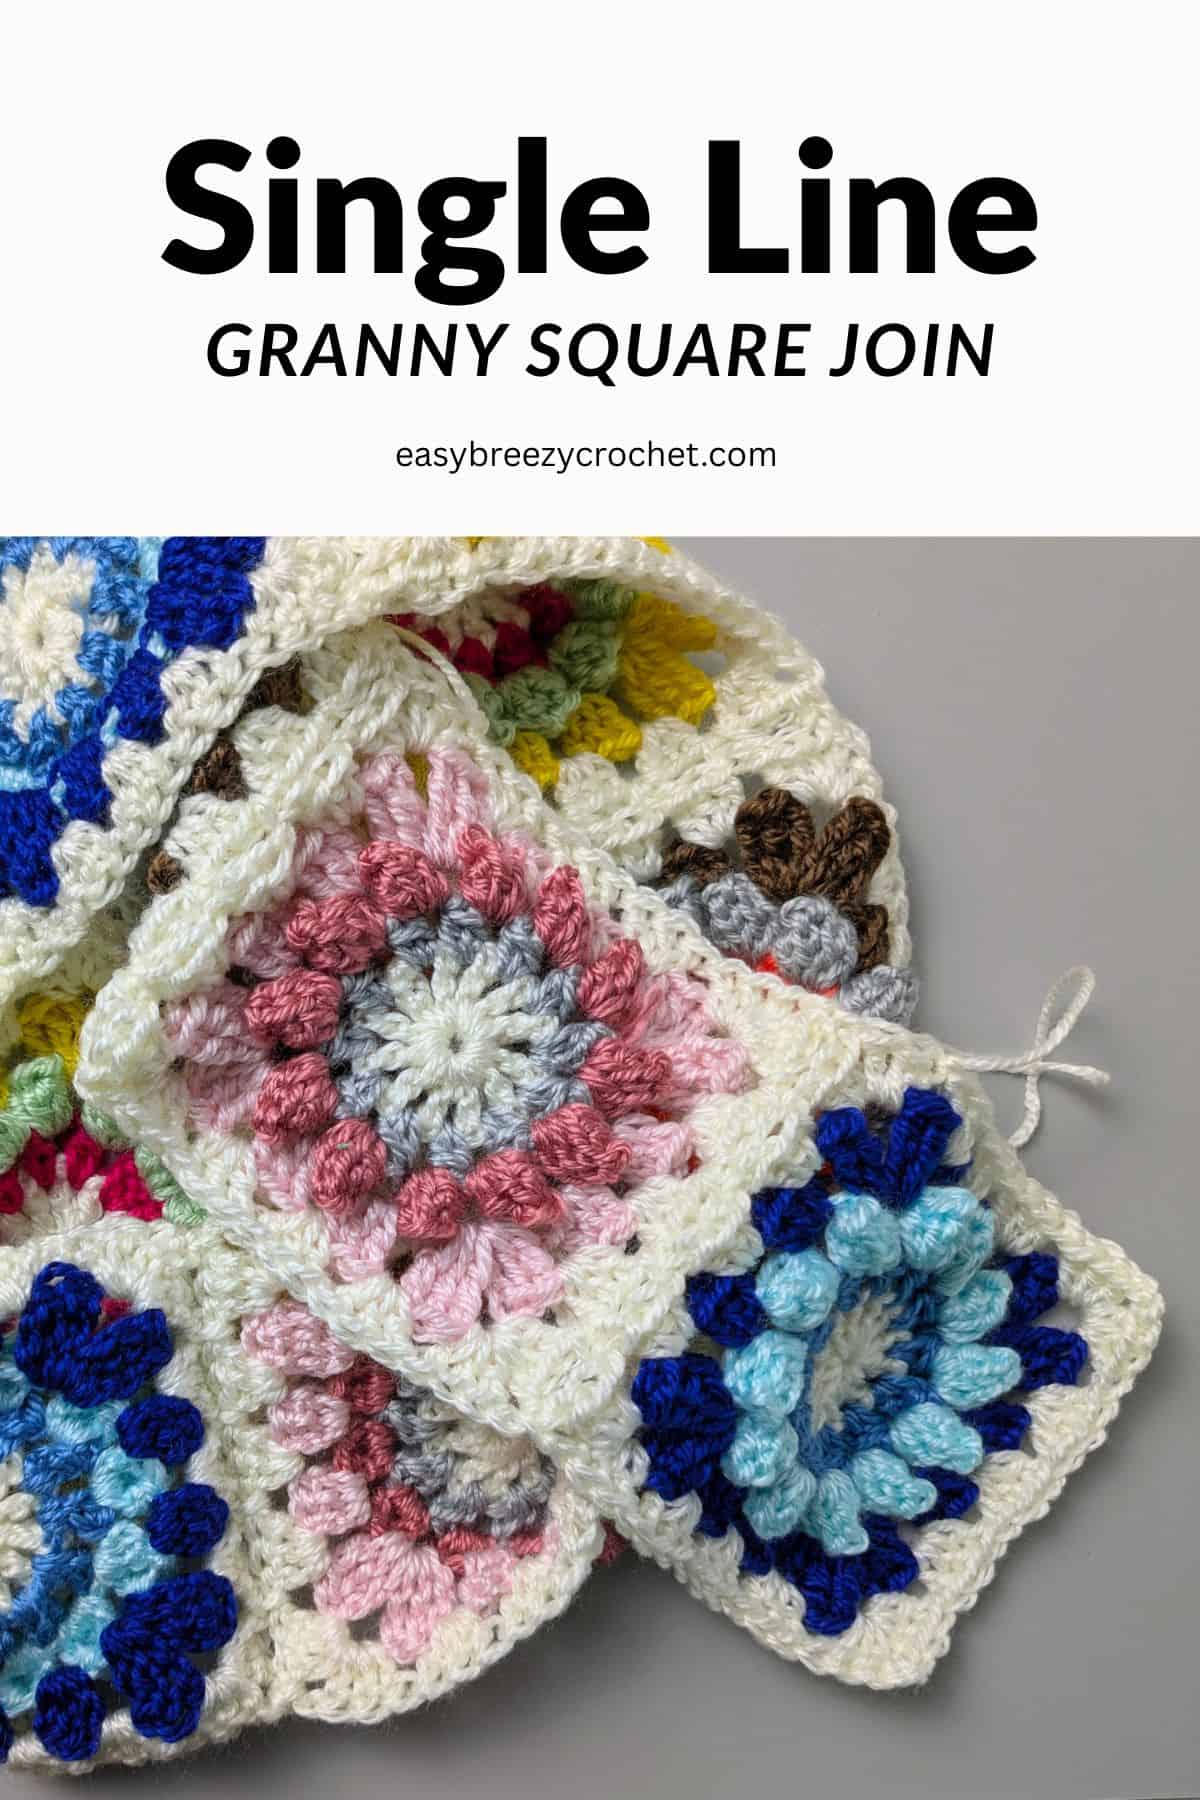
One Row Granny Square Join As You Go Method
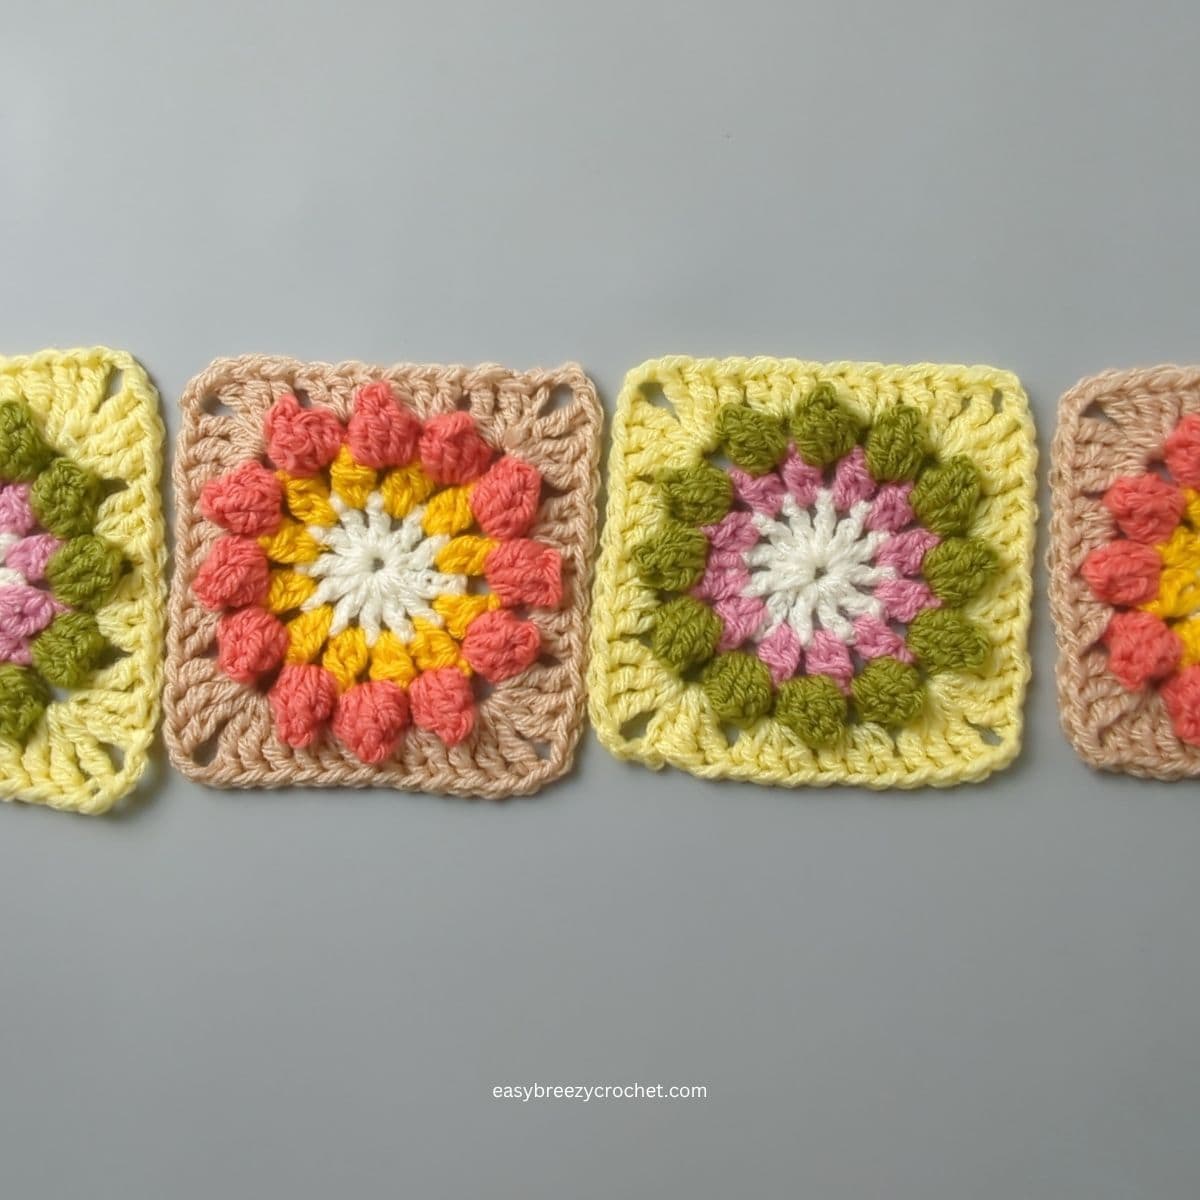
The single line granny square join method joins granny squares into a single, one-square-wide strip using a modified join-as-you-go approach.
Each square is completed individually, with its border joined to the previous square as it is worked, before the yarn is fastened off.
The process is repeated for each new square, building a neat single line of squares rather than a full blanket or grid.
Unlike traditional join-as-you-go methods, this technique is designed specifically for single-line construction only, making it ideal for projects where a narrow, structured band of granny squares is needed.
Note: This joining method is designed for traditional granny squares worked in double crochet cluster rounds with open spaces.
It is not intended for solid granny squares or tightly filled motifs, as the join relies on the gaps created by the cluster structure.
Table of contents
- One Row Granny Square Join As You Go Method
- Why Use This Method?
- Why I Wrote This Method
- How This Method Differs From Other Joins
- Materials And Preparation
- How To Make A Single Line Granny Square Join
- Join Next Square
- Watch Single Line Granny Square Join
- Closing The Strip Into A Circle (For Skirt, edges, Hats)
- Watch How To Close The Strip Into A Round
- Variations
- Uses for a Single-Line Granny Square Strip Join
- Tips for best results
- Single Line Granny Square Join FAQs
- Method Recap
- Stay Connected
- Comments
Why Use This Method?
This joining technique is useful when you want the look of granny squares without assembling a large fabric piece. It creates a clean, organised strip that lies flat and has a consistent structure.
It is especially helpful if you want to:
- Avoid sewing squares together at the end
- Build a decorative strip as you go
- Create narrow, functional crochet pieces
- Keep all construction work in a single direction
Why I Wrote This Method
I created and documented this joining method after finding that most existing granny square joining techniques focus on building full blankets or multi-directional layouts.
When I was searching for a way to join squares into a single, one-square-wide strip, the results I found didn't match what I was trying to achieve.
This method is designed specifically for that gap - joining granny squares into a linear strip only and without sewing, using a modified join-as-you-go approach.
It also reflects my own way of working, where I prefer to complete each square individually and fasten off before moving on to the next.
By sharing it, I hope to make it easier for others who want a simple, structured way to build granny squares into strips for projects like scarves, headbands, table runners, and other one-line designs - without needing to adapt blanket-style joining methods.
How This Method Differs From Other Joins
How This Method Differs From Other Joins
This technique is often confused with other granny square joining methods, but there are important differences:
Traditional Join-As-You-Go (JAYG): typically used to build full blankets or multi-row grids
- Continuous joins: use unbroken yarn across multiple motifs
- Sewn joins: squares are completed first and joined afterwards
In contrast, this method is:
- Sequential - each square is completed before moving to the next
- Single-line only - it does not expand into rows or columns
- Border-integrated joining - the join happens while working the square's border
- Fastened off between squares - each motif is individually finished
Exclusive Printable Crochet Patterns
Be inspired and keep creating!
Join us in The Pattern Vault, Easy Breezy Crochet's exclusive community.
Connect with other crocheters from all around the world and gain access to an extensive library of printable PDF crochet patterns.
All patterns are ad-free and available to you when you want, allowing you to crochet in your own time. So, if you're stuck on inspiration or on the hunt for you next crochet project, the Pattern Vault is for you!
Materials And Preparation
For best results:
- Granny squares without final border rounds
- Use consistent yarn weight across all squares
- Keep hook size uniform for even tension
- Ensure all squares are the same size before joining
- Block squares if needed to maintain straight edges
Consistent sizing is especially important, as uneven squares can cause twisting or rippling in the finished strip.
How To Make A Single Line Granny Square Join
For clarity, contrasting colors are used in this tutorial to distinguish the borders and joining areas.
First Square Border (Join Preparation)
This pattern uses chain 2 corner spaces and no chain spaces between clusters, so if you normally work chain 1 spaces between clusters or use a different corner spacing, you can adjust your border accordingly.
For example, you may omit chain 1 spaces between clusters and use chain 2 corners for consistency with this method.
Because this join is only worked along one edge, any difference in size or tension is usually minimal, as long as the same method is used consistently for all squares.
Border on First Square
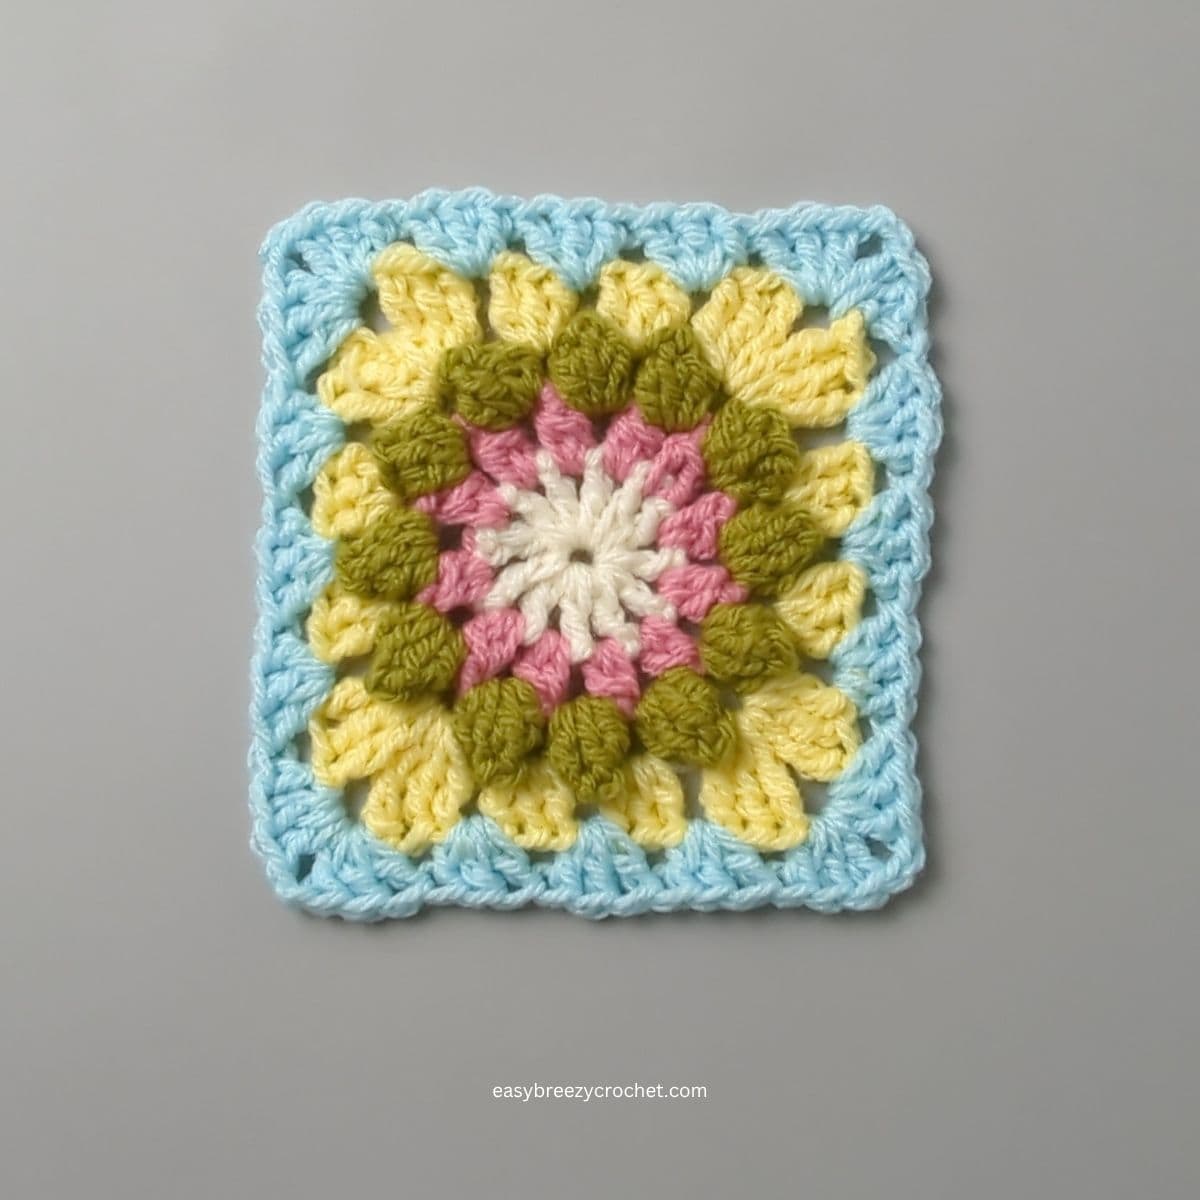
- Slip stitch yarn into any corner space, chain 2 (count this as a double crochet, make 2 double crochet (dc), chain 2, 3 double crochet in the corner space,
- then make 3 double crochet in each space between the clusters of the previous round,
- then make 3 double crochet, chain 2, 3 double crochet in the next corner space,
- continue making 3 double crochet cluster stitches in the spaces between stitches and 3 double crochet, chain 2, 3 double crochets in the corner spaces, until you reach the end
- slip stitch into the top of chain 2 to join, cut yarn fasten off and weave in end.
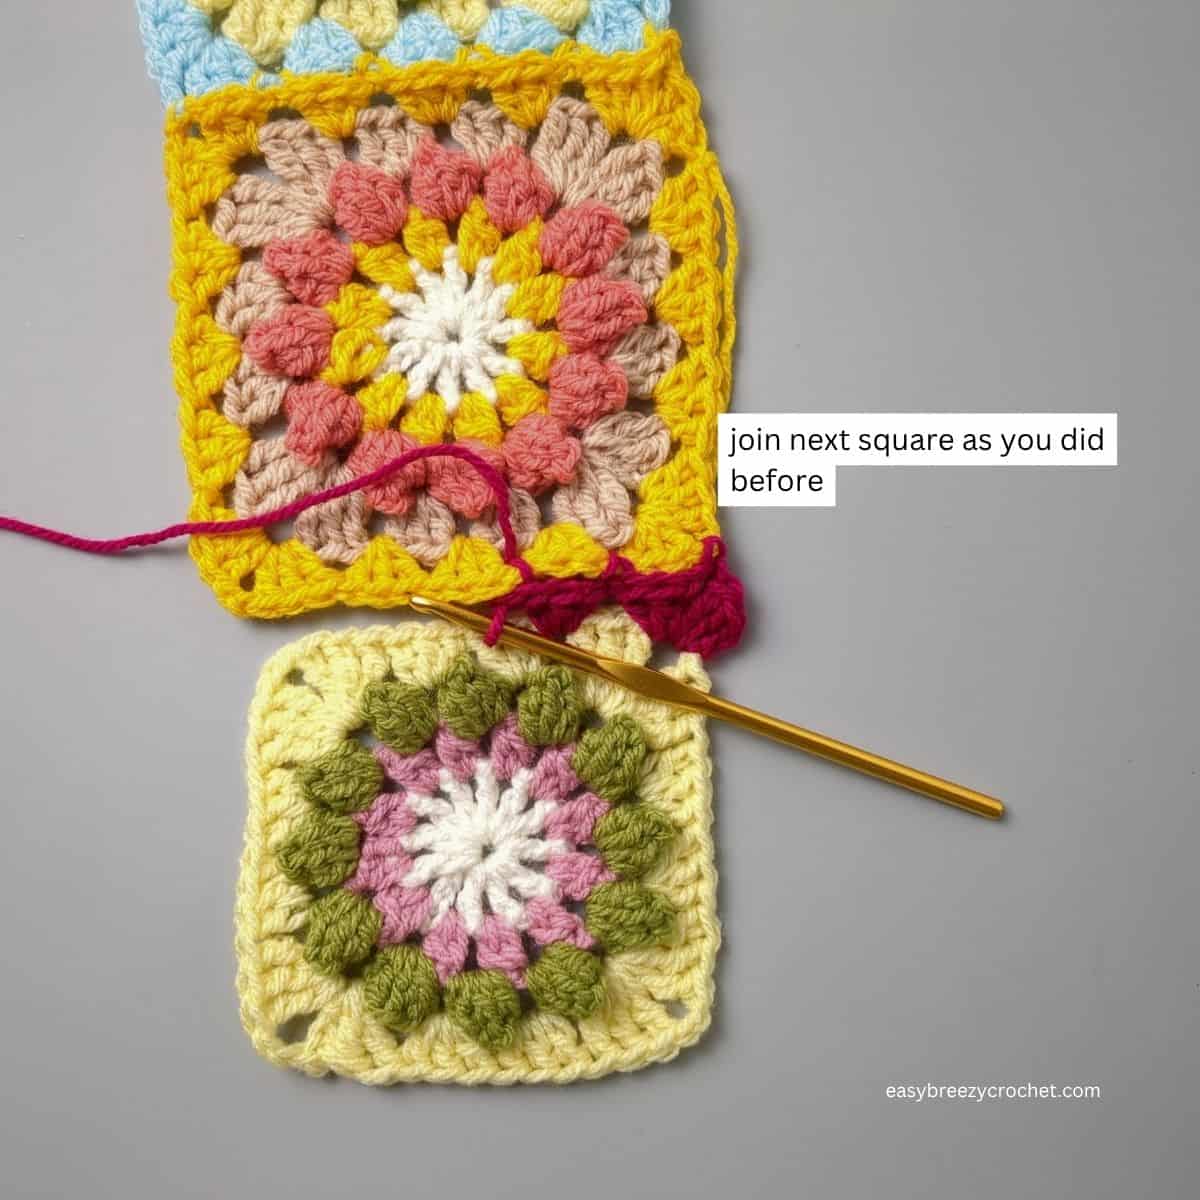
Join Next Square
Position the next square (the one without a border) at the front and square with the border at the back and the right sides facing up.
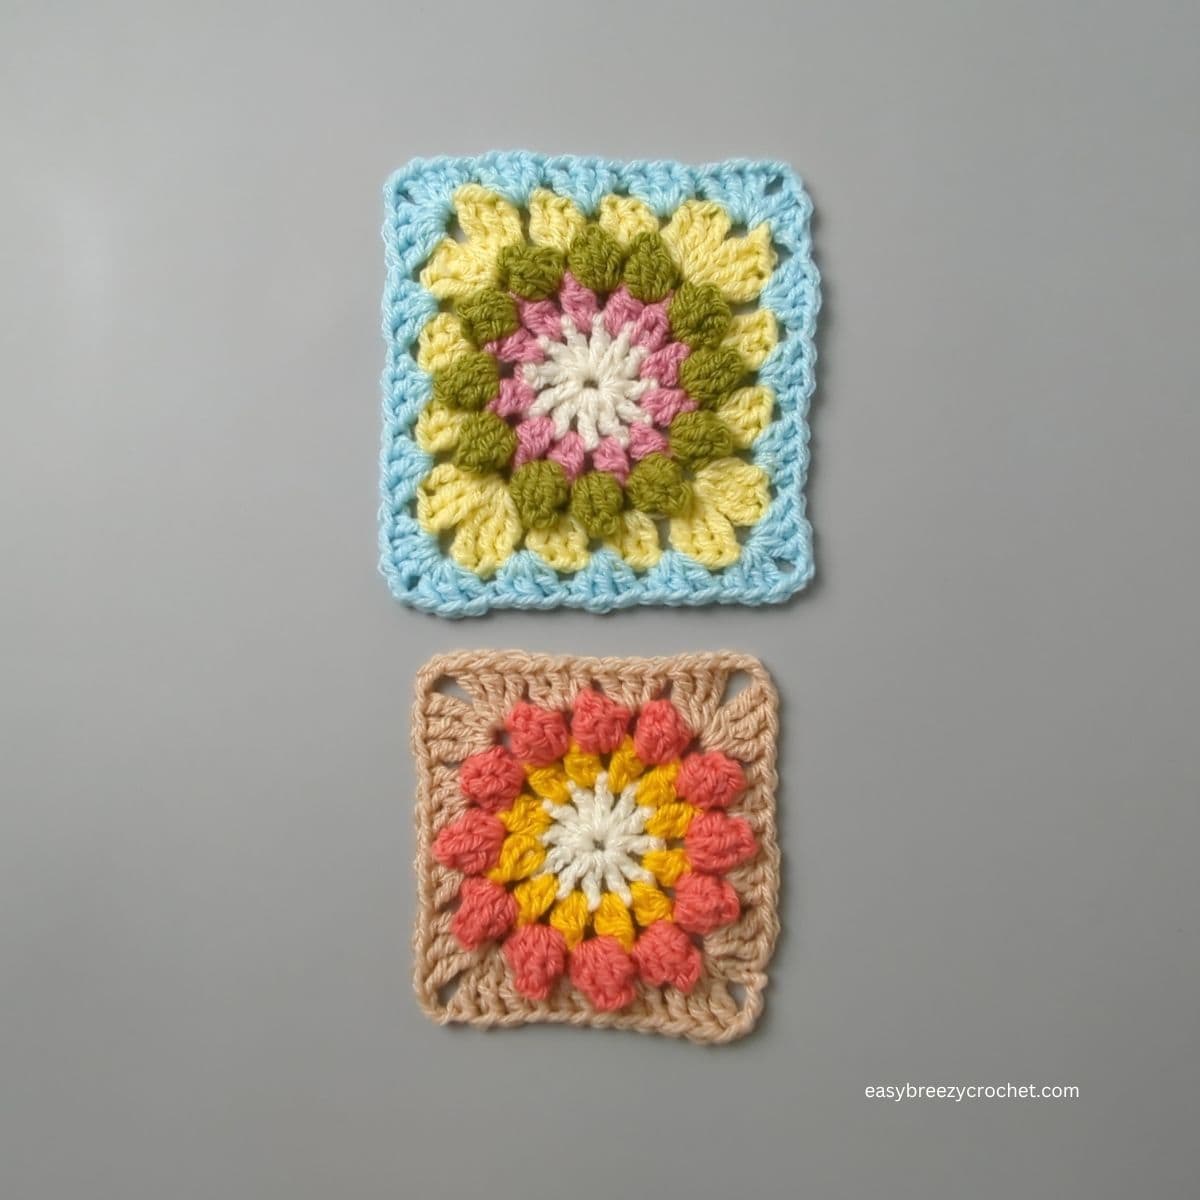
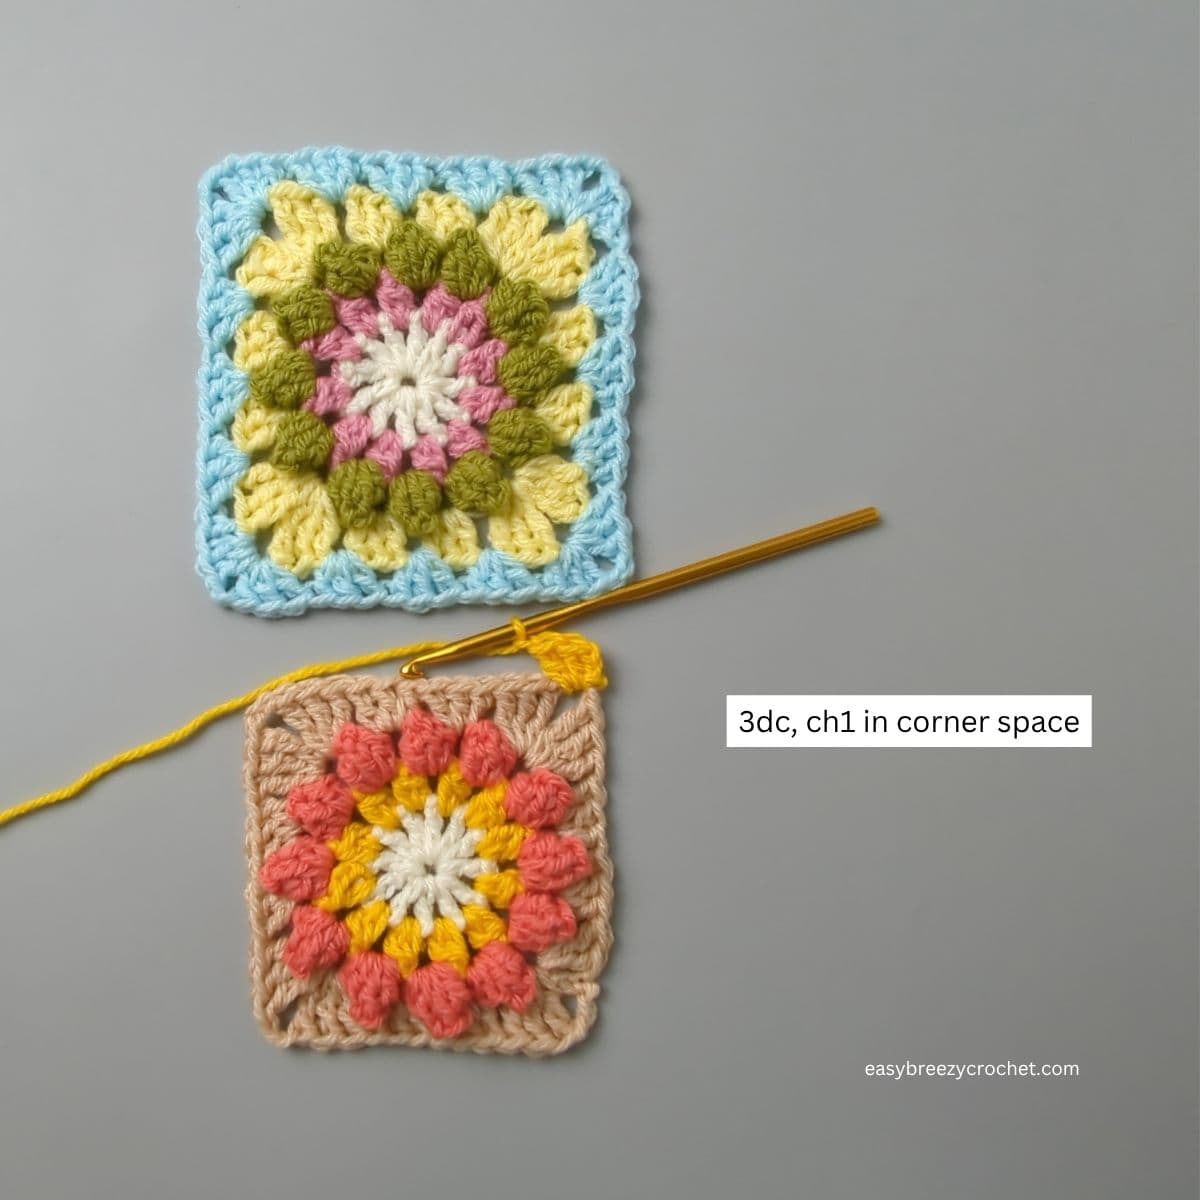
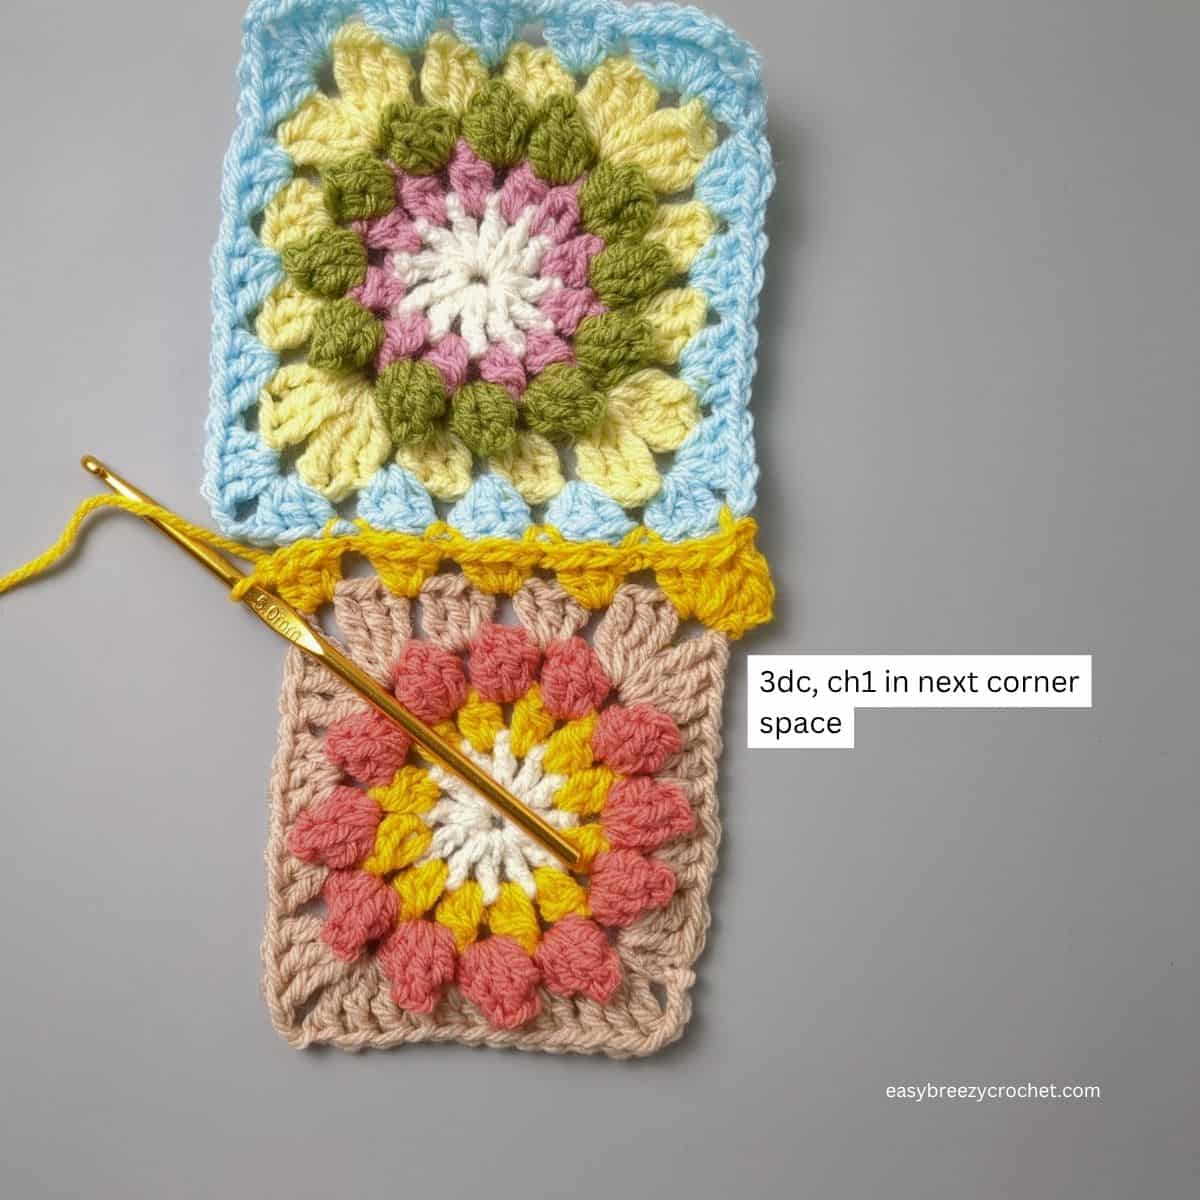
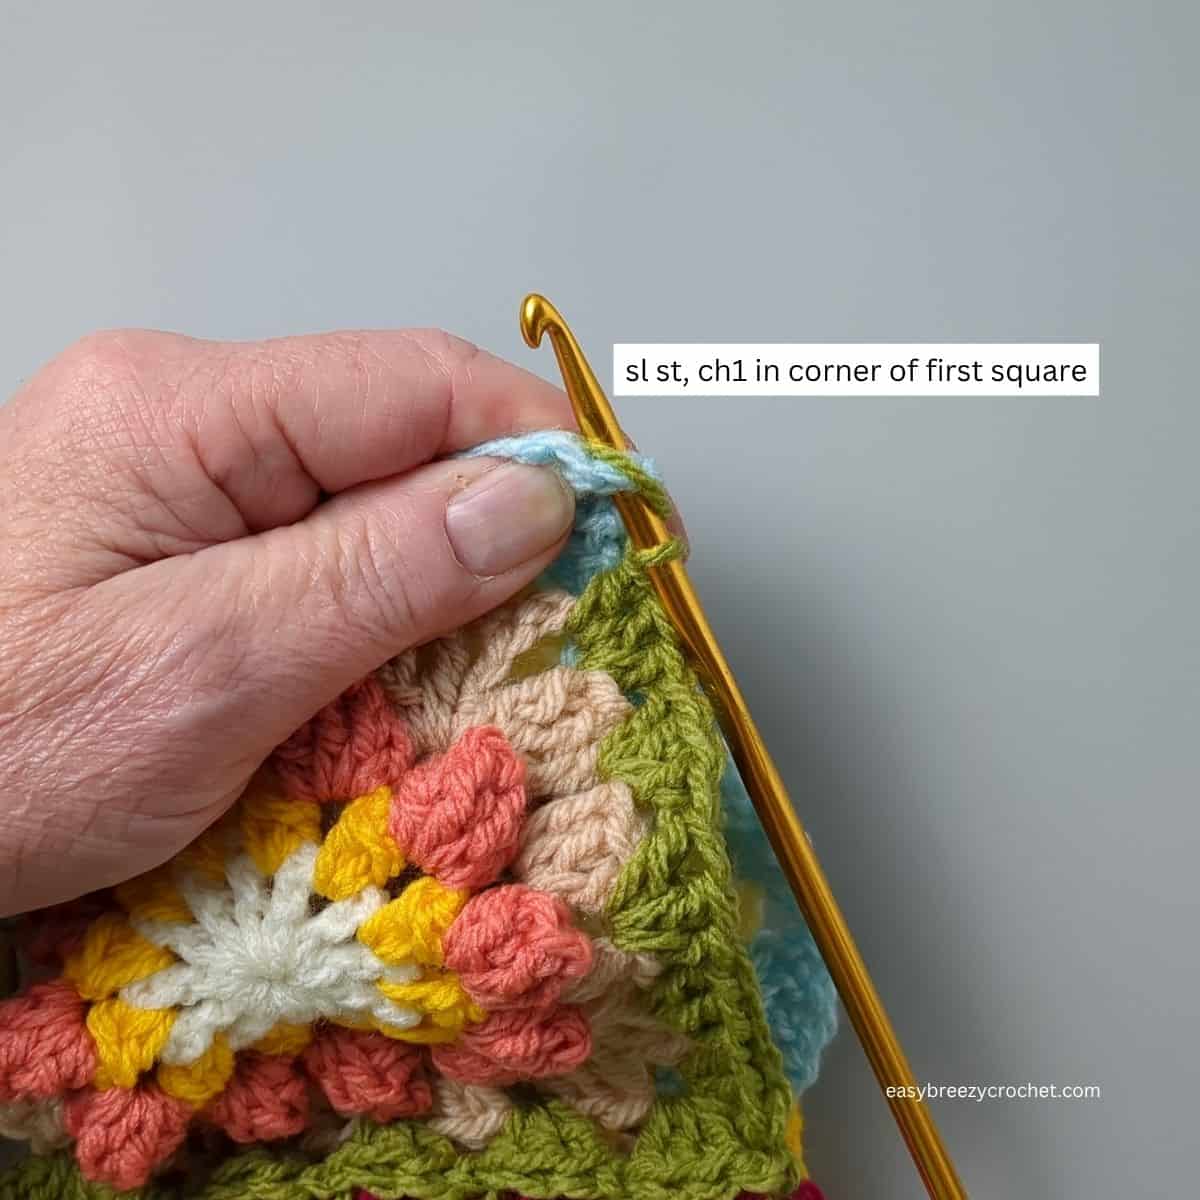
1 - Slip stitch yarn into any corner space on the square without the border, chain 2 (this counts as the first double crochet), then make 2 double crochet and chain 1 in the same corner space.
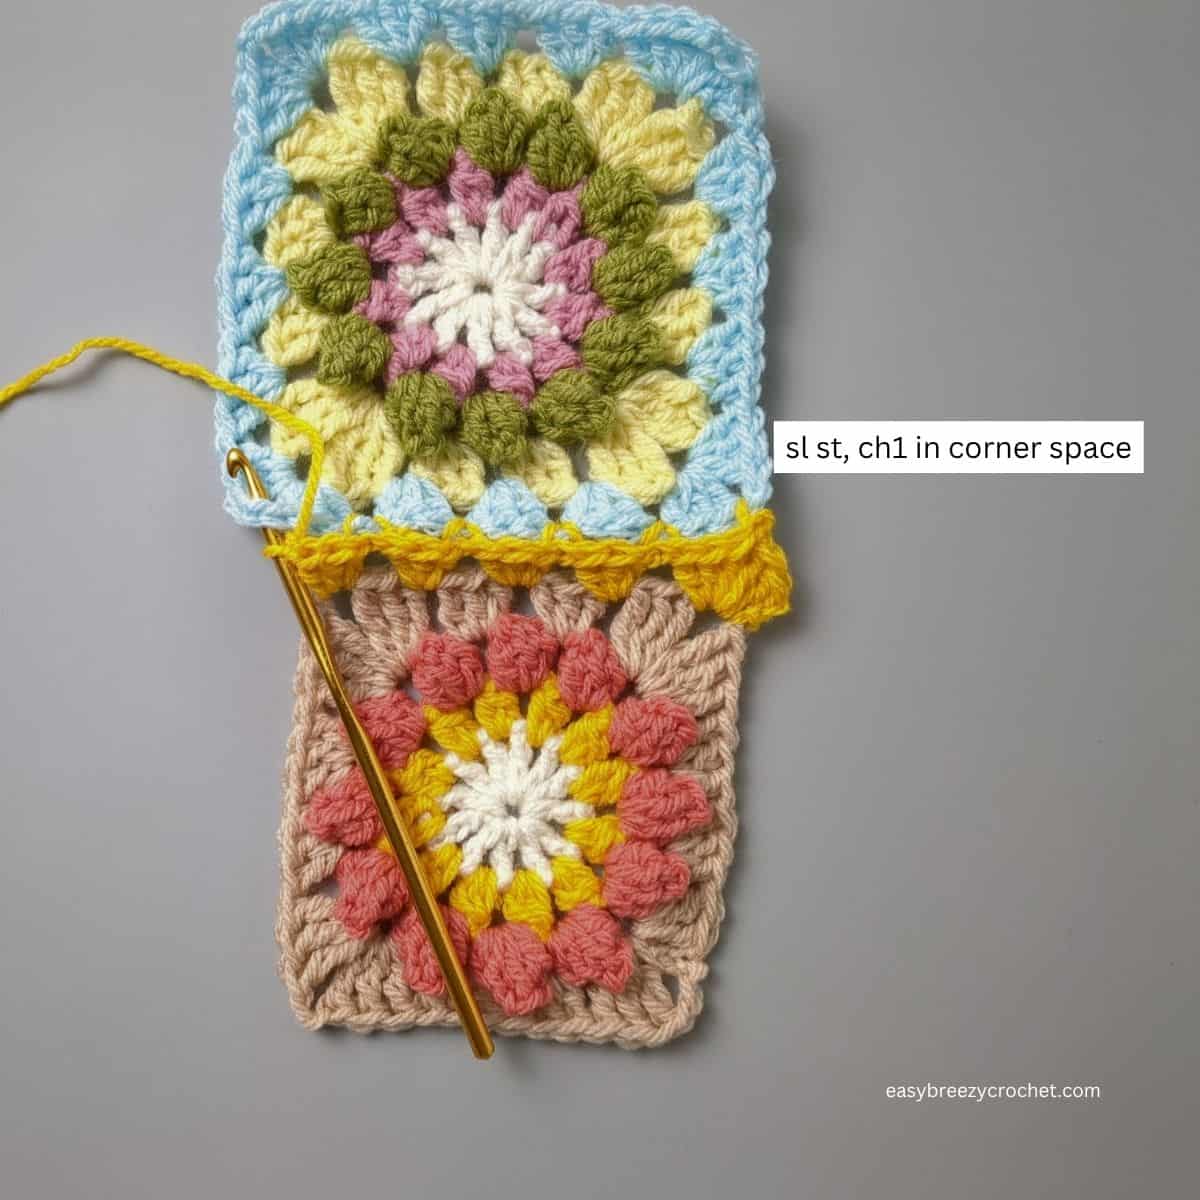
2 - Slip stitch and chain 1 into the corner space of the square with the border (this will start the joining),
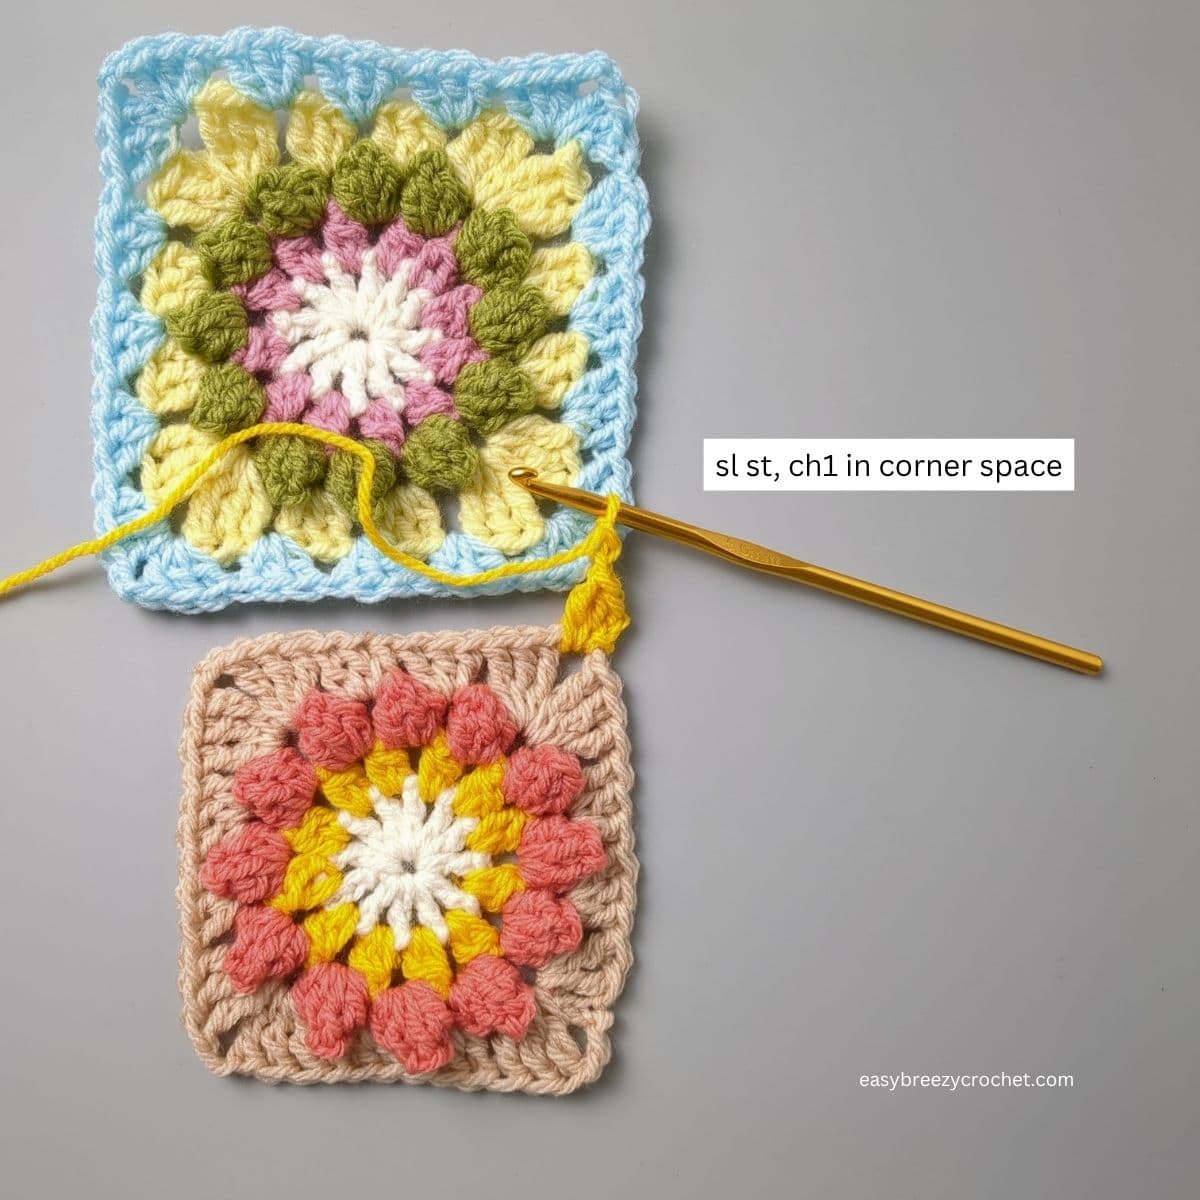
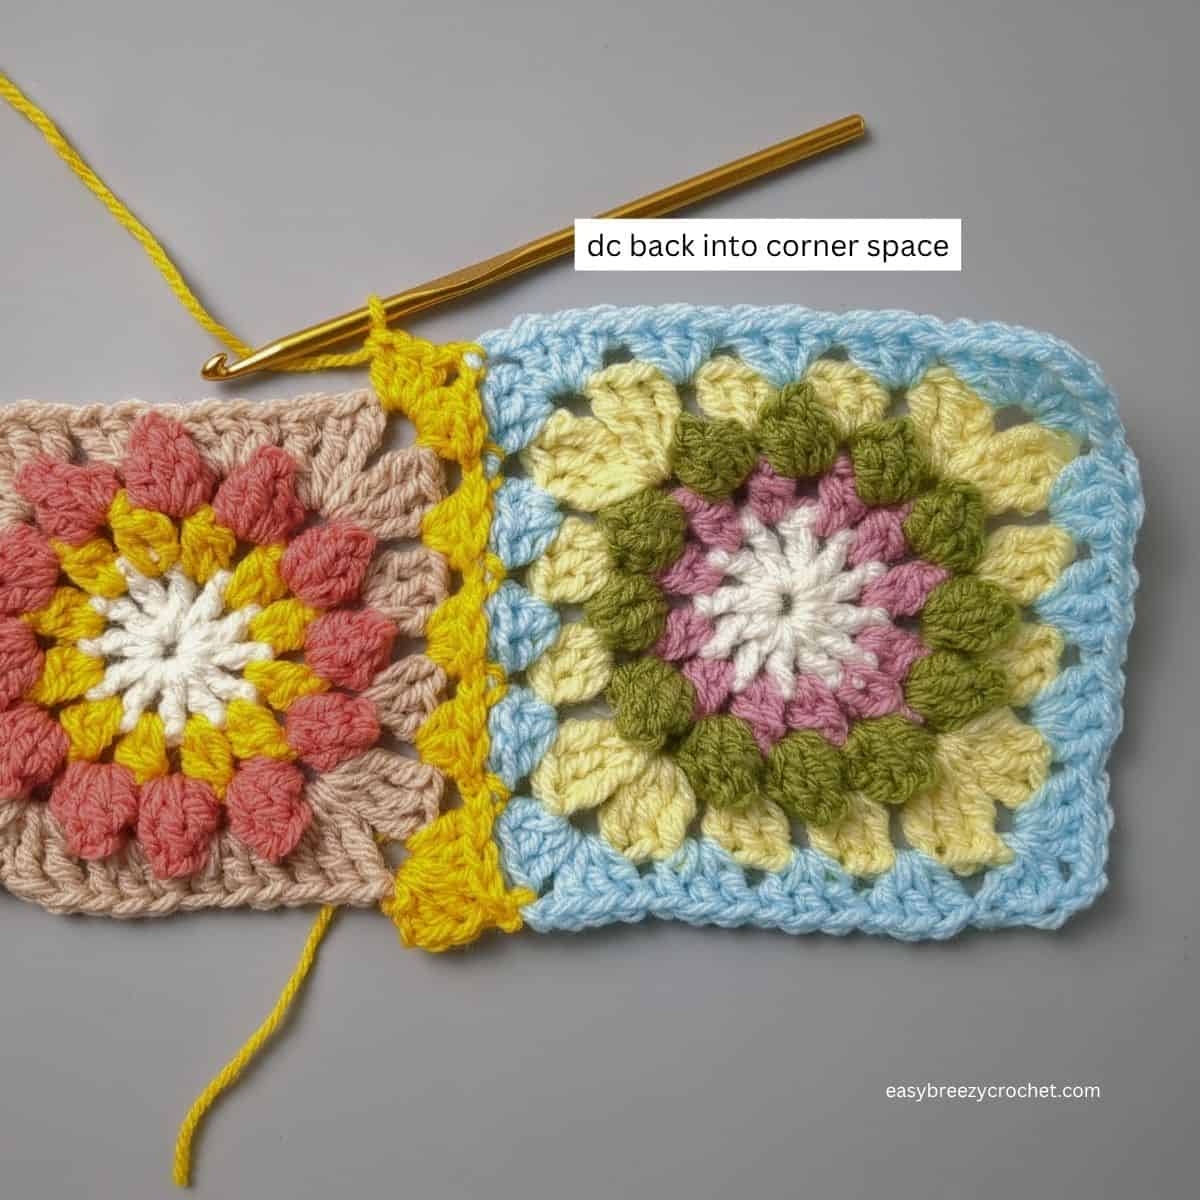
3 - Then make 3 double crochet cluster back into the corner space of the square without the border,

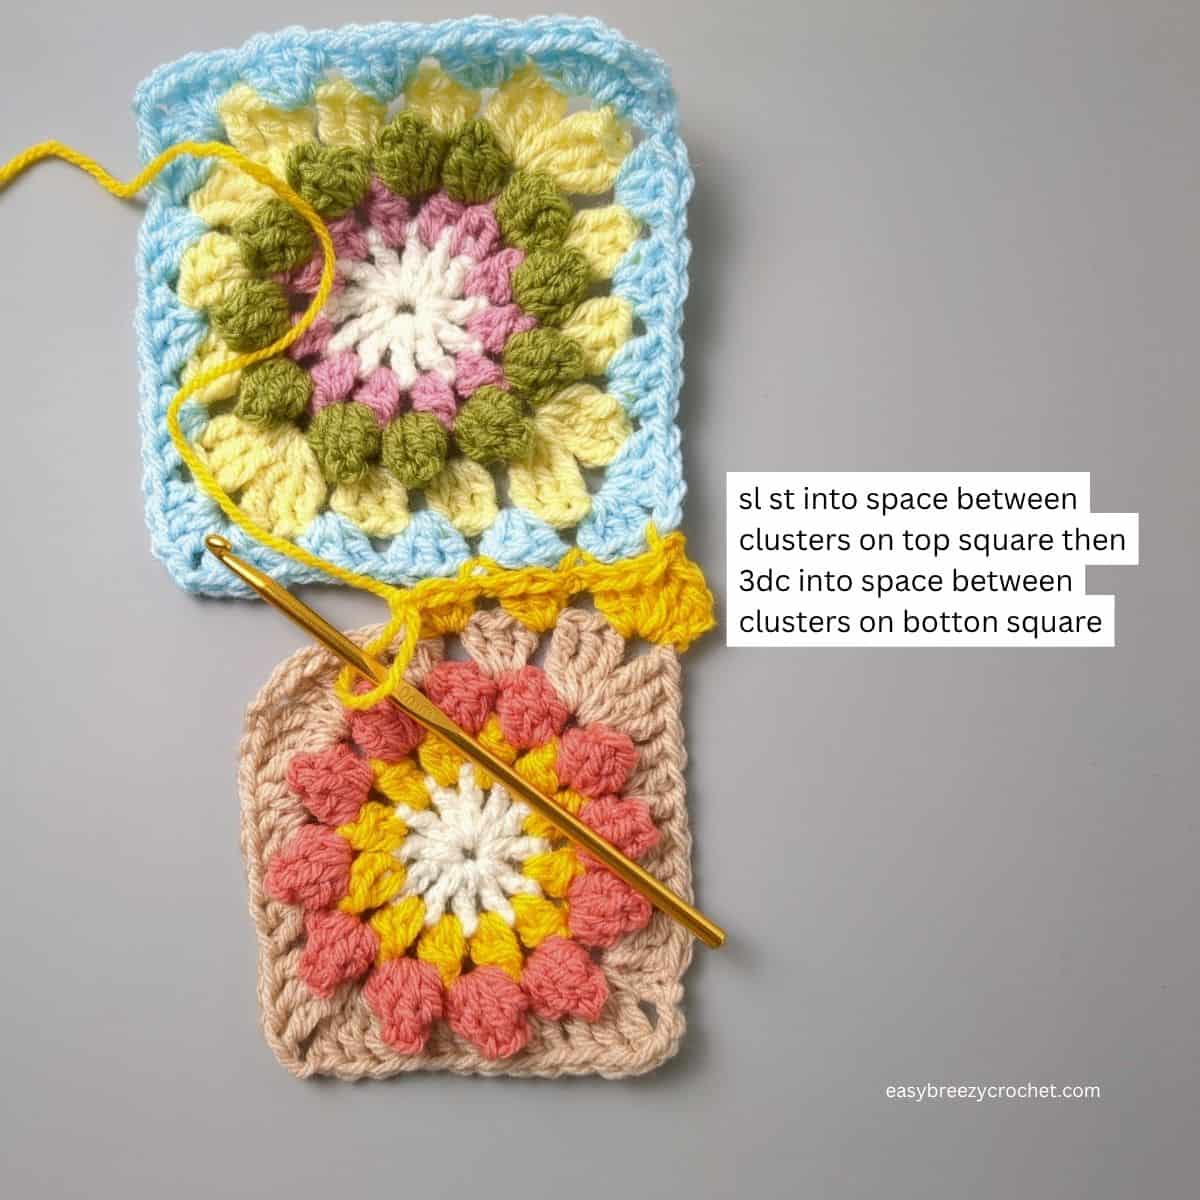
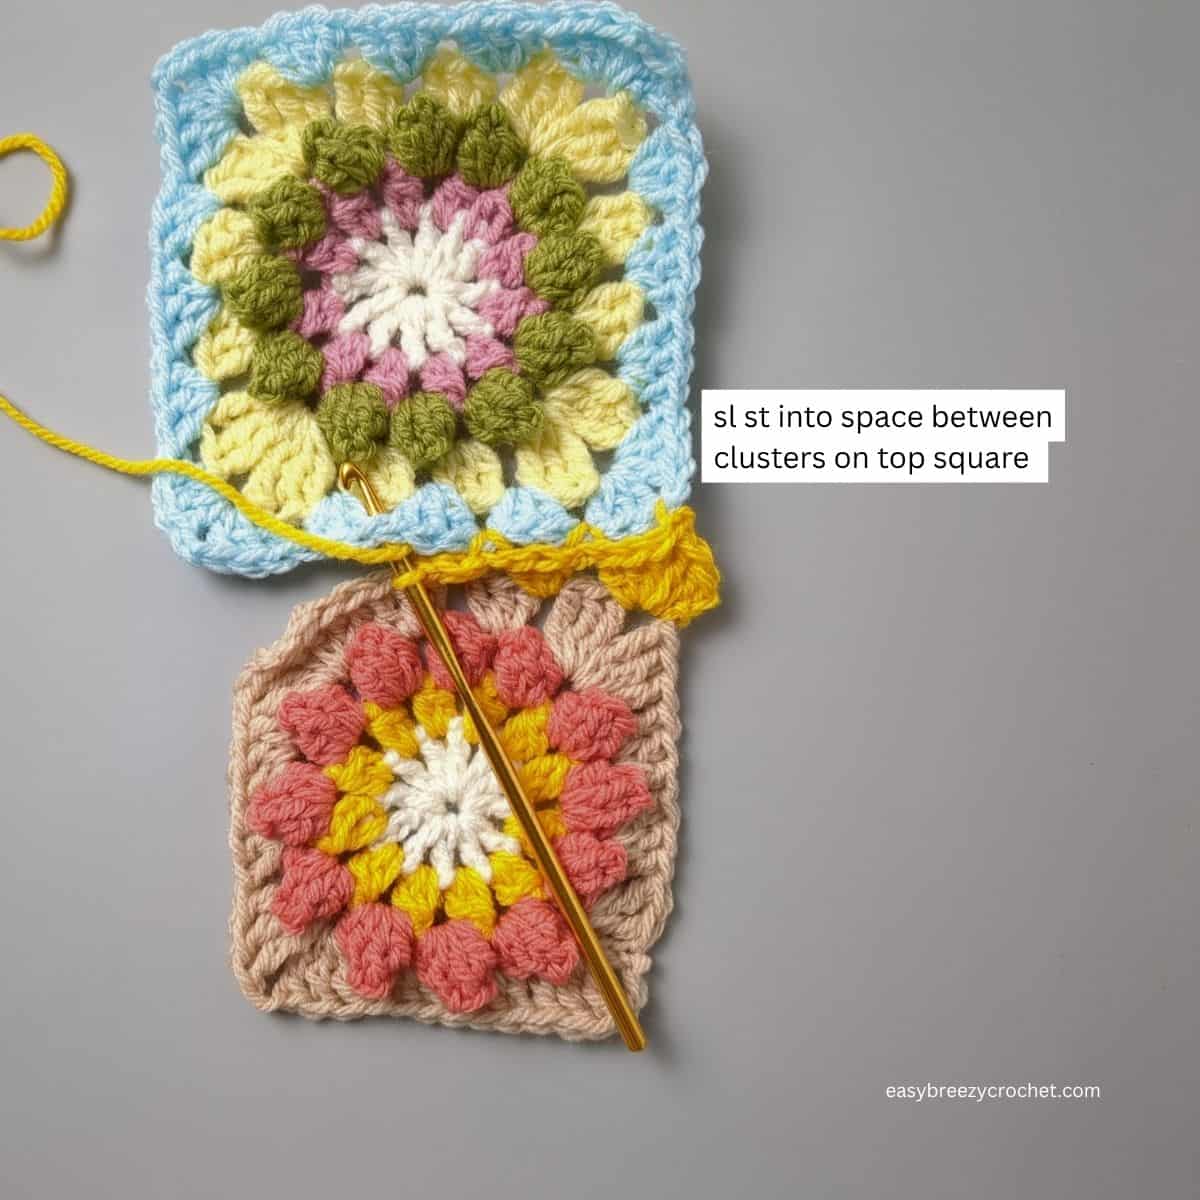
4 - Slip stitch into the space between clusters on the square with the border
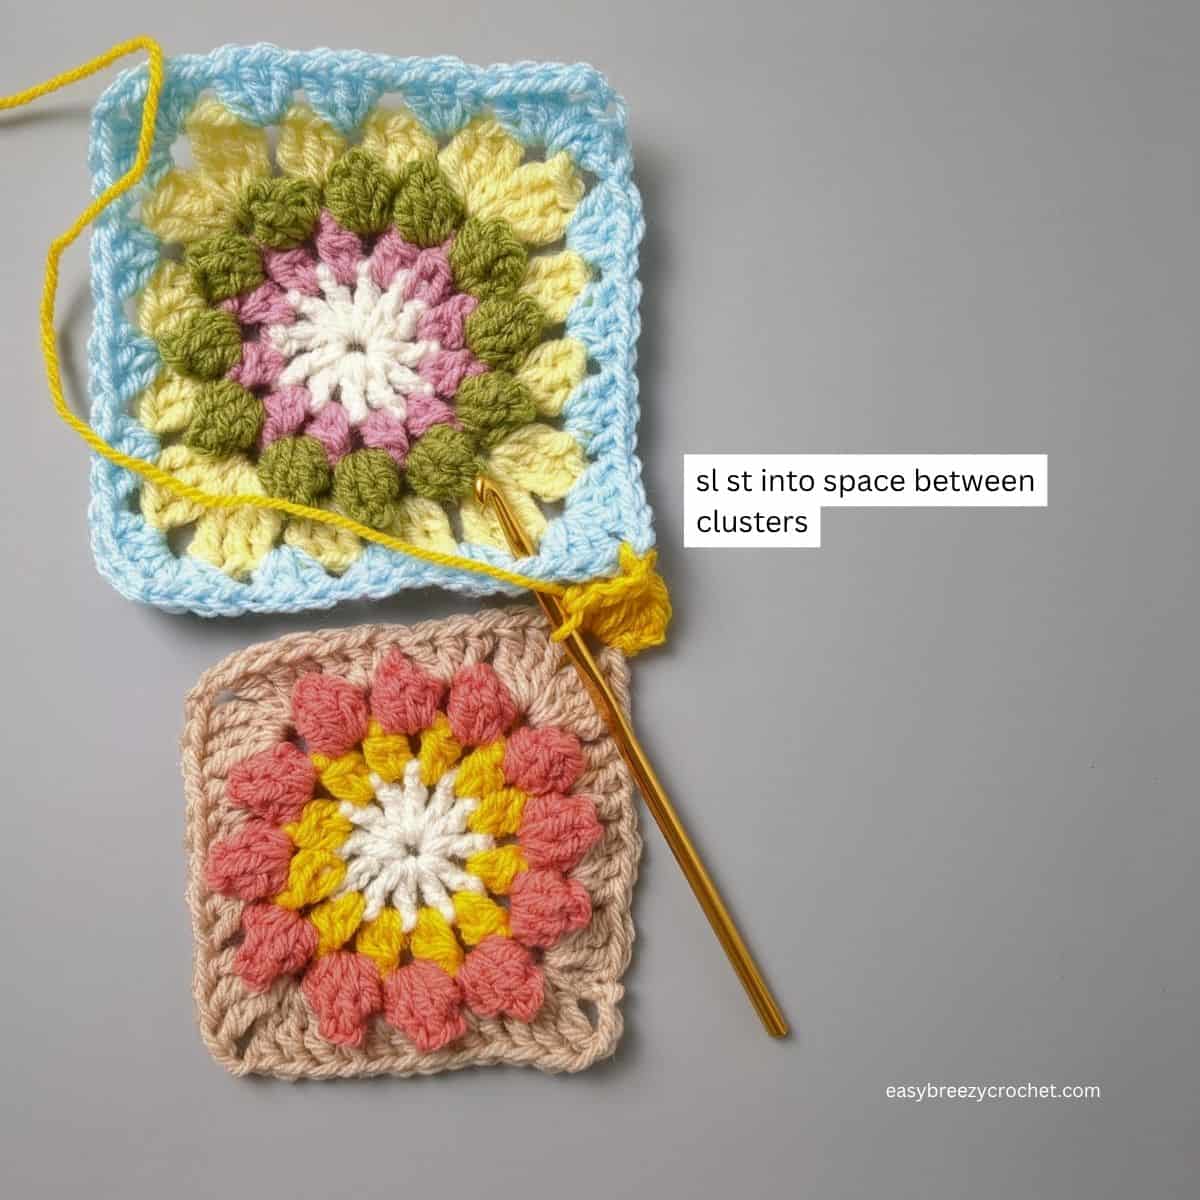
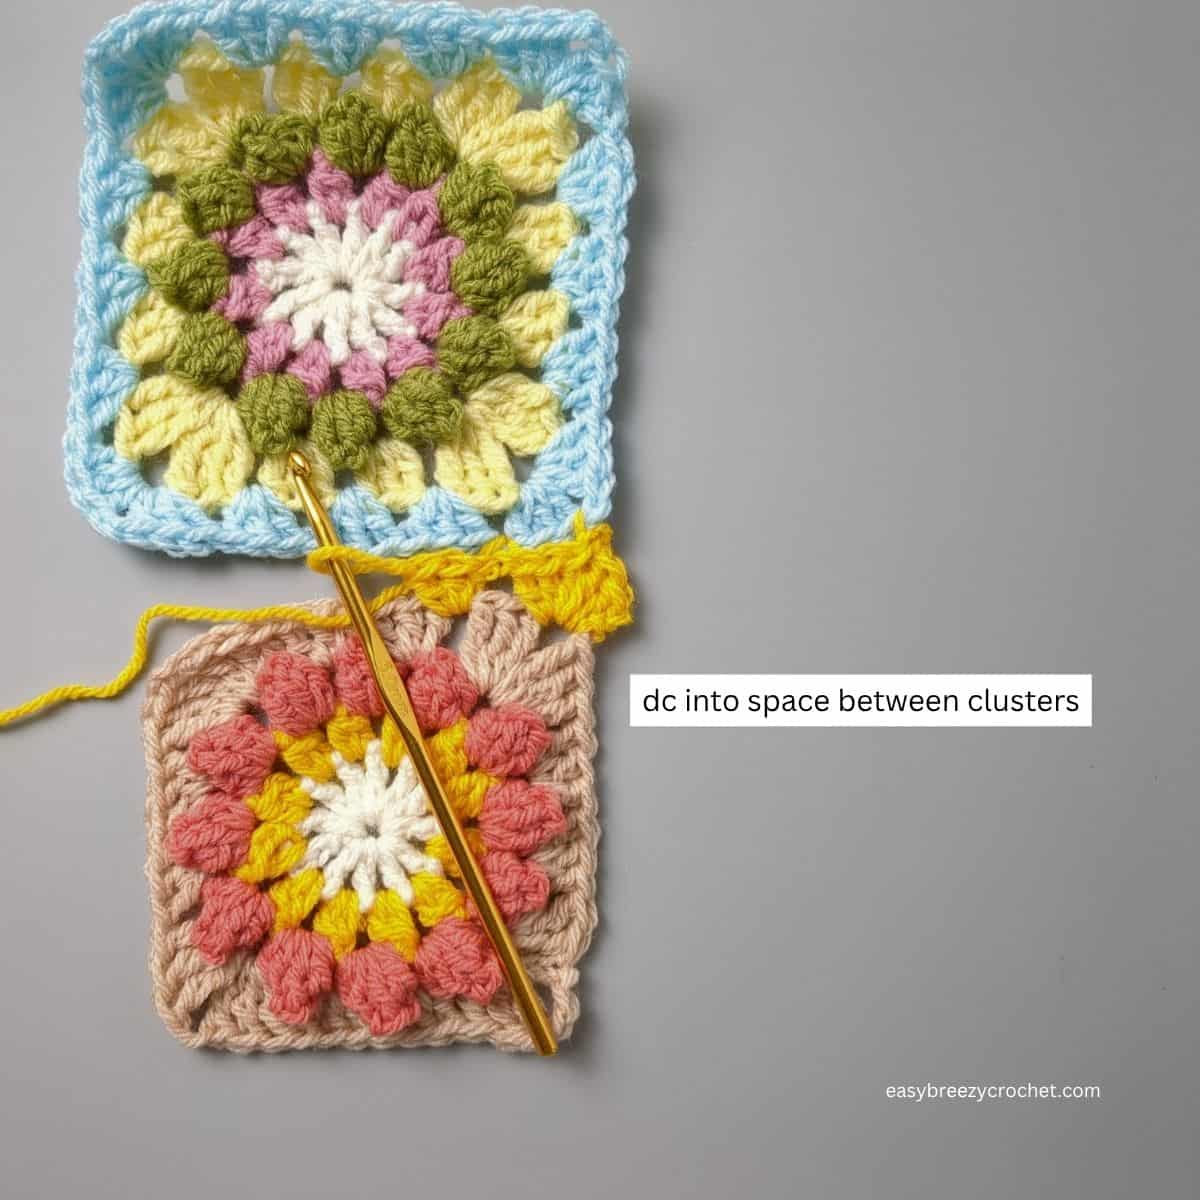
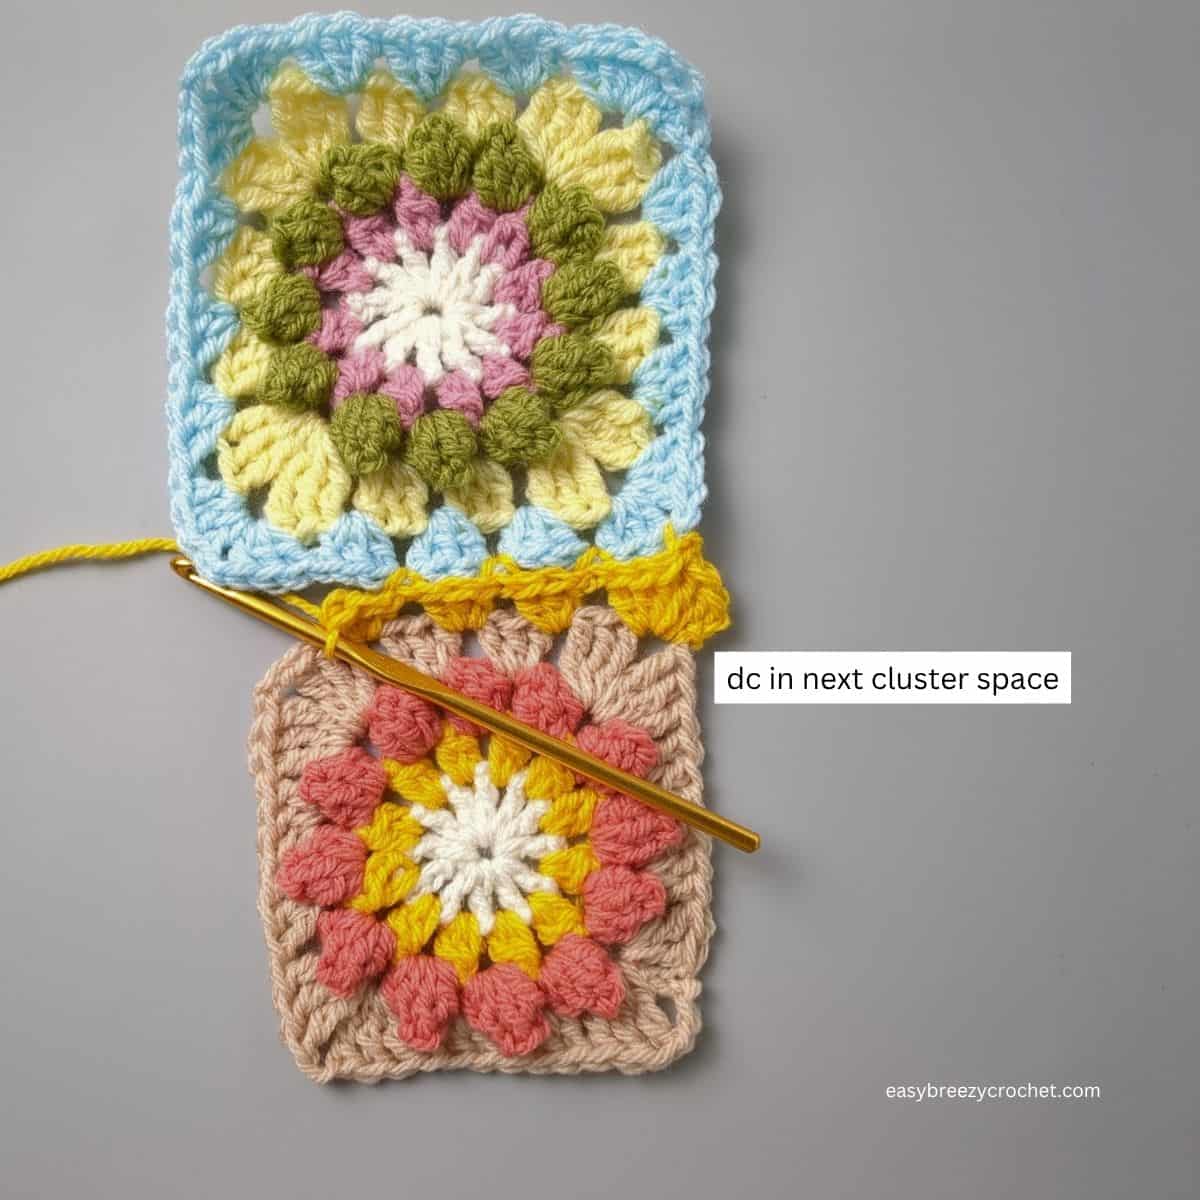
5 - Make a 3 double crochet cluster in the space between the next clusters on the square without the border
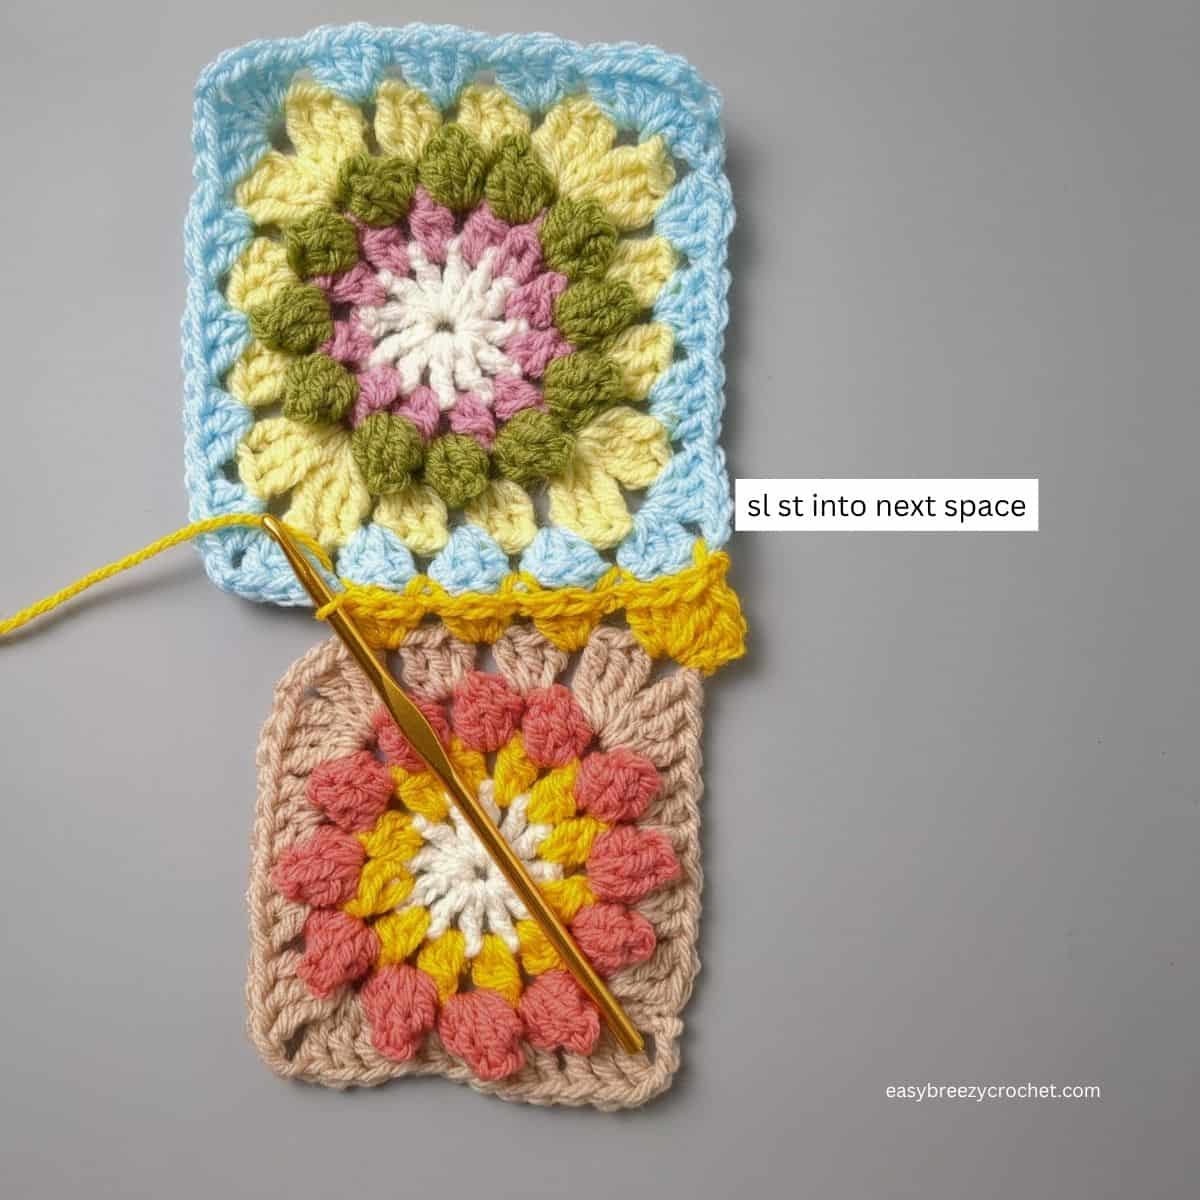
6 - Slip stitch into the next space between clusters on the square with the border
7 - Make a 3 double crochet cluster in the space between the next clusters on the square without the border
8 - Slip stitch into the next space between clusters on the square with the border
9 - Make a 3 double crochet cluster in the space between the next clusters on the square without the border
10 - Slip stitch into the next space between clusters on the square with the border
11 - Make 3 double crochet and chain 1 in the corner space of the of the square without the border
12 - Slip stitch into the corner space of the square with the border
13 - Make 3 double crochet cluster in the corner space of the square without the border
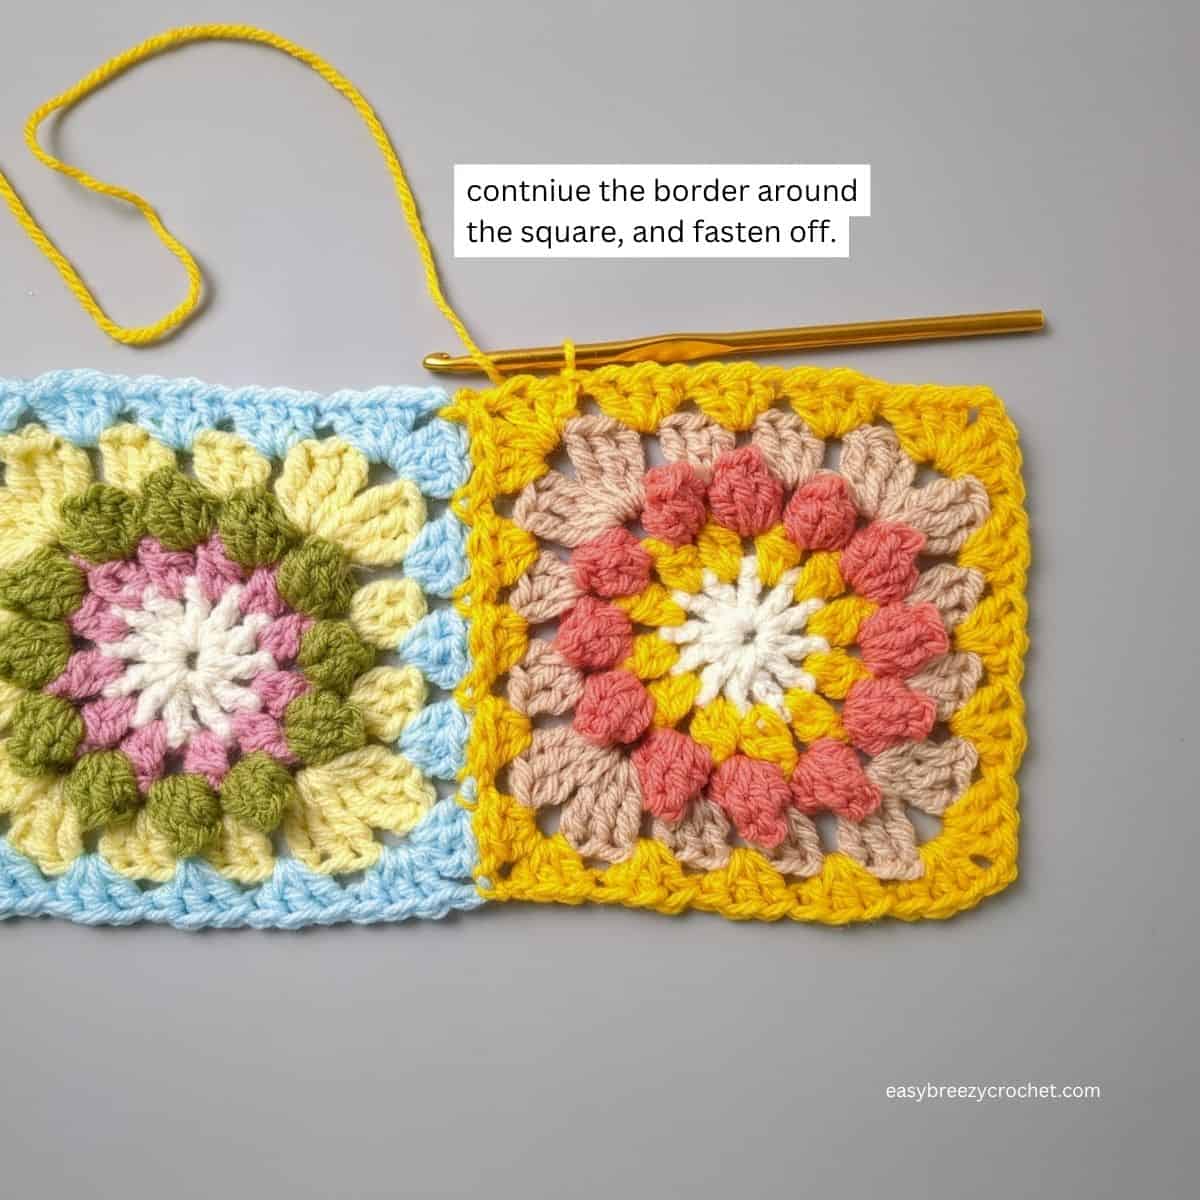
14 - Continue to make 3 double crochet in each space between clusters and 3 double crochet, chain 2, 3 double crochet in the chain 2 corners, after making the last 3 double crochet cluster group, slip stitch into the top of chain 2 to join, ch1, cut yarn fasten off and weave in ends.
15 - Repeat the above steps for the remaining squares.
Now that you've learned how to create a long strip of joined granny squares, you can take it a step further by joining the ends to form a circle. This is especially useful for projects such as this crochet slouchy beanie (coming soon).
Watch Single Line Granny Square Join
Closing The Strip Into A Circle (For Skirt, edges, Hats)
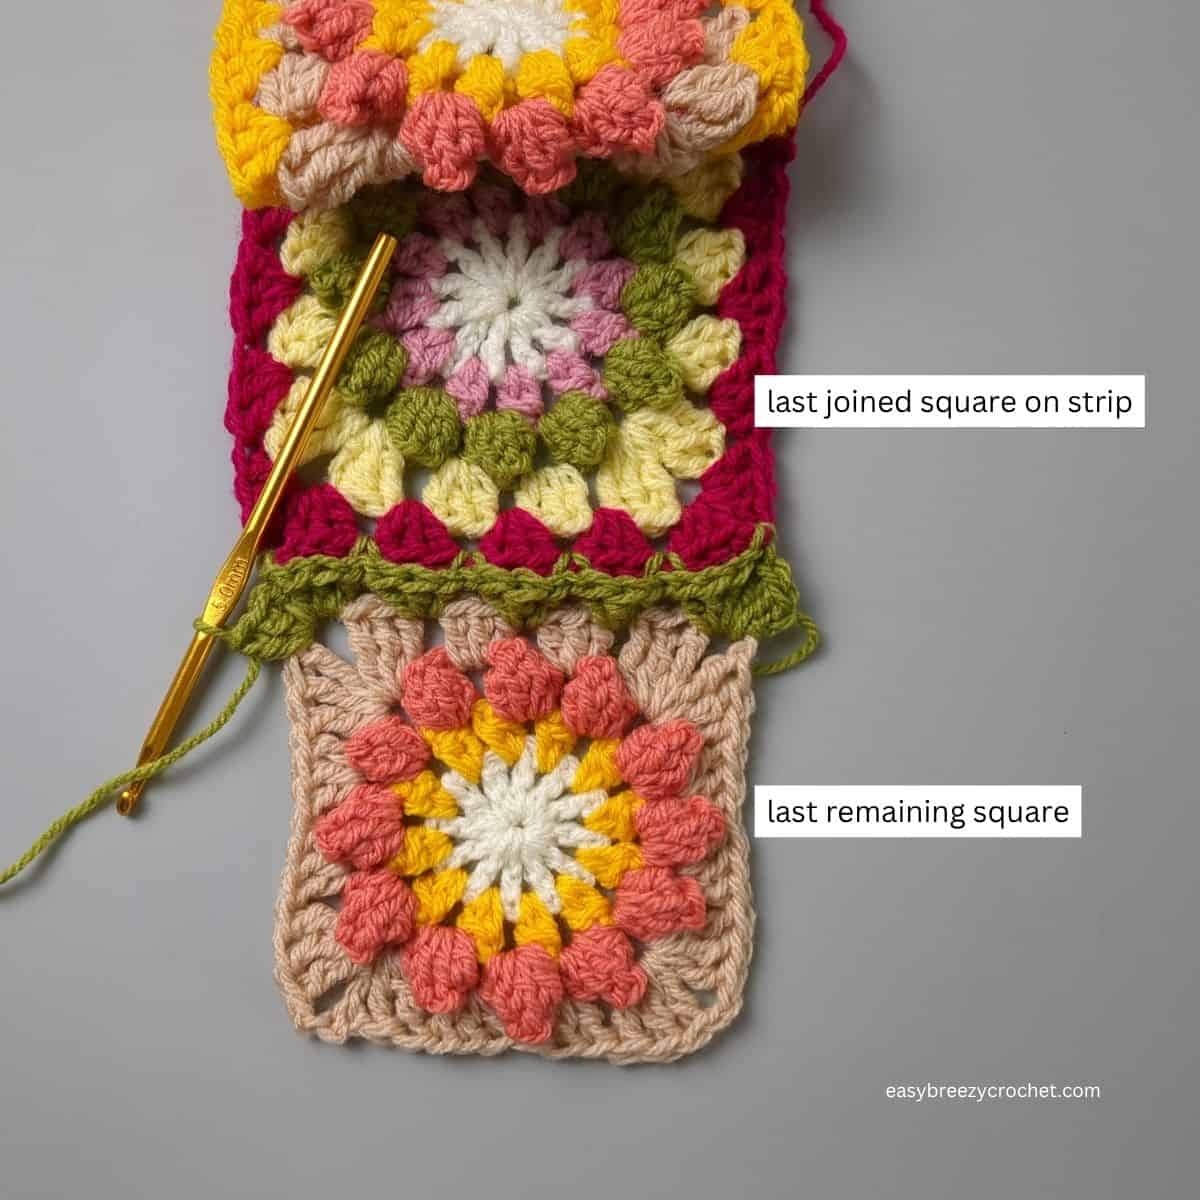
To make this into a ring work your last square as follows
1 - Join the last remining square to the last square joined in the strip using the steps above until you reach step 13
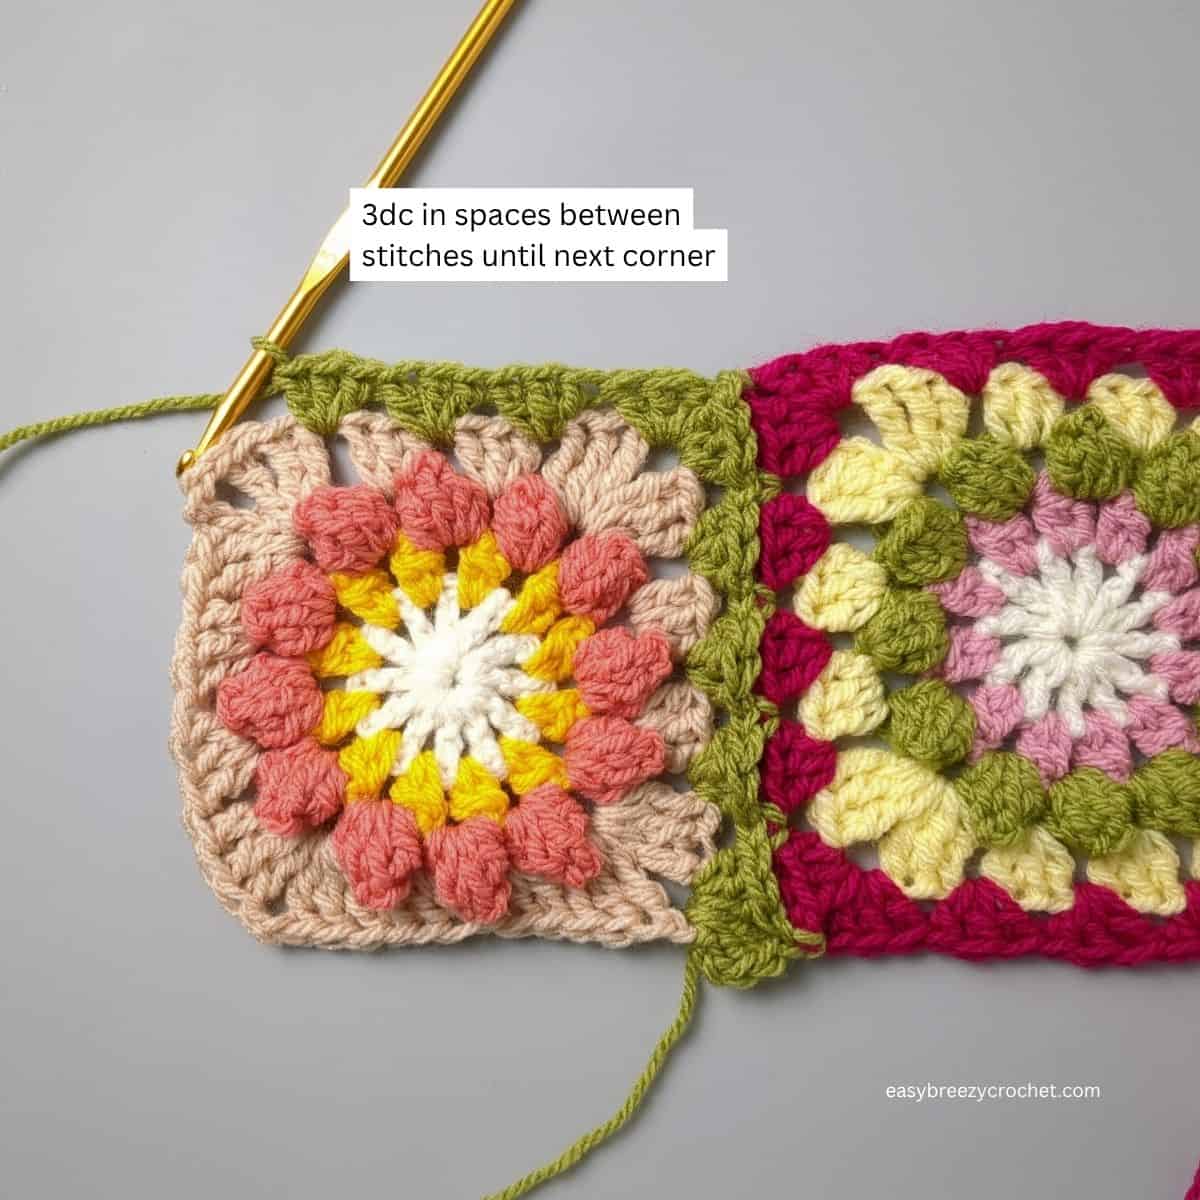
2 - Make 3 double crochet stitches in each of the spaces between the clusters along the next side until you reach the next corner,
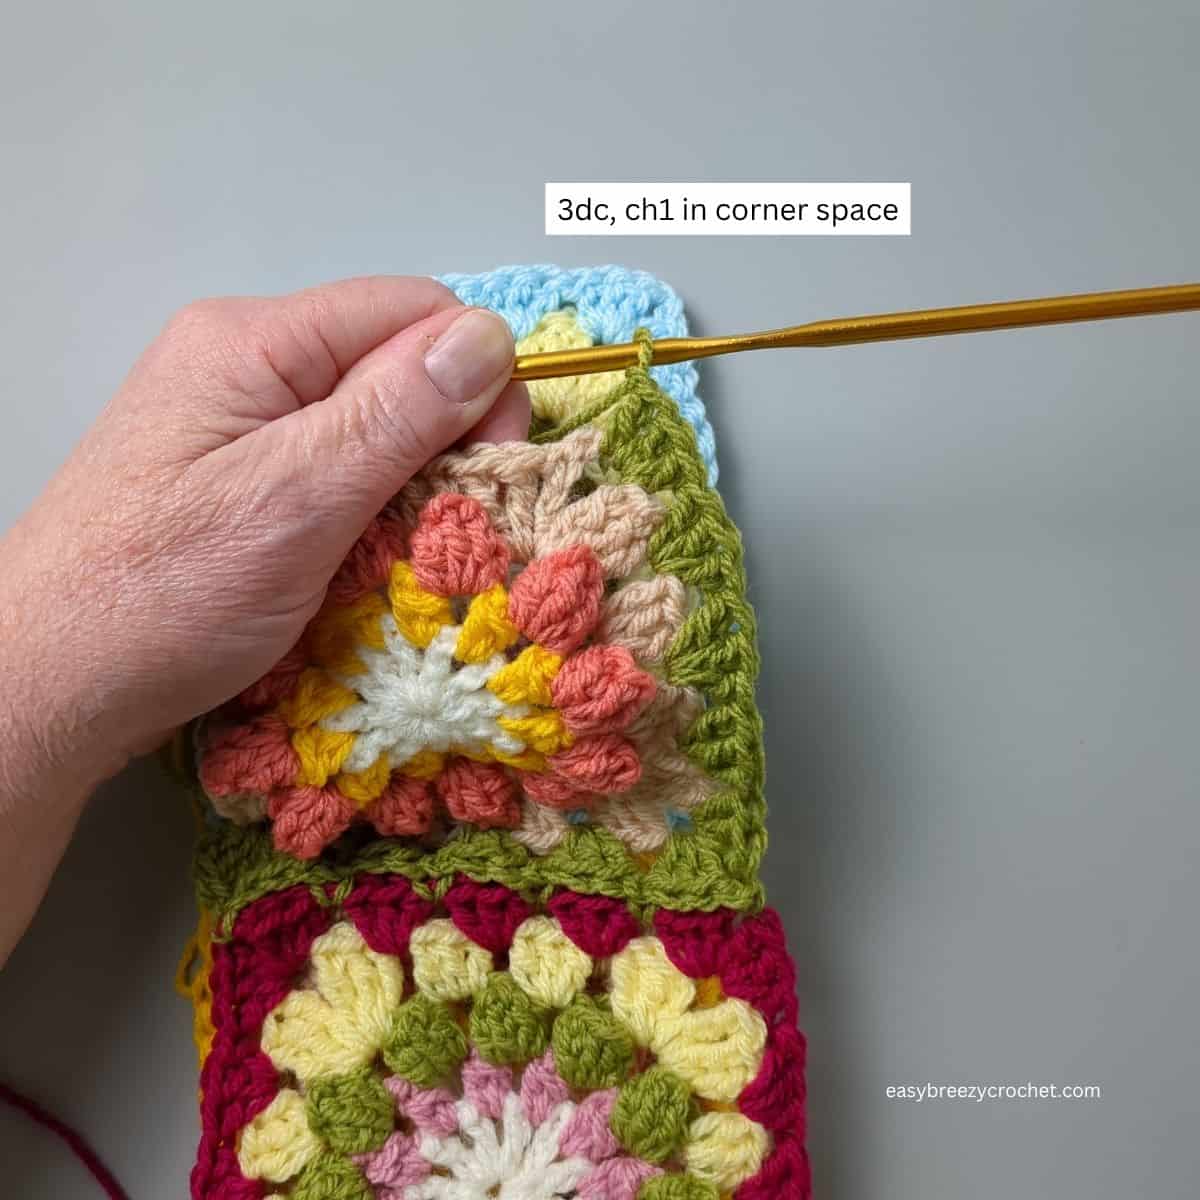
3 - Make 3 double crochet and chain 1 in corner space of the square without the border
4 - Slip stitch and chain 1 in the corner of the first joined square
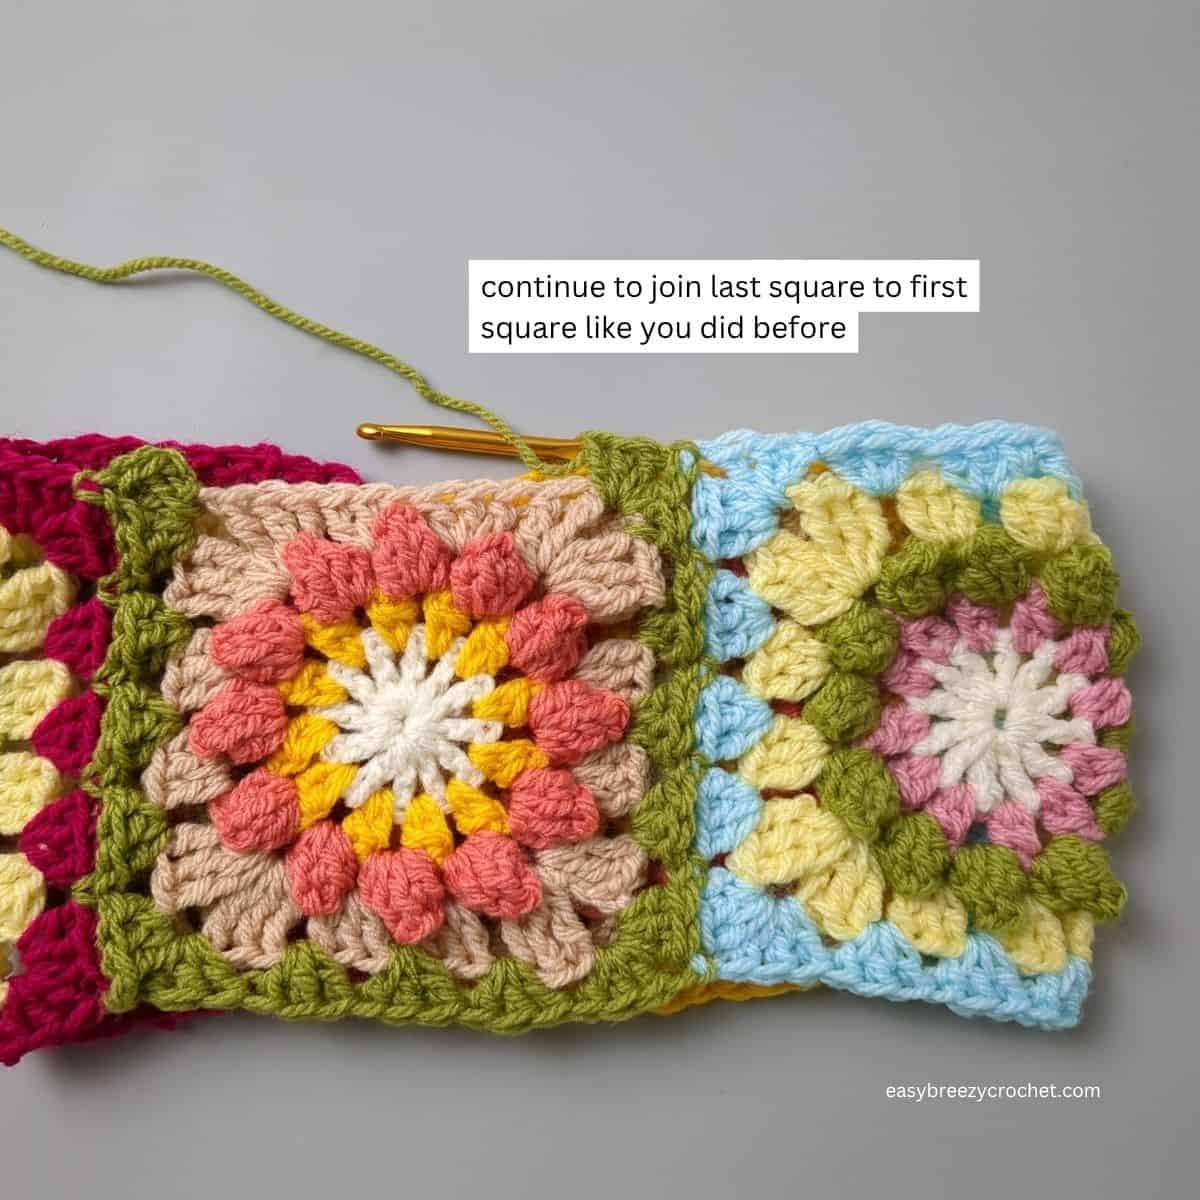
5 - Continue to join the last square to the first square like you have done before
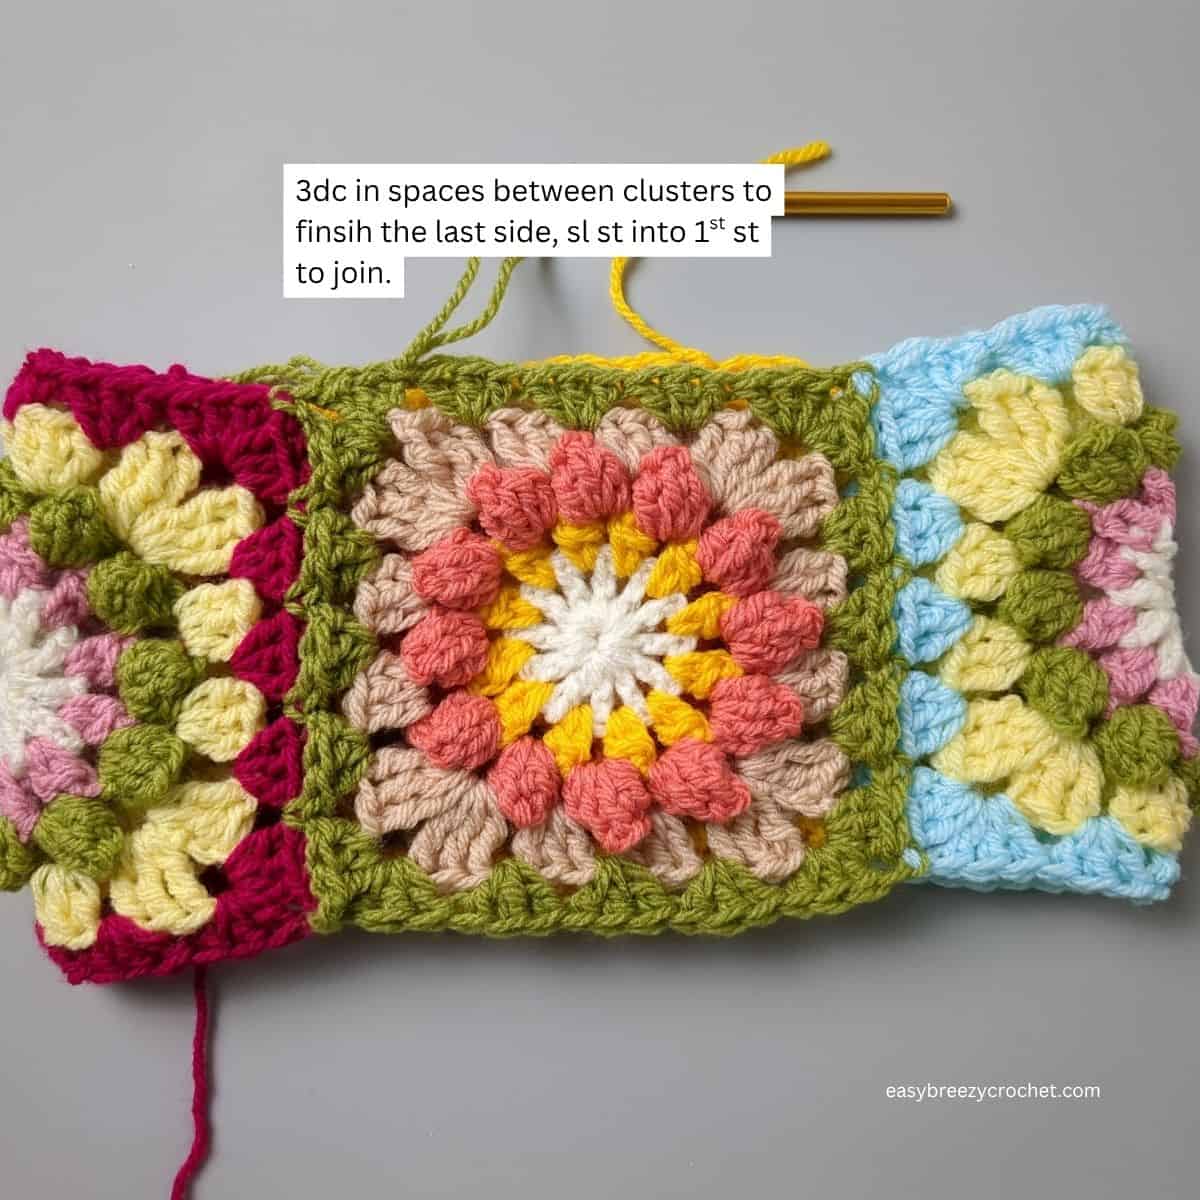
6 - When you come to the fourth side make 3 double crochet in each space between clusters, then slip stitch into the top of the chain 2 to join, chain 1, cut yarn fasten off and weave in all ends.
Watch How To Close The Strip Into A Round
Variations
For the joining example on this page, I've used double crochet stitches, as in my Harmony Crochet Scarf (coming soon).
However, for other projects like my Harmony granny square headband (coming soon), I used single crochet stitches for the border round instead.
This created a narrower band that was better suited to these finished items. If double crochet or half double crochet stitches were used instead, the strips would have been too long for those projects.
Uses for a Single-Line Granny Square Strip Join
This method can be used for a range of narrow, linear crochet projects, including:
- Scarves
- Headbands
- Ear warmers
- Belt or waist tie
- Decorative edging for throws, cushions, blankets, shawls, bags, cardigans, skirts, jumpers, or hats
- Decorative strips for tables, shelf or mantle
Tips for best results
- Lay the squares out in the order you wish to join them.
- The first square always starts of with a full border.
- When joining, place the square with the border at the back of the square without a border, with both right sides facing out.
- Pay attention to orientation so all squares face the same direction
- Maintain even tension during slip stitch joins to avoid tight pulling
- Check alignment after each square before fastening off
- Keep borders consistent so joins remain visually even
Small adjustments as you go will help keep the strip straight and balanced.
Single Line Granny Square Join FAQs
No. While it is a modified join-as-you-go technique, it is not continuous. Each square is completed individually, and the yarn is fastened off before moving on to the next square.
Not in its intended form. This method is designed specifically for a single-row strip of granny squares rather than a multi-row or grid-style blanket.
No sewing is required. The squares are joined while working the border of each new square, so everything is connected during crochet
It shouldn't, as long as all squares are made the same size and tension is consistent. Blocking your squares beforehand can also help keep the strip straight.
You can use slip stitch, single crochet, half double crochet, or double crochet depending on the look and width you want. Smaller stitches create a tighter, narrower join.
This method avoids hand sewing, keeps construction continuous as you work, and creates a clean, integrated join that becomes part of the design rather than an added step.
Yes. You can add as many squares as you like, making it ideal for adjustable-length projects such as scarves, straps, or trims.
Method Recap
The Single-Line Granny Square Strip Join is a modified join-as-you-go method designed specifically for creating a one-square-wide strip of joined motifs.
It offers a structured, sequential way to build linear crochet pieces without sewing or full blanket construction, making it ideal for decorative and functional strip-based projects.
Stay Connected
Pin this post - Pin now to and take your skills to the next level.
Leave a comment - We're excited to hear your thoughts! Leave a comment below and let us know what you think.
Share on Instagram or Facebook - Capture the beauty of your finished crochet projects and share it on Instagram or Facebook! Tag us @easybreezycrochet or #ebcrochetcreations so we can see your work!
Copyright Notice - This pattern and its contents are protected by copyright law. It may not be copied, altered, redistributed, resold, translated, or used to produce video tutorials in any format, either in whole or in part.
You are permitted to sell finished items made using this pattern. However, the written pattern itself may not be sold, shared, or distributed in any form. When marketing or displaying your finished items, please photograph your own work and refrain from using any of my original images.
Sharing Guidelines For Roundups - Bloggers you are welcome to include this pattern in roundup posts, as long as you use one photo and link directly back to the original post. For full details, please refer to my Terms of Use page.

Comments
No Comments