A crochet puff stitch is a textured stitch in crochet that creates a raised, puffy cluster of stitches.
It is made by working multiple incomplete stitches into the same stitch or space and then completing them all at once, forming a "puff" or cluster.
This stitch adds dimension and interest to crochet projects.
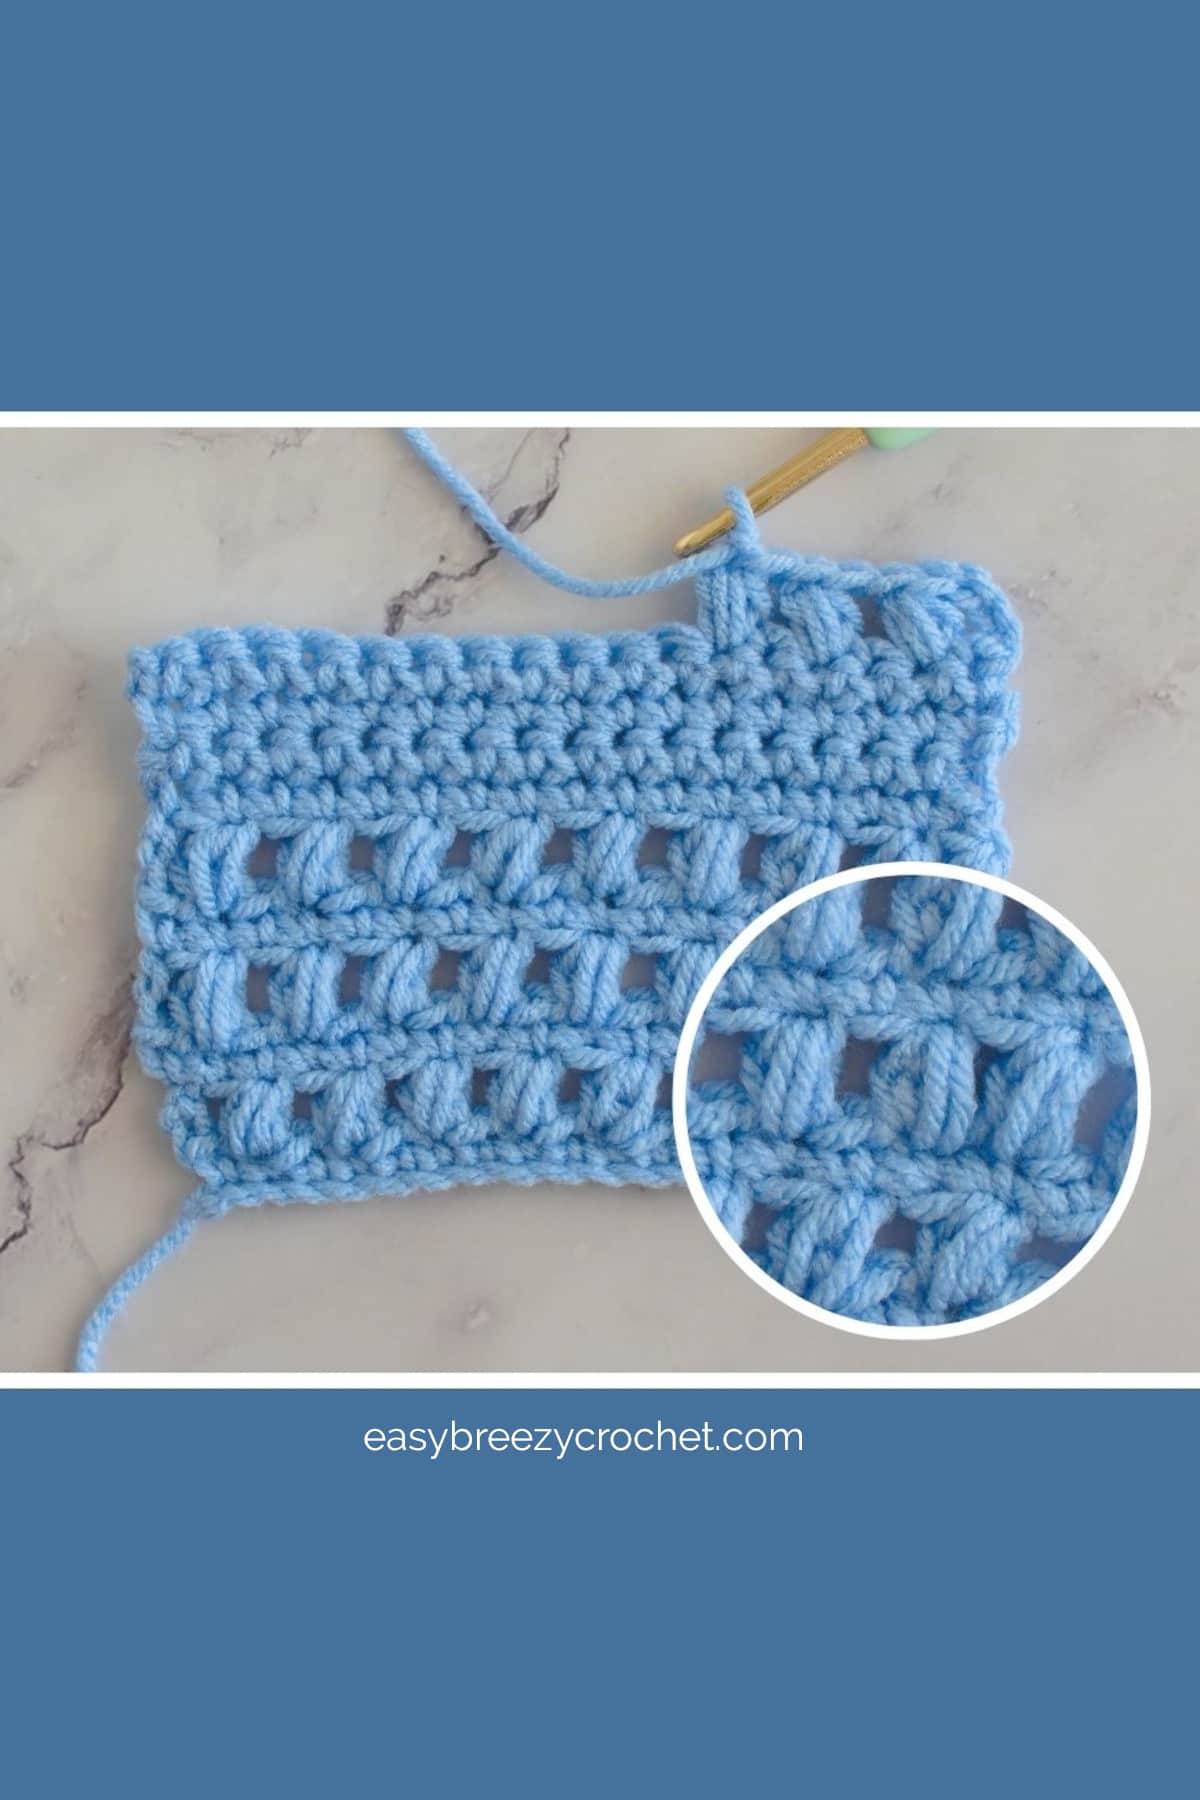
Table of contents
What Type of Stitch Is Used to Make Puff Stitches?
A puff stitch is made up of a series of loops rather than stitches. These loops are made by yarning over and inserting your hook into the designated stitch or space, yarn over again, and pull up a loop.
You repeat this process multiple times (the number of times depends on the specific pattern), creating a set of loops on your hook.
Finally, you yarn over and pull through all the loops on the hook, securing the puff stitch.
The yarn over is essential for building up the height and volume of the puff stitch.
How many loops are in a puff stitch?
The number of loops in a puff stitch will vary, and you might see puff stitches with 3 to 7 loops, but the exact number can be specified in the pattern instructions.
Always refer to the pattern you are using to get the accurate number of loops for the puff stitch in that particular design.
How high do you pull up loops for puff stitches?
The height to which you pull up loops for a puff stitch can vary depending on the specific pattern instructions you are following.
However, in a typical puff stitch, you will yarn over and pull up loops to a height that creates the desired puffiness and texture.
Generally, you will pull up the loops to a height that is a bit taller than the surrounding stitches to achieve the distinctive "puff" effect.
Exclusive Printable Crochet Patterns
Ready to take your crochet skills to the next level?
Join us in the Pattern Vault, Easy Breezy Crochet's exclusive community.
Connect with other crocheters from all around the world and gain access to a growing library of printable PDF crochet patterns.
All patterns are ad-free and available to you when you want, allowing you to crochet in your own time. So, if you're stuck on inspiration or on the hunt for your next crochet project, then the Pattern Vault is for you!
How to Make a 7-loop puff stitch
Here are instructions for making a 7-loop puff stitch. This can easily be adjusted by decreasing or increasing the number of loops to create smaller or larger puff stitches.
Step One
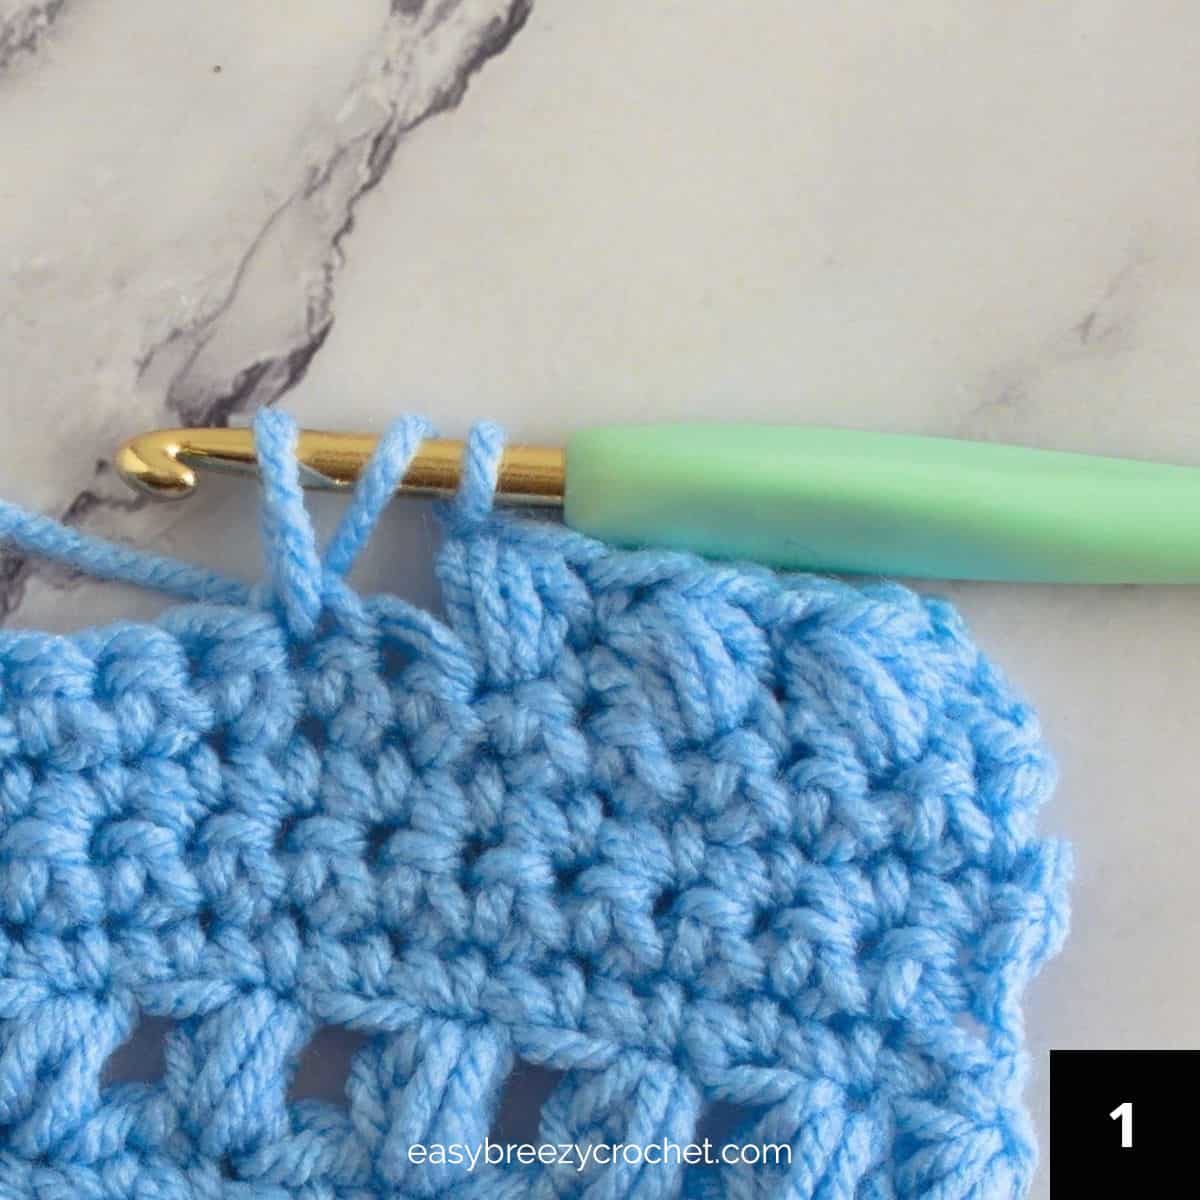
Yarn over hook (YO) and insert the hook into a stitch. Yarn over the hook (YO), and pull the yarn back up through the stitch. You will have three loops on the hook.
Step Two
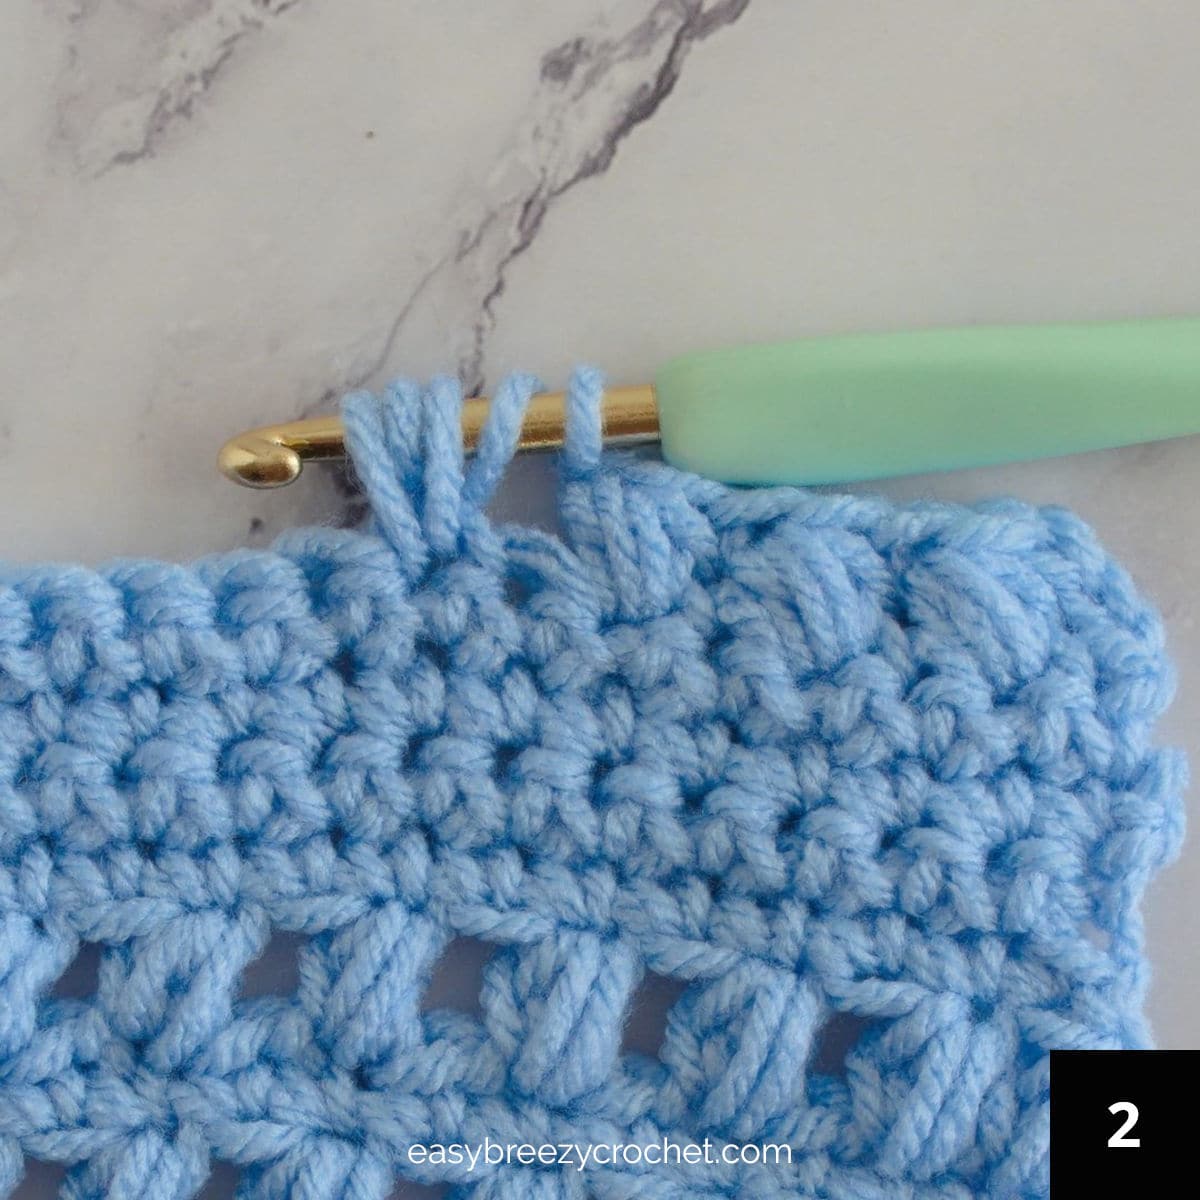
Yarn over the hook (YO), and insert hook back into the same stitch, yarn over hook (YO), and pull yarn through the stitch., You will have five loops on the hook.
Step Three

Yarn over the hook (YO), and insert hook back into the same stitch, yarn over hook (YO), and pull yarn through the stitch. You will have seven loops on the hook.
Step Four

Yarn over the hook (YO), and pull through all seven loops, chain 1 to secure the puff stitch.
This completes a puff stitch.
Learn To Crochet
If you are new to crochet and would like to learn more. You might like these:
- Basic crochet stitches for beginners
- How to crochet for beginners
- Crochet terms and abbreviations
- How to read a crochet pattern for beginners
- How to read a yarn label
- How to hold yarn when crocheting
Stay Connected
Pin this post - Pin now to and take your skills to the next level.
Leave a comment - We're excited to hear your thoughts! Leave a comment below and let us know what you think.
Share on Instagram or Facebook - Capture the beauty of your finished crochet projects and share it on Instagram or Facebook! Tag us @easybreezycrochet or #ebcrochetcreations so we can see your work!
Copyright Notice - This pattern and its contents are protected by copyright law. It may not be copied, altered, redistributed, resold, translated, or used to produce video tutorials in any format, either in whole or in part.
You are permitted to sell finished items made using this pattern. However, the written pattern itself may not be sold, shared, or distributed in any form. When marketing or displaying your finished items, please photograph your own work and refrain from using any of my original images.
Sharing Guidelines For Roundups - Bloggers you are welcome to include this pattern in roundup posts, as long as you use one photo and link directly back to the original post. For full details, please refer to my Terms of Use page.


Comments
No Comments