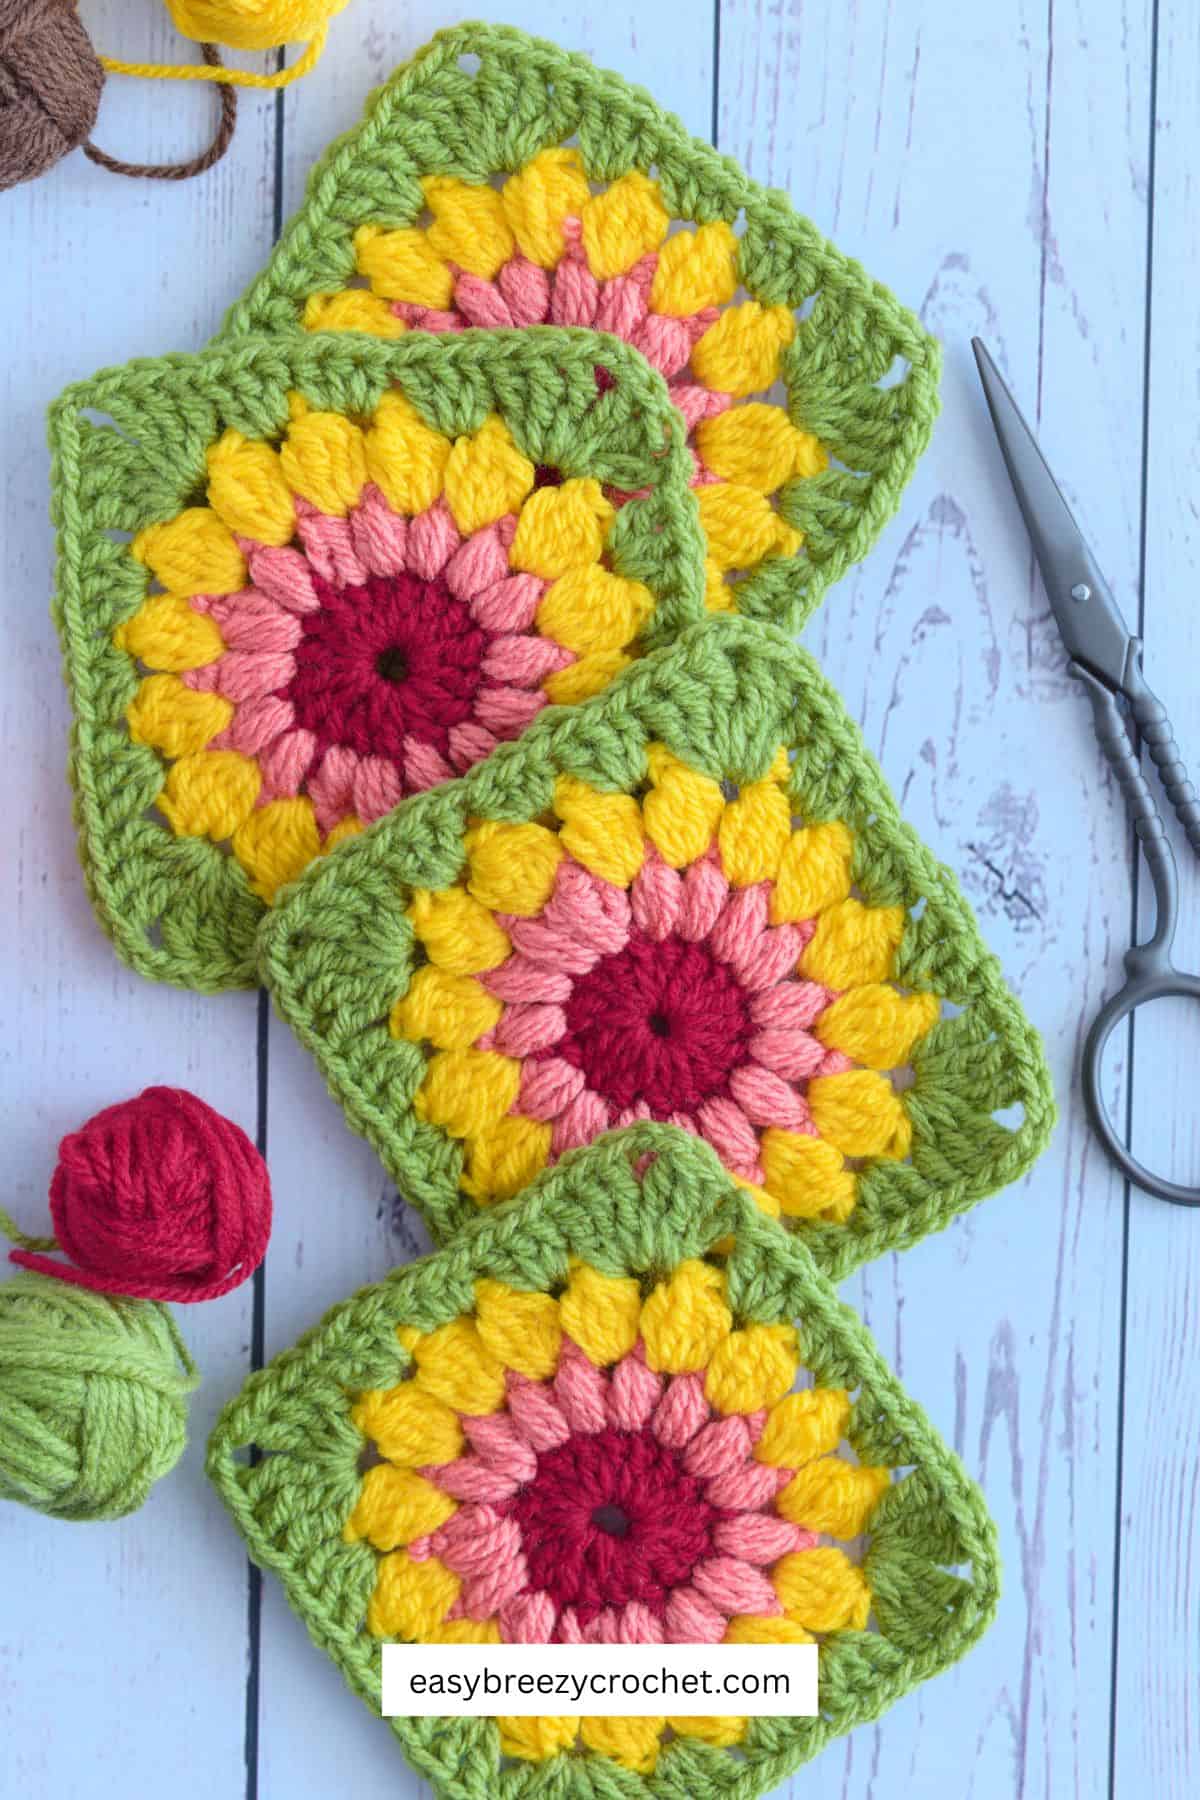
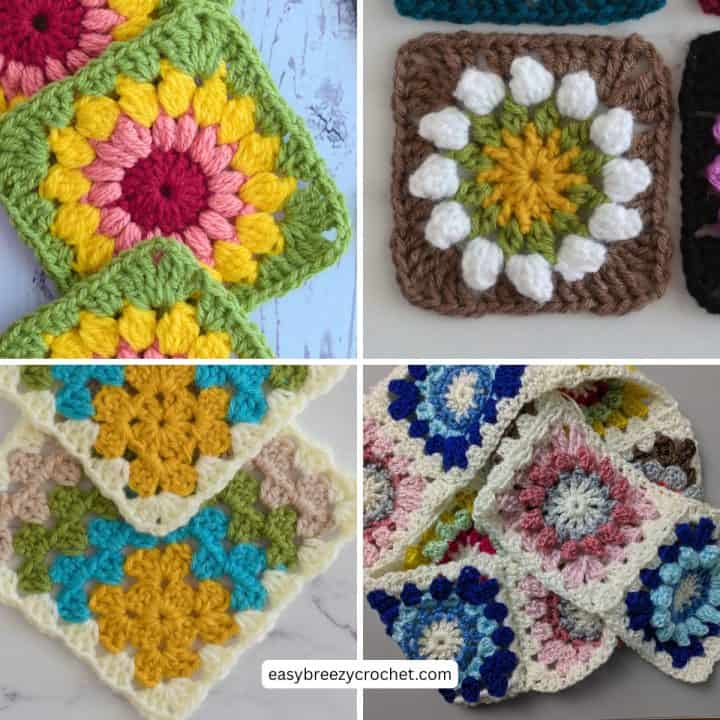
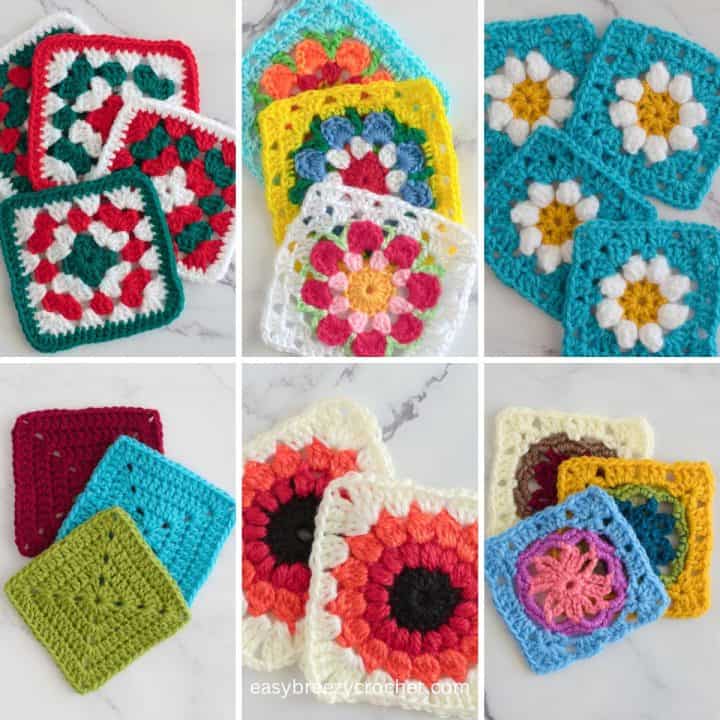
A sunburst granny square crochet pattern is a classic crochet motif that starts with a textured floral center and is squared off in later rounds.
It's also often called a sunflower granny square because of its warm, petal-like design.
This beginner-friendly pattern is perfect for blankets, table runners, tote bags, cushions, and other granny square crochet projects.
In this tutorial, you'll learn how to:
- use your squares in larger projects
- crochet a sunburst granny square from the center out
- square off a circular motif neatly
- add an optional finishing round for cleaner edges
Table of contents
Mix And Match Details
- Yarn weight: #3 Light, with 12 WPI (wraps per inch)
- Hook size: 4mm
- Finished size: 4.5 x 4.5 inches (11.5 x 11.5 cm)
- Number of rounds: 4
- Stitch count per side: 15 stitches and chain 2 corners
This square are perfect for building classic granny square blankets and mix-and-match projects. See all our 4 inch granny square patterns collection.
Exclusive Printable Crochet Patterns
Be inspired and keep creating!
Join us in The Pattern Vault, Easy Breezy Crochet's exclusive community.
Connect with other crocheters from all around the world and gain access to an extensive library of printable PDF crochet patterns.
All patterns are ad-free and available to you when you want, allowing you to crochet in your own time. So, if you're stuck on inspiration or on the hunt for you next crochet project, the Pattern Vault is for you!
Materials
- DK or worsted weight yarn (cotton or acrylic both work well)
- Crochet hook suitable for your yarn (commonly 4.0mm-5.0mm)
- Scissors
- Yarn needle
Note: for this sample we used #3 light and a 4mm hook.
Suggested colors (example):
- Center: color A - claret or deep rust
- Petal, round 2, color B - shrimp
- Petal, round 3,- color C sun gold
- Square base, round 4, color D - pasture green
- Optional, round 5, color E - dark brown
Stitches And Abbreviations - US Terms
- ch - chain stitch
- col - color
- dc - double crochet
- dc4cl - double crochet 4 cluster (see special stitches below)
- hdc - half double crochet
- hk - hook
- puff - puff stitch
- rnd - round
- rpt - repeat
- sl st- slip stitch
- sp/sps - space/spaces
- st/sts - stitch/stitches
- tr - treble crochet
- YO - yarn over hook
- [ ] - at the end of a round indicates the number of stitches in that round
Special Stitches
Double crochet 4 cluster (dc4cl)
YO, insert hk in a st, YO, pull up loop, YO, pull through 2 loops, (YO, insert hk in same st, YO, pull up loop, YO, pull through 2 loops) three times, YO, pull through all 5 loops on hk,
Colour Planning for a Beautiful Sunburst Effect
Colour placement is just as important as stitch work in sunburst granny squares.
A strong visual flow usually follows this structure:
Recommended colour progression
- Centre: deep or rich tone (claret, rust, deep gold)
- First petal round: mid-warm contrast (shrimp, coral, soft orange)
- Second petal round: lighter or brighter tone (sun gold, warm yellow)
- Square base: grounding neutral or muted green (pasture, sage)
- Optional frame: deep neutral (walnut brown, chocolate, charcoal)
Why this works
This creates:
- natural depth (dark - light - grounded edge)
- clear separation between floral layers
- stronger "sunburst" definition
- better visibility when squares are joined
Common mistake
Using colours that are too similar in value can make the flower lose definition and look flat.
Pattern Overview
This square is worked in two stages:
- Sunburst circle (floral center)
- Square shaping rounds
The final result is a structured granny square with a decorative floral centre.
How To Make A Sunburst Granny Square
Center Ring
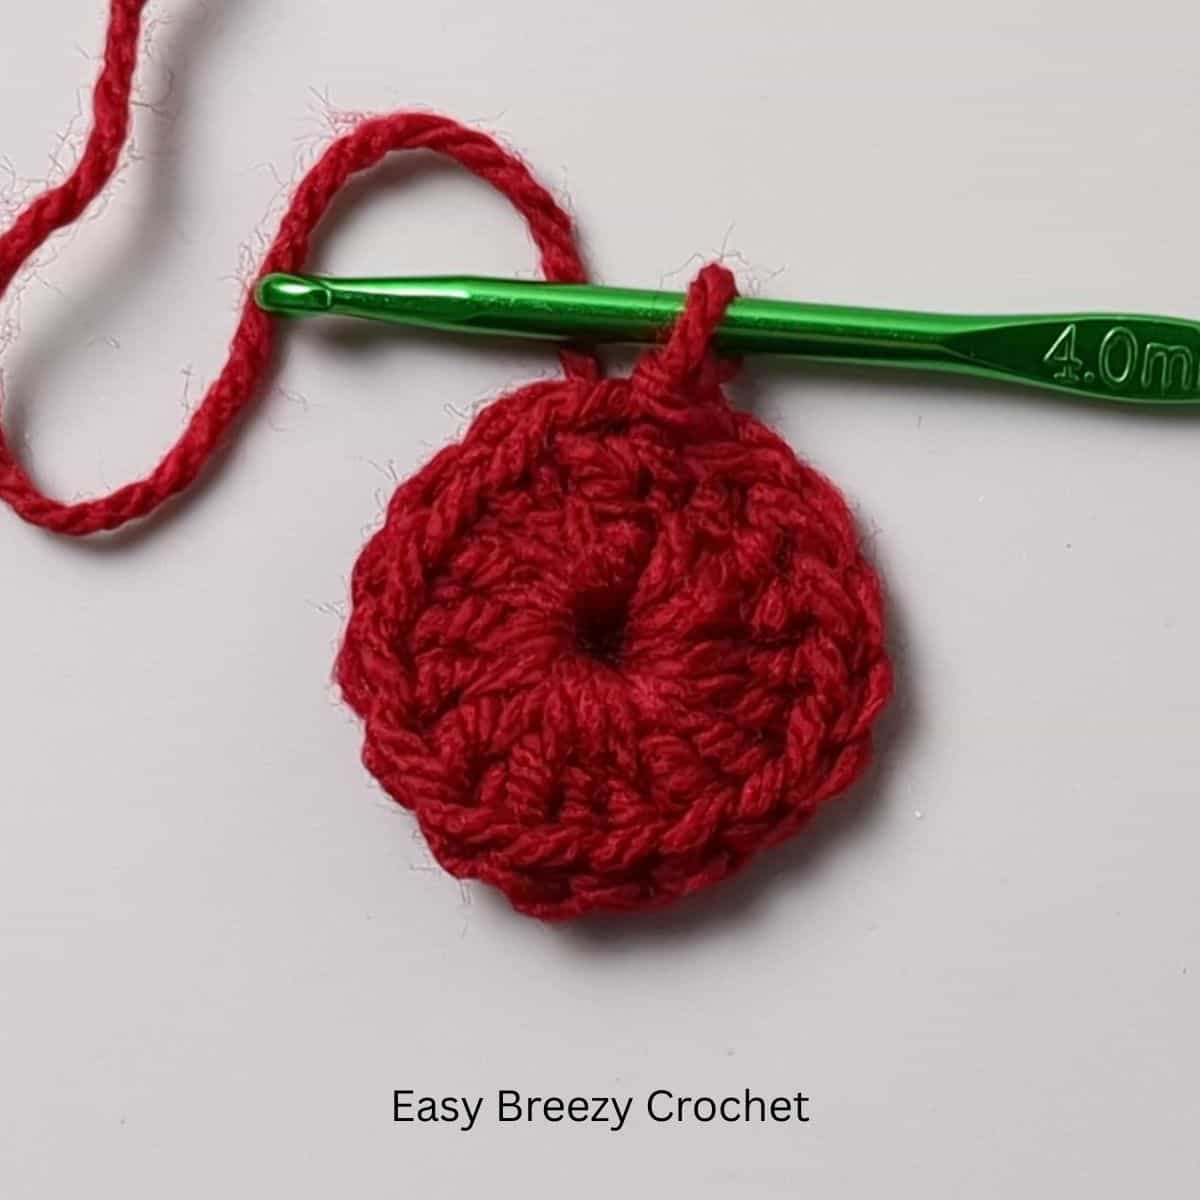
Form a magic ring or a chain ring. Double crochet stitches are worked into the ring, then joined with a slip stitch and fastened off.
Foundation, col A - MR or ch4, sl st into 1st st to make a ring.
Rnd 1 - ch2 (not counted as a st), 16dc into ring, sl st into 1st st to join, cut yarn, fasten off and weave in ends. [16dc]
First Petal Round
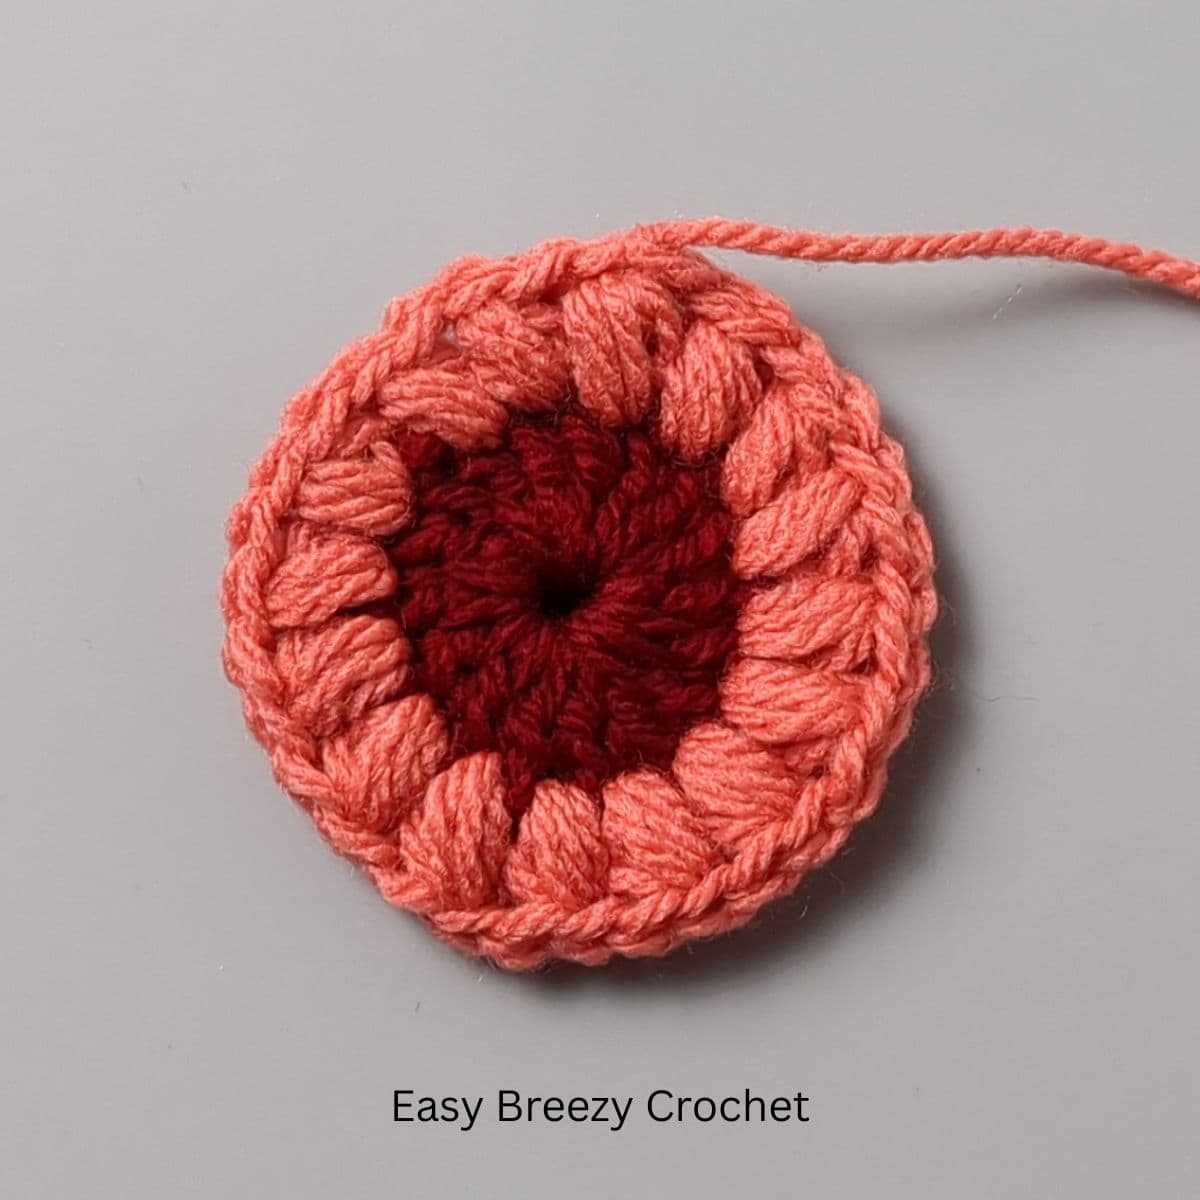
Puff stitches are worked into the double crochet stitches, then joined with a slip stitch into the top of the 1st puff stitch and fasten off.
Start the first puff stitch in a round, by pulling up the loop slightly then make your first puff.
Learn how to make a puff stitch.
Rnd 2, col B - sl st new yarn col into any ch-1 sp, -puff into ch-1 sp, then make a puff in each ch-1 sp around, and sl st into the top of 1st puff to join, cut yarn, fasten off and weave in ends. [16puff]
Second Petal Round
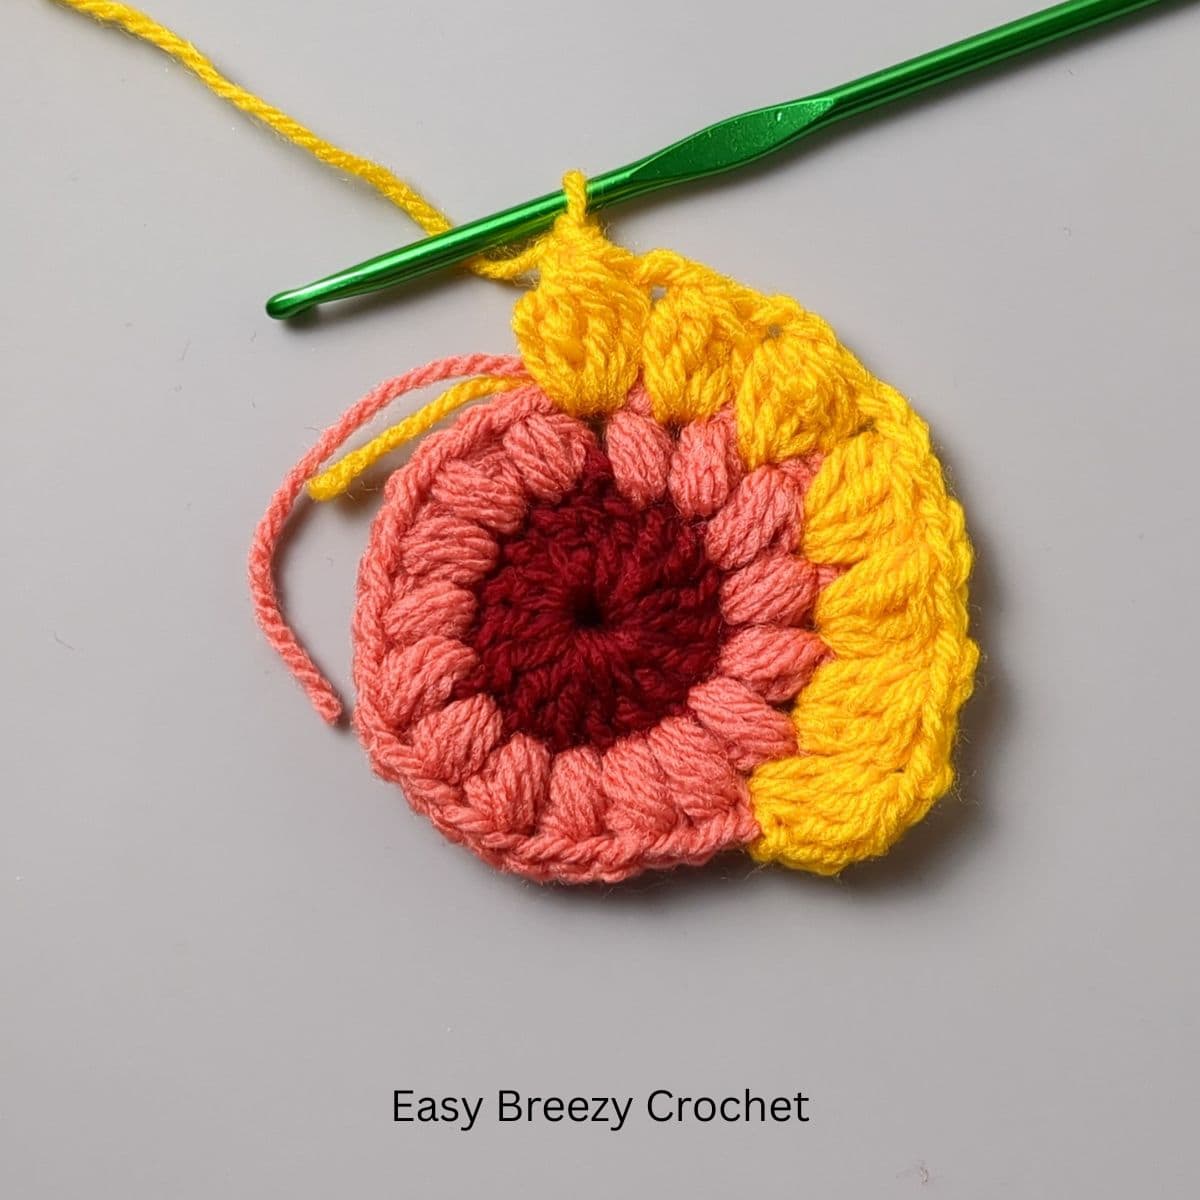
In this round double crochet four clusters (DC4CL) are made into the spaces between the puffs of the previous round, they are spaced apart with two chain stitches.
To start the first cluster of the round you will need to create a chain 2 (this will count as the first double crochet of the cluster).
Refer to our special stitches section above to learn how to make a DC4CL
Rnd 3, col C - sl st new col into any sp between puffs, ch2 (counts as 1st dc of DC4CL), (DC4CL, ch2) in same sp as ch2, *(DC4CL, ch2) in next sp, rpt from * 15 times, sl st into top of 1st DC4CL to join, cut yarn, fasten off and weave in ends. [16DC4CL]
Granny Square Shaping
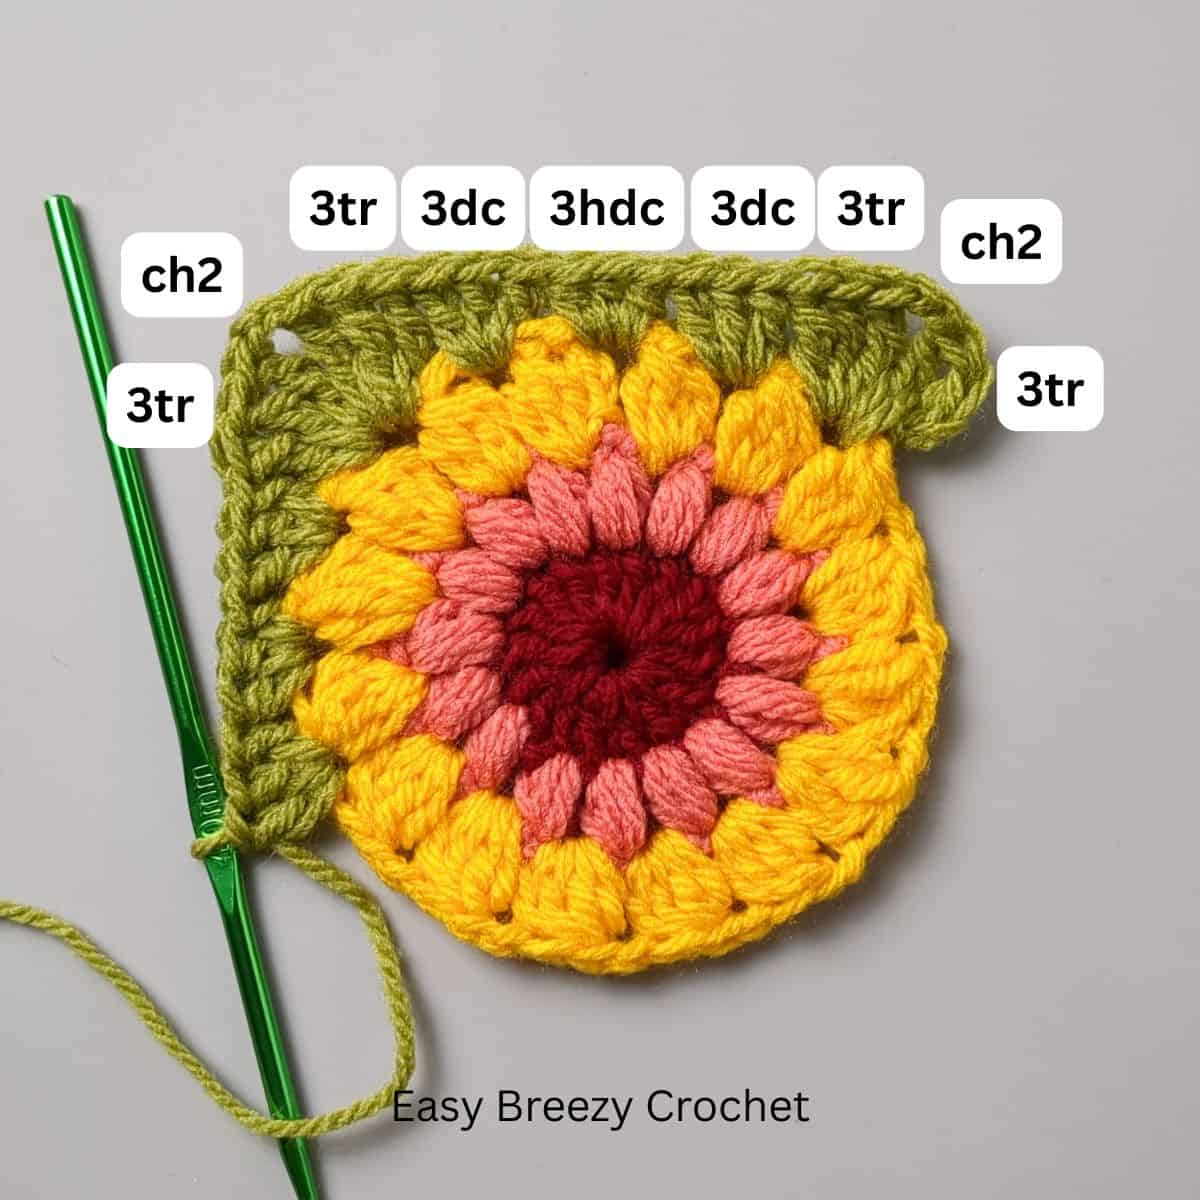
This is where your circle becomes a square. This round is made up of treble crochets and chain stitches in the corners, with double crochet and half double crochet clusters worked in to the chain 2 spaces of the previous round.
Rnd 4, col D - sl st new col into any ch-2 sp, ch3 (counts as 1tr), (2tr, ch2, 3tr) into same sp as ch3, 3dc in next ch-2 sp, 3hdc, in next ch-2 sp, 3dc in next ch-2 sp, * (3tr, ch2, 3tr) in next ch-2 sp, 3dc in next ch-2 sp, 3hdc, in next ch-2 sp, 3dc in next ch-2 sp, rpt from * 3 times, sl st into top of ch-3 to join, cut yarn fasten off and weave in ends. [24tr, 24dc, 12hdc, 4xch2]
15 stitches each side with ch-2 corners
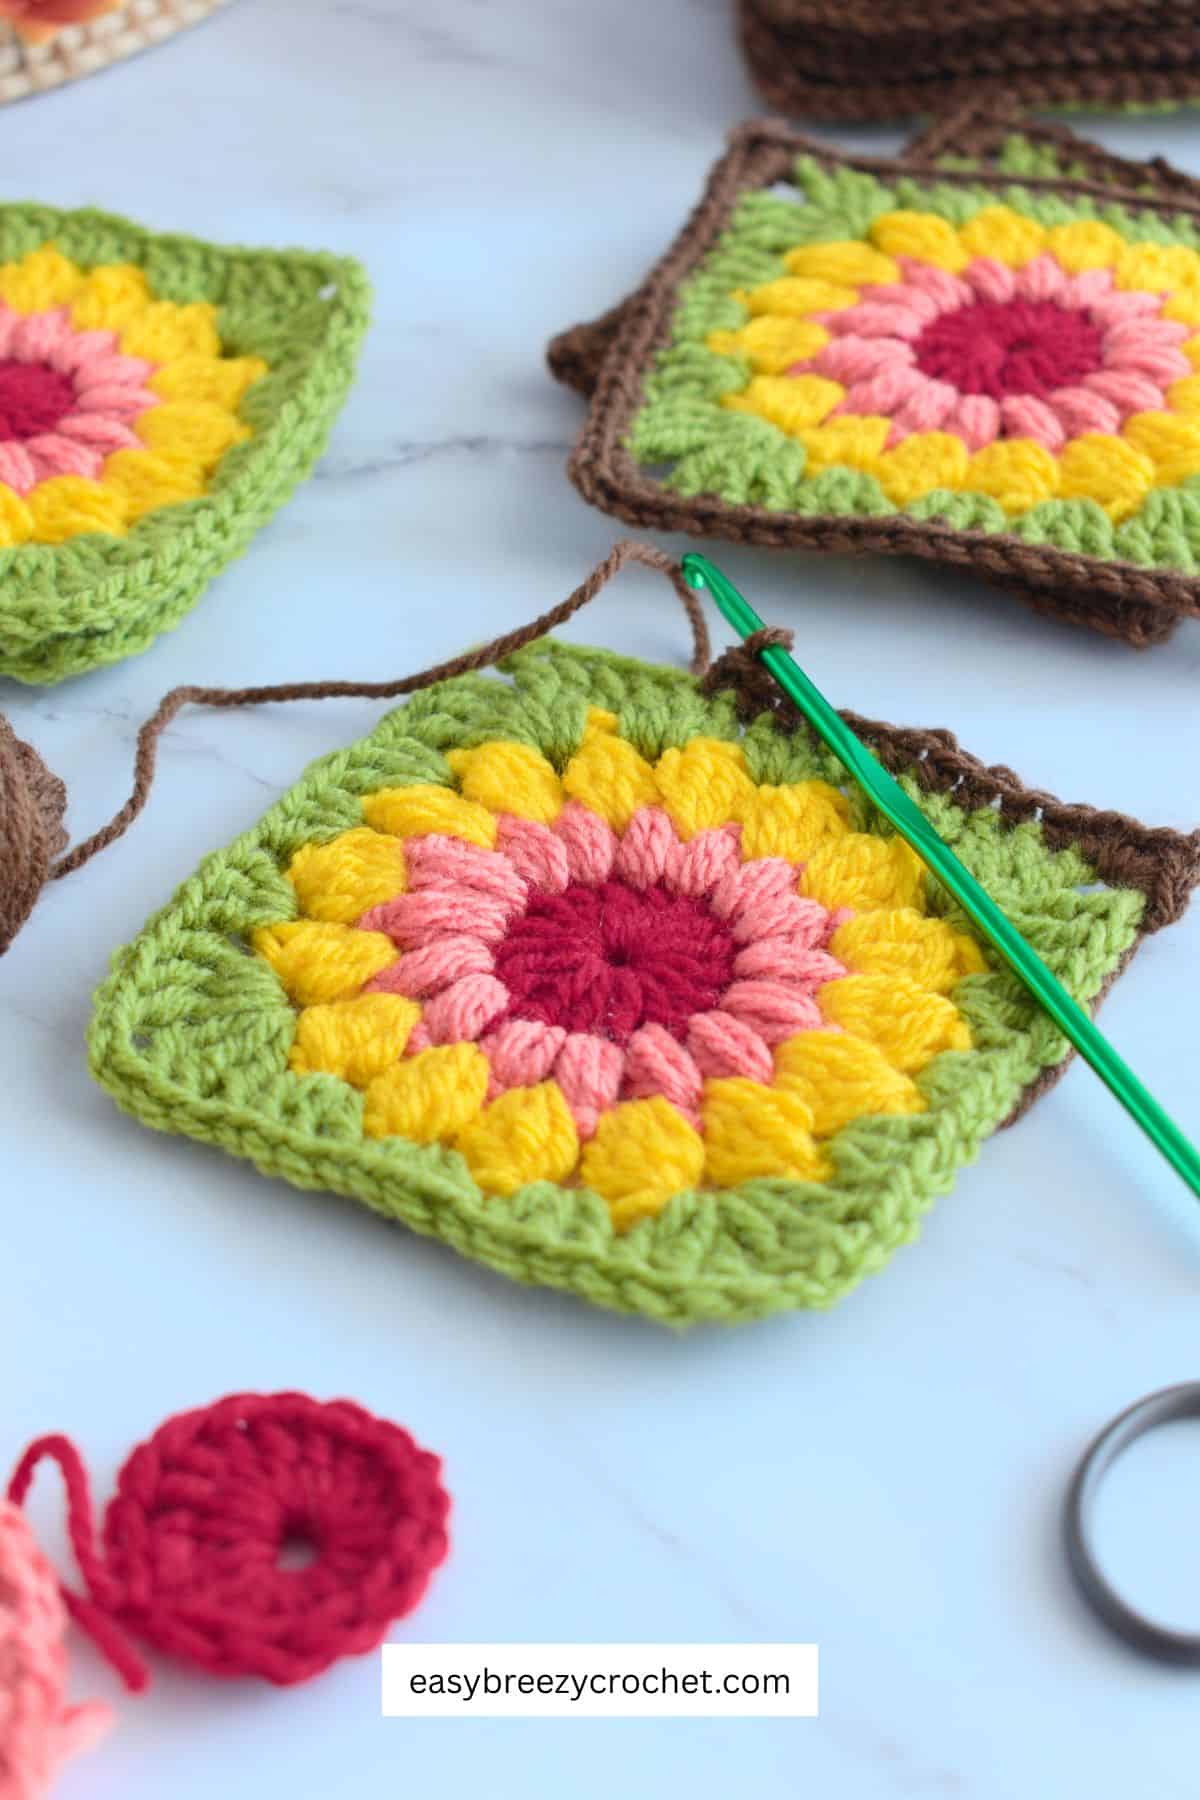
Optional Finishing Round (Dark Brown Frame)
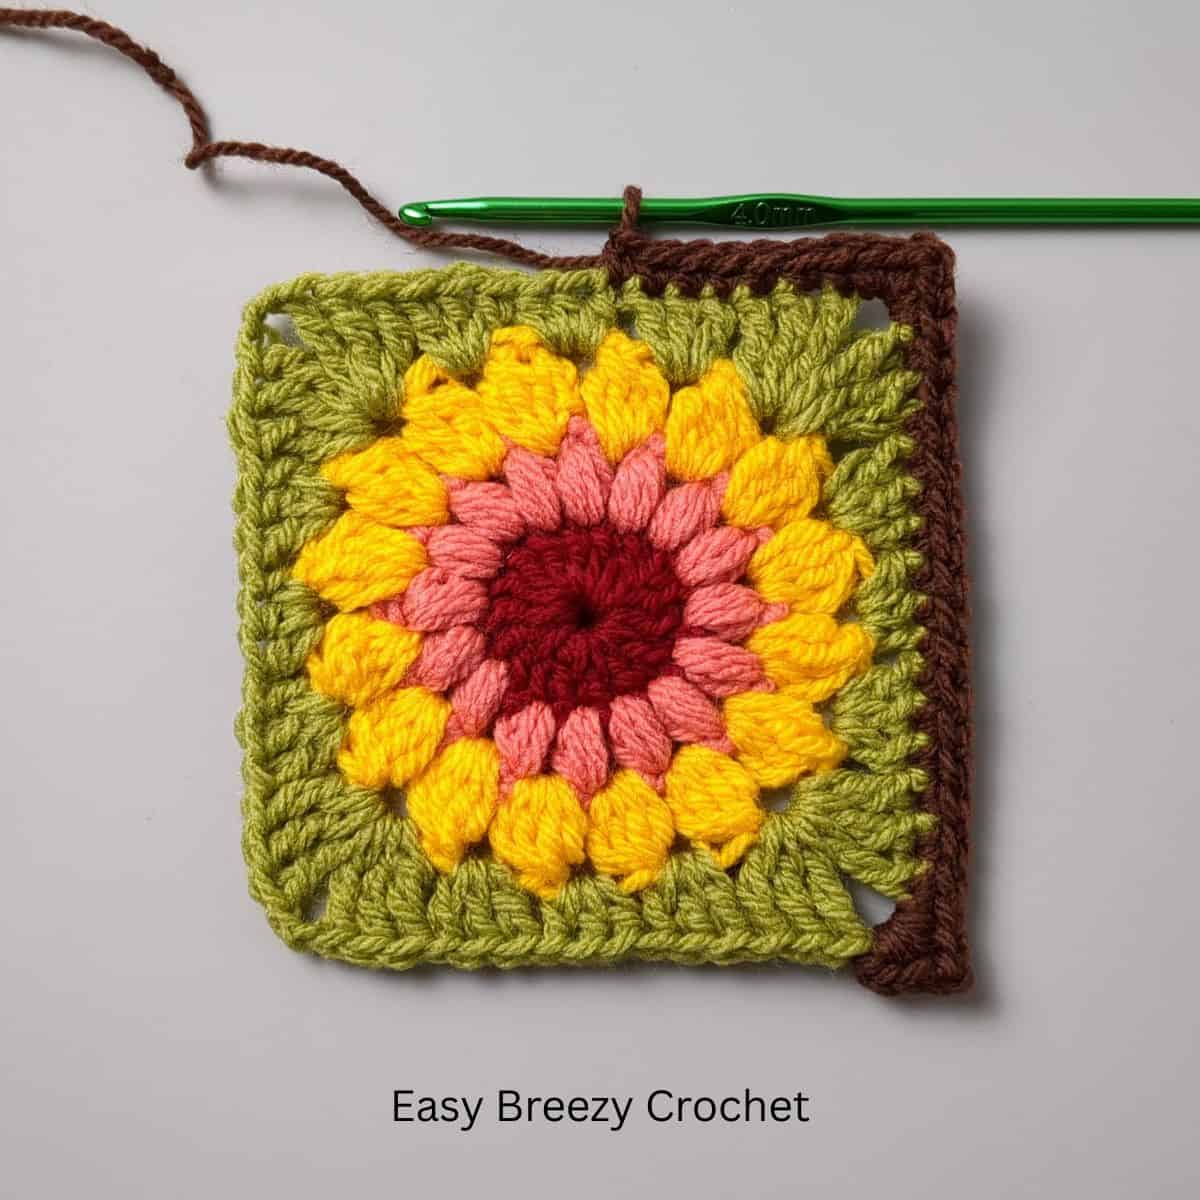
This is a design variation used in many finished projects.
This round is consists of single crochet stitches and it:
- Sharpens the square edges
- Prepares the squares for joining
- Adds contrast and definition
Rnd 5, col E (optional) - sl st new col into any ch-2 sp, ch1 (not counted as a st), (2sc, ch2, 2sc) in same sp as ch-1, 1sc in next 15-sts. *(2sc, ch2, 2sc) in next ch-2 sp, 1sc in next 12-sts, rpt from * 3 times, sl st into 1st sc to join, cut yarn fasten off and weave in ends. [76sc, 4xch2]
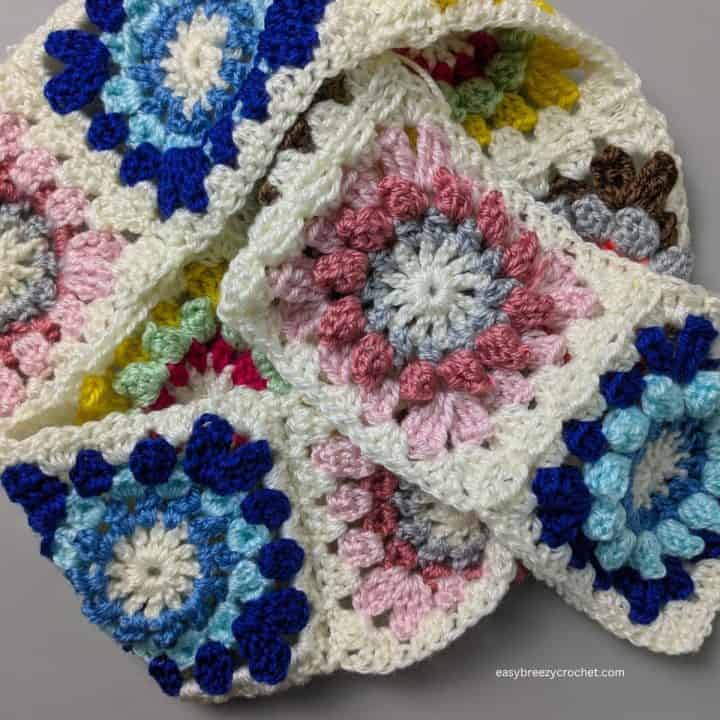
How to Join Granny Squares
This pattern is often used in larger projects, so joining is an important next step.
Full joining methods are covered in detail in my dedicated guide: How to Join Granny Squares Guide
Here's a quick overview of common approaches:
Flat slip stitch join
- minimal bulk
- clean modern look
Whip stitch join
- nearly invisible seam
- flexible and beginner-friendly
Join-as-you-go (JAYG)
- joins squares during final round
- very efficient for large projects
Decorative join
- adds texture (great for boho projects)
- can become a design feature
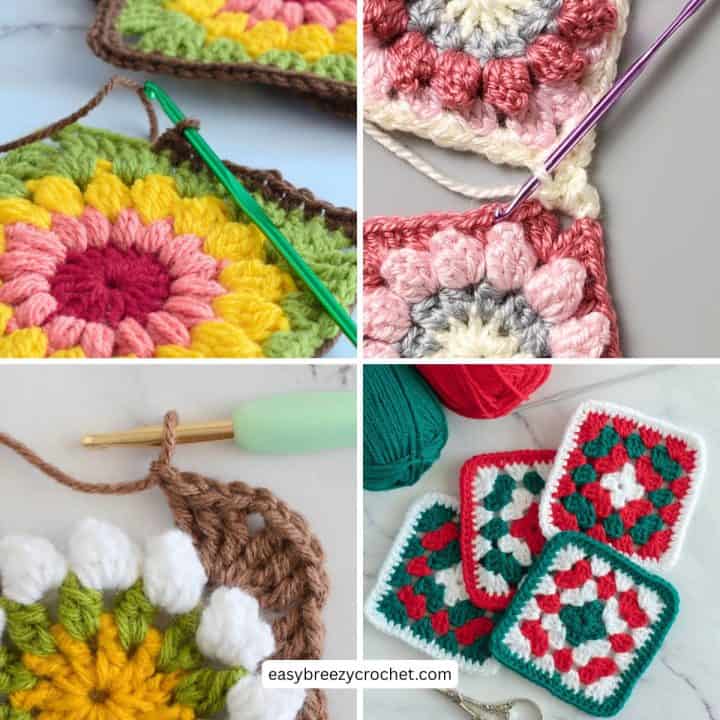
What to Make With Sunburst Granny Squares
Once you've made your squares, you can use them in many projects:
- Easy Granny Square Chicken - A cute little decor idea that is giftable.
- Crochet Table Runner - Perfect for showcasing repeated floral motifs in a structured layout.
- Tote Bag - A great way to turn squares into wearable art.
- Cushion Covers - Ideal for highlighting individual sunburst motifs.
- Blankets - Combine multiple squares for a larger heirloom piece.
Suggested Project Link
If you'd like to turn your squares into a finished project, see: crochet granny square table runner tutorial (coming soon).
Granny Square FAQs
This usually happens if stitches are too tight or increases are uneven.
Why doesn't my circle become square?
You may need to adjust corner increases or tension in the shaping rounds.
Yes - this pattern is perfect for color changes at every round.
It's highly recommended for consistent size and neat joining.
Learn more about blocking granny squares.
Don't stop here...
Your next 50 crochet projects are ready inside the Pattern Vault - all printable, ad-free, and ready to download instantly.
Final Notes
The sunburst granny square is a versatile motif that can be styled in many ways depending on colour and finishing choices.
Adding an optional framing round (like dark brown) creates a more structured, professional finish - especially for projects like table runners and bags.
Copyright Notice - This pattern and its contents are protected by copyright law. It may not be copied, altered, redistributed, resold, translated, or used to produce video tutorials in any format, either in whole or in part.
You are permitted to sell finished items made using this pattern. However, the written pattern itself may not be sold, shared, or distributed in any form. When marketing or displaying your finished items, please photograph your own work and refrain from using any of my original images.
Sharing Guidelines For Roundups - Bloggers you are welcome to include this pattern in roundup posts, as long as you use one photo and link directly back to the original post. For full details, please refer to my Terms of Use page.
Comments
No Comments