

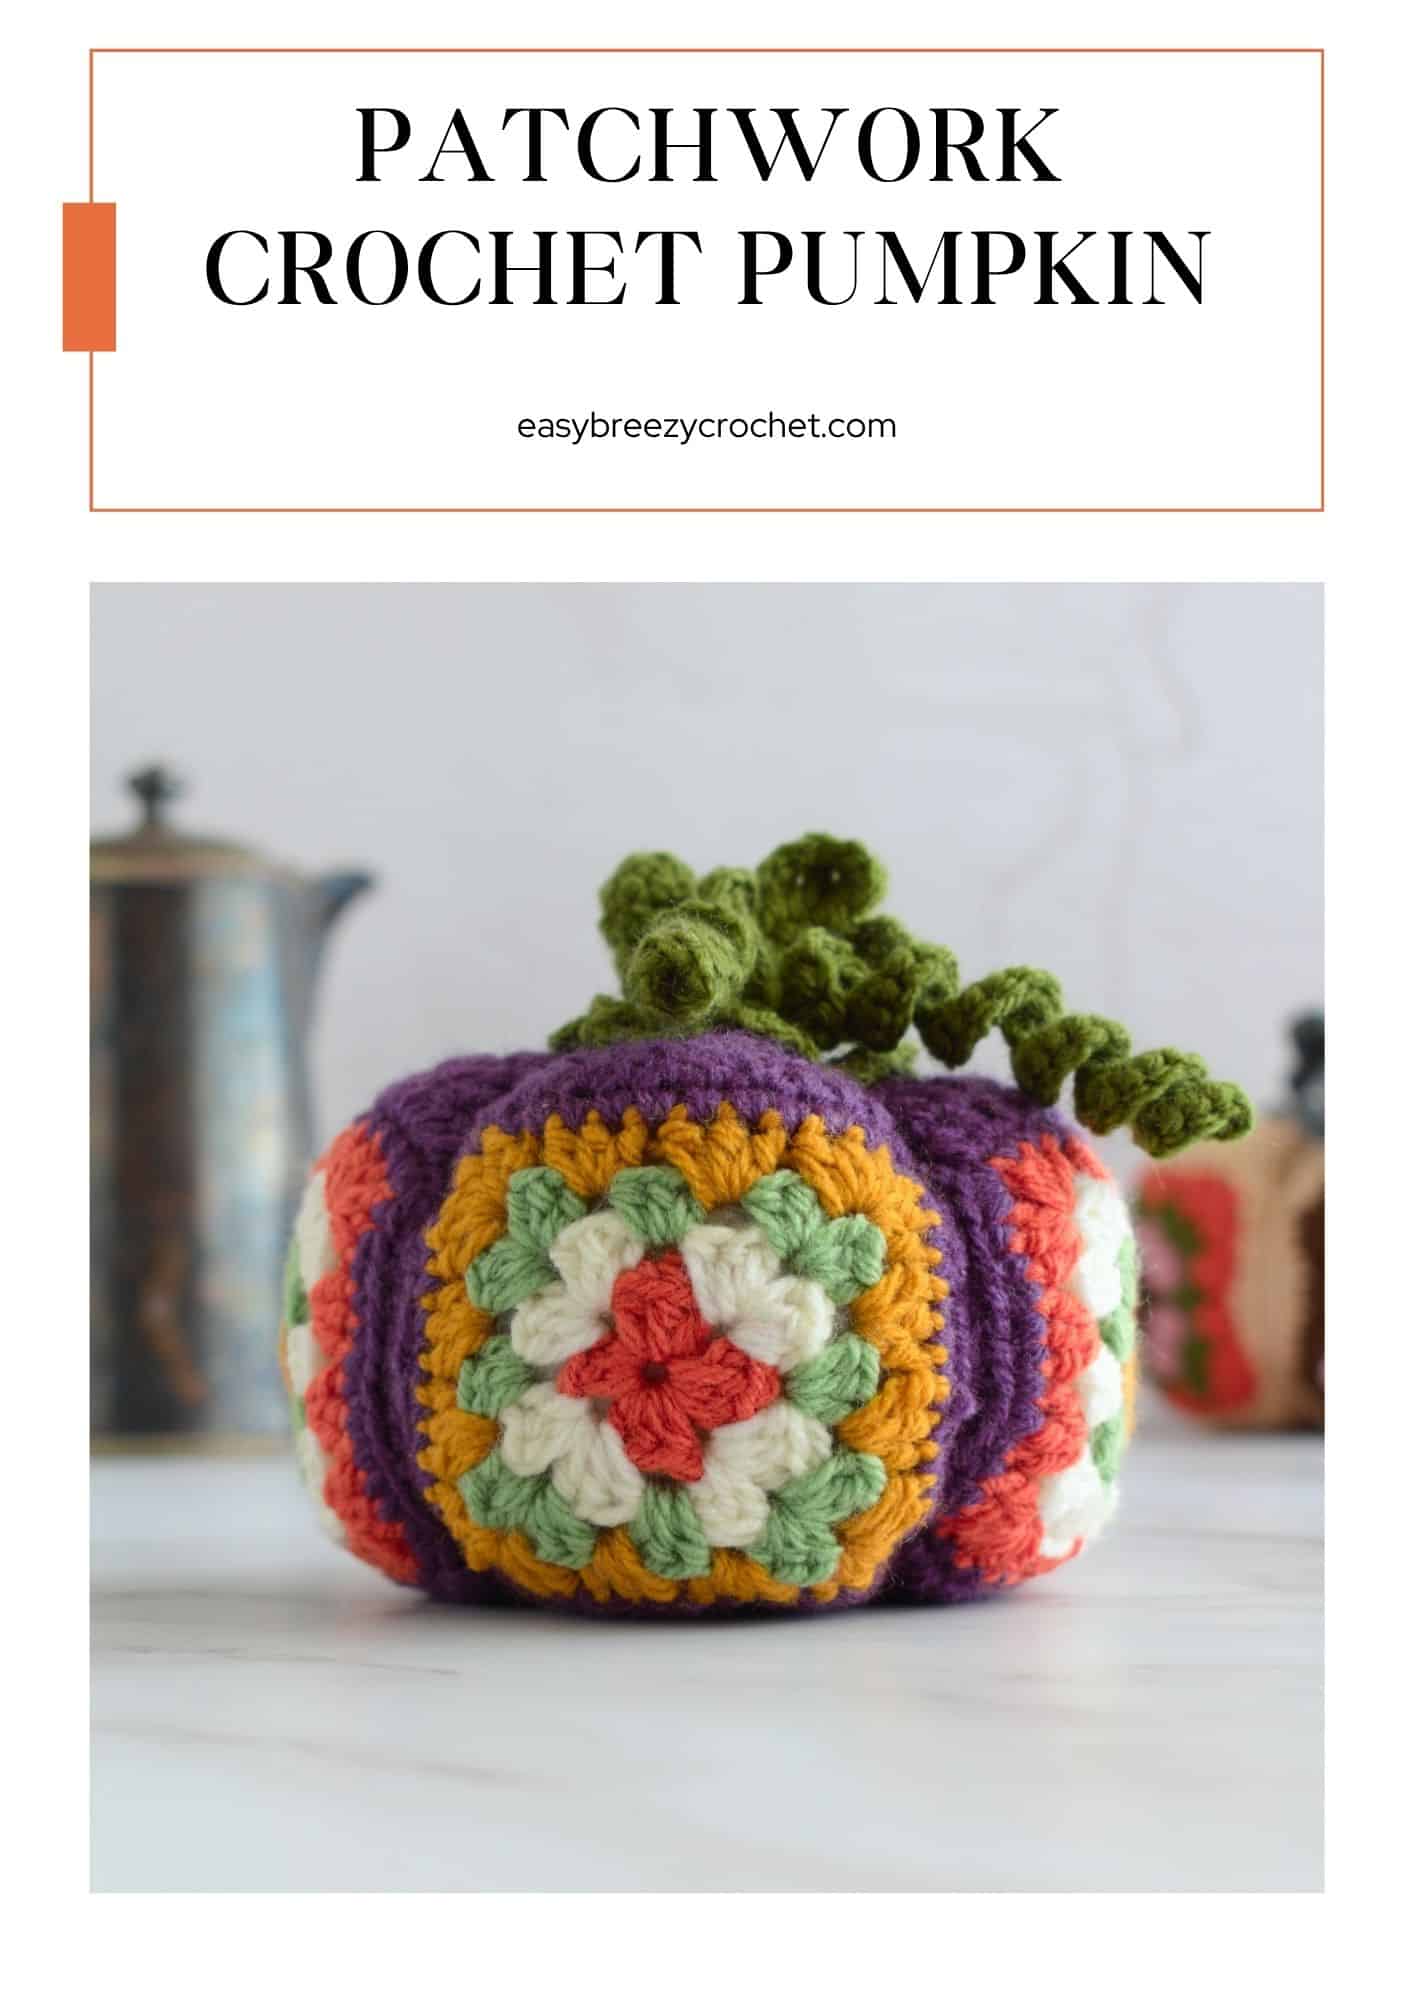
Bring cozy autumn charm into your home with this patchwork crochet pumpkin - a simple, modern seasonal project made by joining just four classic granny squares into a soft, sculpted pumpkin shape.
This quick make is perfect for fall decorating, craft markets, or handmade gifting. With its clean construction and nostalgic granny square texture, it blends traditional crochet with a fresh seasonal twist.
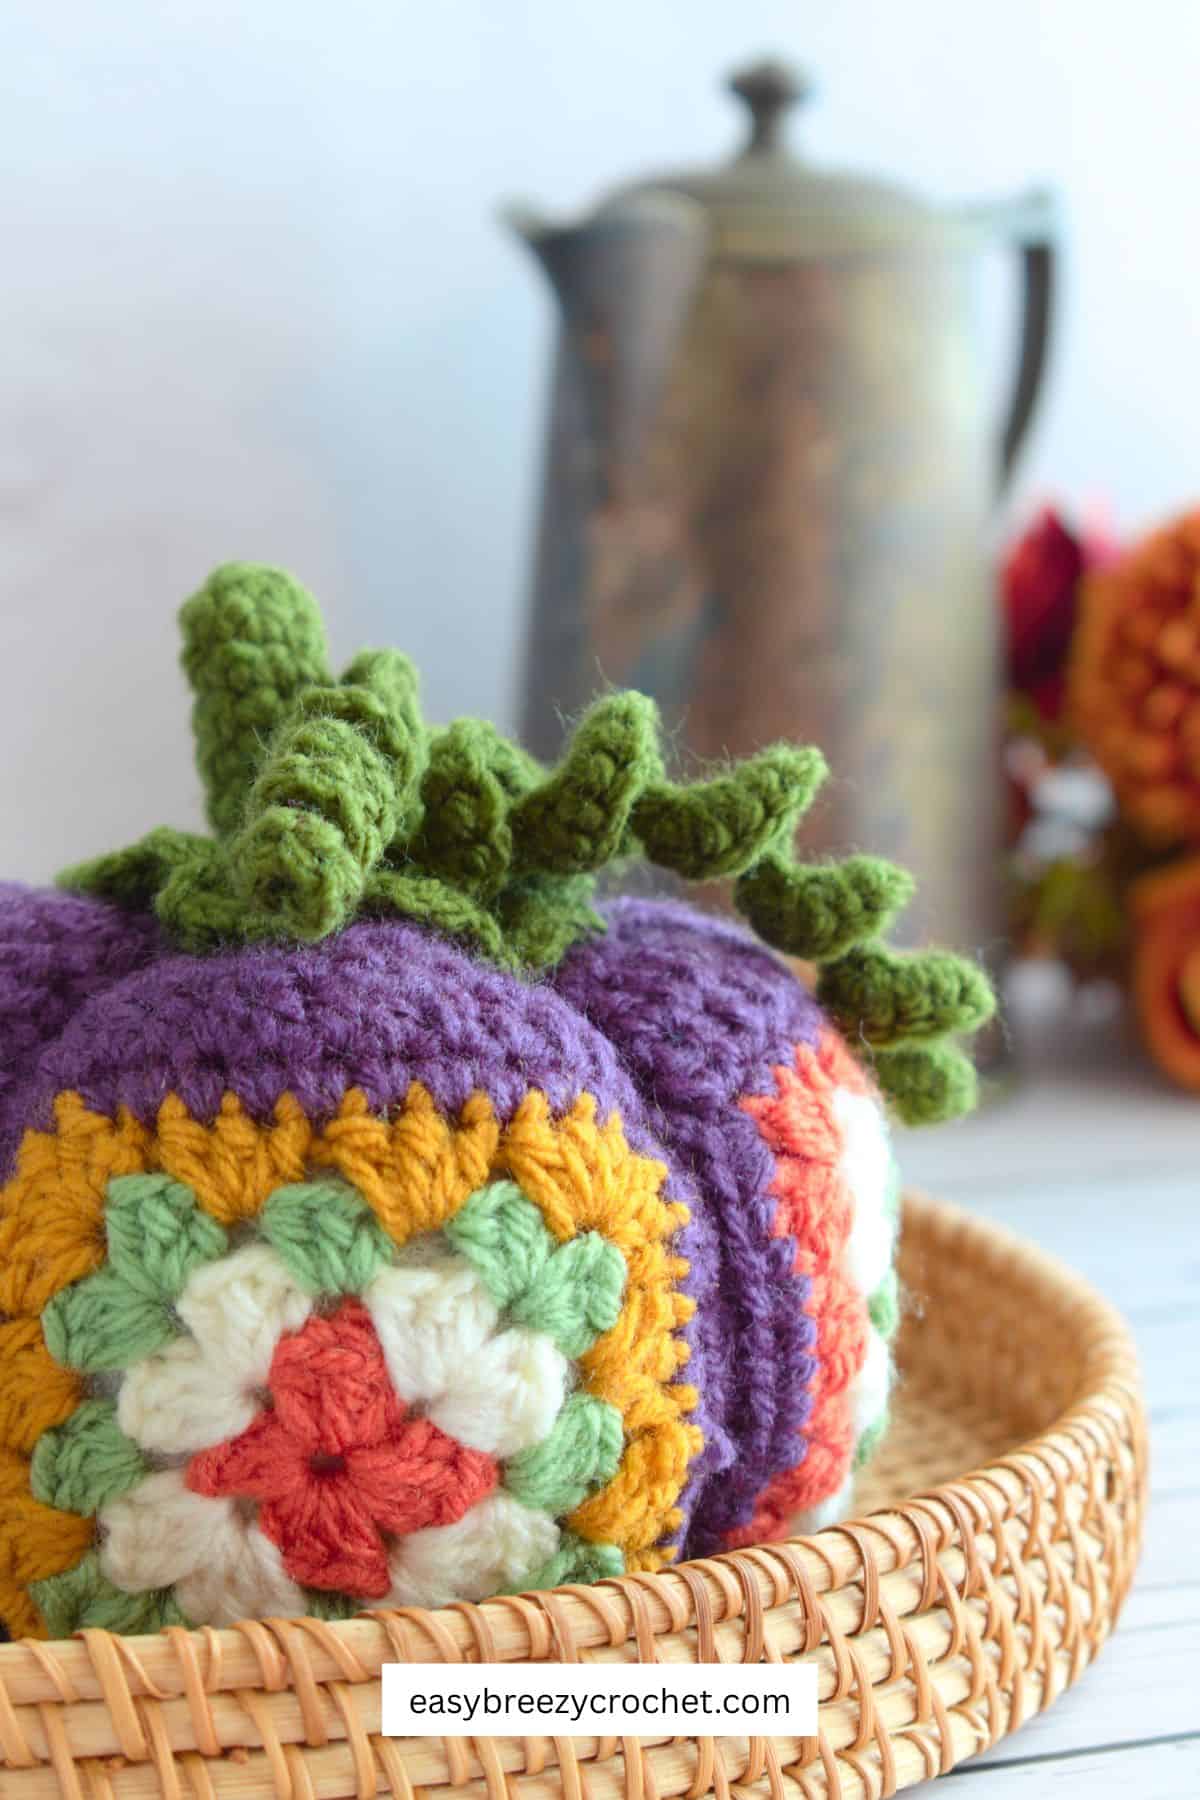
Table of contents
- Why You'll Love This Crochet Granny Square Pumpkin Pattern
- Pattern Details
- About This Design Fall Crochet Pumpkin
- Harriet's Notes
- Construction Overview
- Granny Square Pumkin Notes & Tips
- What You Will Need
- Finished Size & Gauge
- Stitches and Abbreviations (US Terms)
- Pattern Notes
- how to Make A Patchwork Granny Square Pumpkin
- Perfect For
- Patchwork Crochet Pumpkin FAQs
- From Granny Squares To Pumpkin
- Stay Connected
- Comments
Why You'll Love This Crochet Granny Square Pumpkin Pattern
- Quick seasonal make (perfect for last-minute decor)
- Great stash-busting project
- Beginner-friendly but visually impressive
- Perfect for fall markets and gifting
- Combines classic crochet with modern styling
Pattern Details
- Skill level - Beginner friendly
- Make time - Approx. 2-2.5 hours
- Yarn weight - DK (Double Knit)
- Hook size - 3 mm crochet hook (one size down from recommended for tighter stitches)
- Construction - 4 granny squares joined + shaped stuffing
- Style - Seasonal fall / autumn décor
If you're new to granny squares, you can also refer to my classic granny square tutorial.
About This Design Fall Crochet Pumpkin
This pumpkin is built using the classic granny square design, reimagined into a 3D seasonal decoration. Four identical squares are joined and shaped into a soft pumpkin form, then lightly stuffed to create structure.
Each square uses fall-inspired color palettes, making this a perfect scrap-busting or coordinated yarn project.
Harriet's Notes
This patchwork crochet pumpkin is designed to be a simple, beginner-friendly seasonal project that still creates a textured, handmade look.
While it may look detailed because of the granny square construction, the process is repetitive and easy to follow once you get started.
If your pumpkin doesn't look perfectly shaped before stuffing, that's normal - the final form comes together as you assemble and fill it.
I recommend taking your time with the shaping step, as it makes the biggest difference to the finished result.
Exclusive Printable Crochet Patterns
Be inspired and keep creating!
Join us in The Pattern Vault, Easy Breezy Crochet's exclusive community.
Connect with other crocheters from all around the world and gain access to an extensive library of printable PDF crochet patterns.
All patterns are ad-free and available to you when you want, allowing you to crochet in your own time. So, if you're stuck on inspiration or on the hunt for you next crochet project, the Pattern Vault is for you!
Construction Overview
This pumpkin is made by:
- Crocheting 4 classic granny squares
- Joining them into a flat panel (1x4 layout)
- Seaming edges to form a circular shape
- Lightly stuffing to create a rounded pumpkin form
- Cinching the top and bottom to shape
- Adding stem, leave and tendril details to finish
Granny Square Pumkin Notes & Tips
- Half double crochet stitches and a 3mm hook are used to make the squares for a tighter fabric and reduced spacing between cluster groups.
- You can adjust size by using thicker yarn or larger squares.
- Mix and match fall tones for a more textured, rustic look.
What You Will Need
Yarn
#3 light (DK, light worsted, 8ply) yarn with 14 WPI (wraps per inch)
- Color A, terracotta - 48 yards (44 meters)
- Color B, dark green - 48 yards (44 meters)
- Color C, dusty pink - 36 yards (33 meters)
- Color D, dark brown - 48 yards (44 meters)
- Color E, natural (joining and shaping) - 51 yards (50 meters)
- Color F, charcoal (stem and leaves) - 11 yards (10 meters)
Crochet Hook
- 3mm
Notions
- Scissors
- Yarn needle
- Toy stuffing
Finished Size & Gauge
Finished size
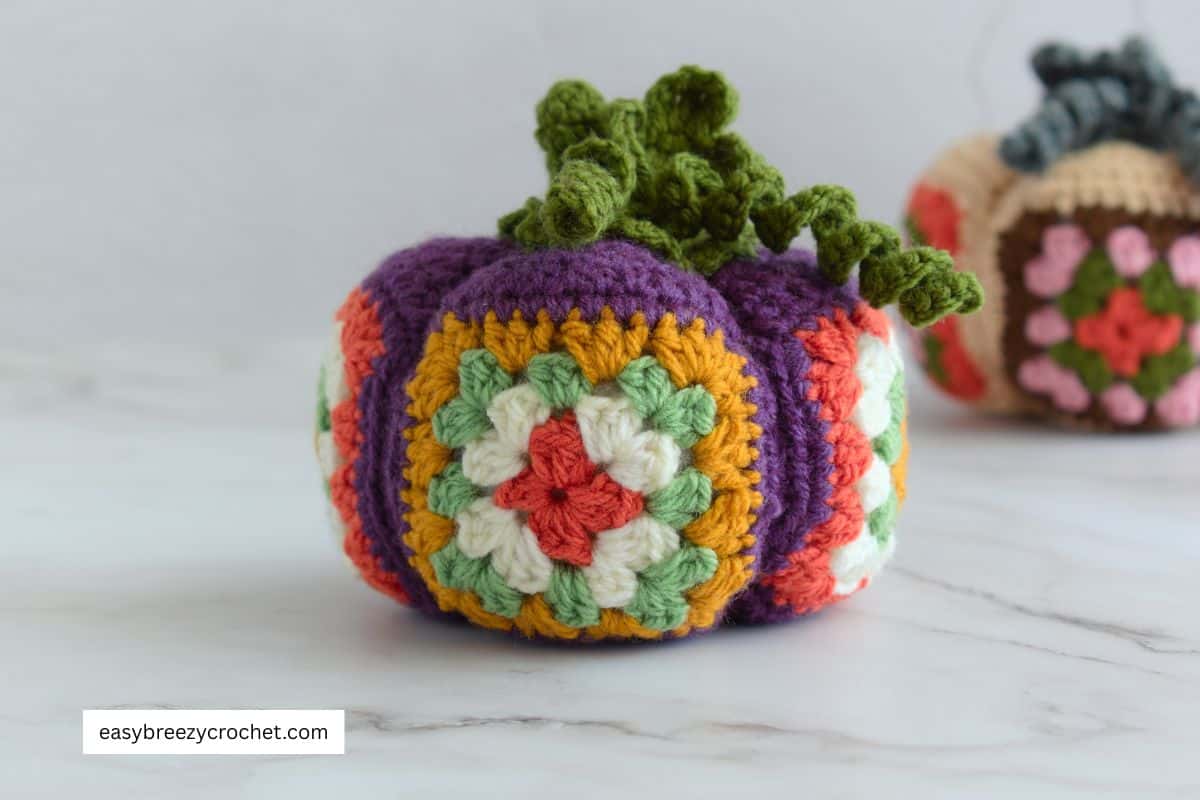
Approximately 3.5 inches (9cm) tall and 4.5 inches (11.5cm) wide
Gauge
- Gauge is not critical for this project. However, it is important to achieve a firm fabric with minimal gaps between stitches.
- For best results, use a crochet hook that is smaller than the size recommended on your yarn label. This will create tighter stitches and will help to keep the stuffing inside.
Stitches and Abbreviations (US Terms)
- ch - chain stitch
- col - color
- dc - double crochet
- FLhdc - half double crochet made in the front loops
- FLsc - single crochet made in the front loops
- hdc - half double crochet
- hdc2tog - half double crochet 2 stitches together
- hk - hook
- rnd - round
- rpt - repeat
- sc - single crochet
- sl st - slip stitch
- sp/sps - space/spaces
- tr - treble crochet
- [ ] - at the end of a round indicates the number of stitches in that round
Pattern Notes
Color A Combination (make 2 squares)
- Rnd 1 - color A
- Rnd 2 - color B
- Rnd 3 - color C
- Rnd 4 - color D
- Rnd 5 - color E
Color B Combination (make 2 squares)
- Rnd 1 - color D
- Rnd 2 - color C
- Rnd 3 - color B
- Rnd 4 - color A
- Rnd 5 - color E
Ready to start crocheting?
Download the ad-free printable PDF and keep the pattern at your fingertips - no scrolling, no ads, no distractions. Get yours in our shop.
how to Make A Patchwork Granny Square Pumpkin
Square color combination A
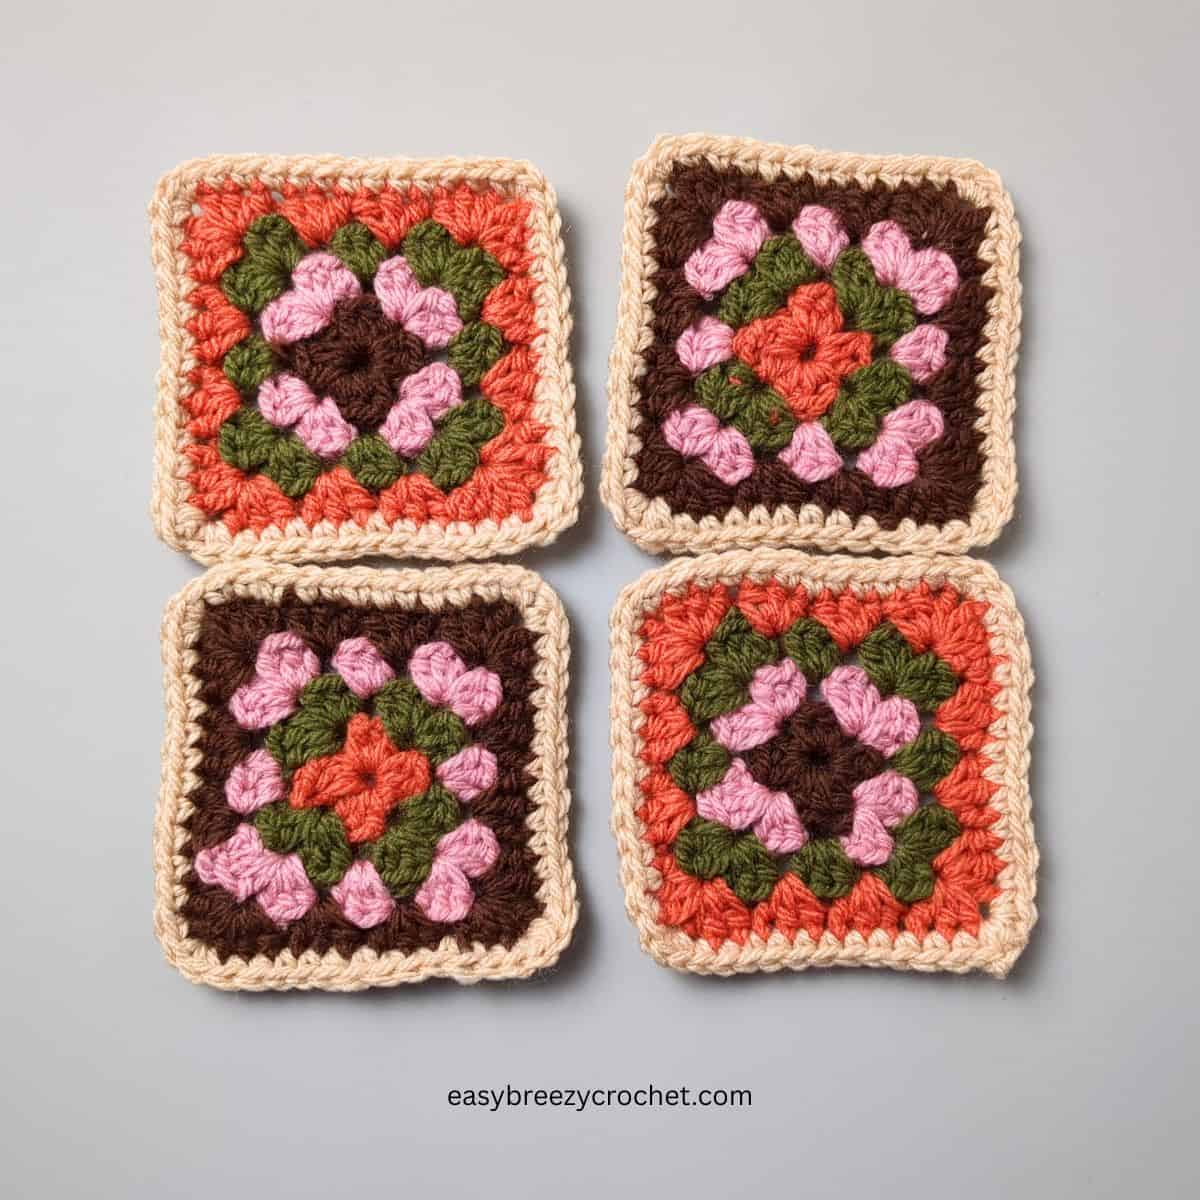
Foundation, col A - ch3, sl st into 1st st to make a ring.
Rnd 1 - ch1 (not counted as a st), *(3hdc, ch1) into ring, rpt from * 4 times, sl st into 1st hdc to join, cut yarn fasten off and weave in ends. [12hdc]
Rnd 2, col B - sl st yarn into and ch-1 sp, ch1 (not counted as a st), (3hdc, ch1, 3hdc) in same sp as ch-1, *(3hdc, ch1, 3hdc) in next ch-1 sp, rpt from * 3 times, sl st into 1st hdc to join, cut yarn, fasten off and weave in ends. [24hdc, 4xch-1]
Rnd 3, col C - sl st yarn into and ch-1 sp, ch1 (not counted as a st), (3hdc, ch1, 3hdc) in same sp as ch-1, 3hdc in sp between clusters, *(3hdc, ch1, 3hdc) in next ch-1 sp, 3hdc in sp between clusters, rpt from * 3 times, sl st into 1st hdc to join, cut yarn, fasten off and weave in ends. [36hdc, 4xch1]
Rnd 4, col D - sl st yarn into and ch-1 sp, ch1 (not counted as a st), (3hdc, ch1, 3hdc) in same sp as ch-1, 3hdc in sp between next 2 clusters, *(3hdc, ch1, 3hdc) in next ch-1 sp, 3hdc in sp between next 2 clusters, rpt from * 3 times, sl st into 1st hdc to join, cut yarn, fasten off and weave in ends. [48hdc, 4xch1]
Rnd 5, col E - sl st new col into any ch-1 sp, ch1 (not counted as a st), 1sc in ch-1 sp, 1sc in next, 12-sts, *2sc in ch-1 sp, 1sc in next 12-sts, rpt from * 3 times, 1sc in 1st ch-1 sp, sl st into top of 1st sc to join, cut yarn fasten off and weave in ends. [56sts, (14sts on each side)]
- Make 1 more square in the above color combination A.
- Make 2 more squares in color combination B.
Join the squares
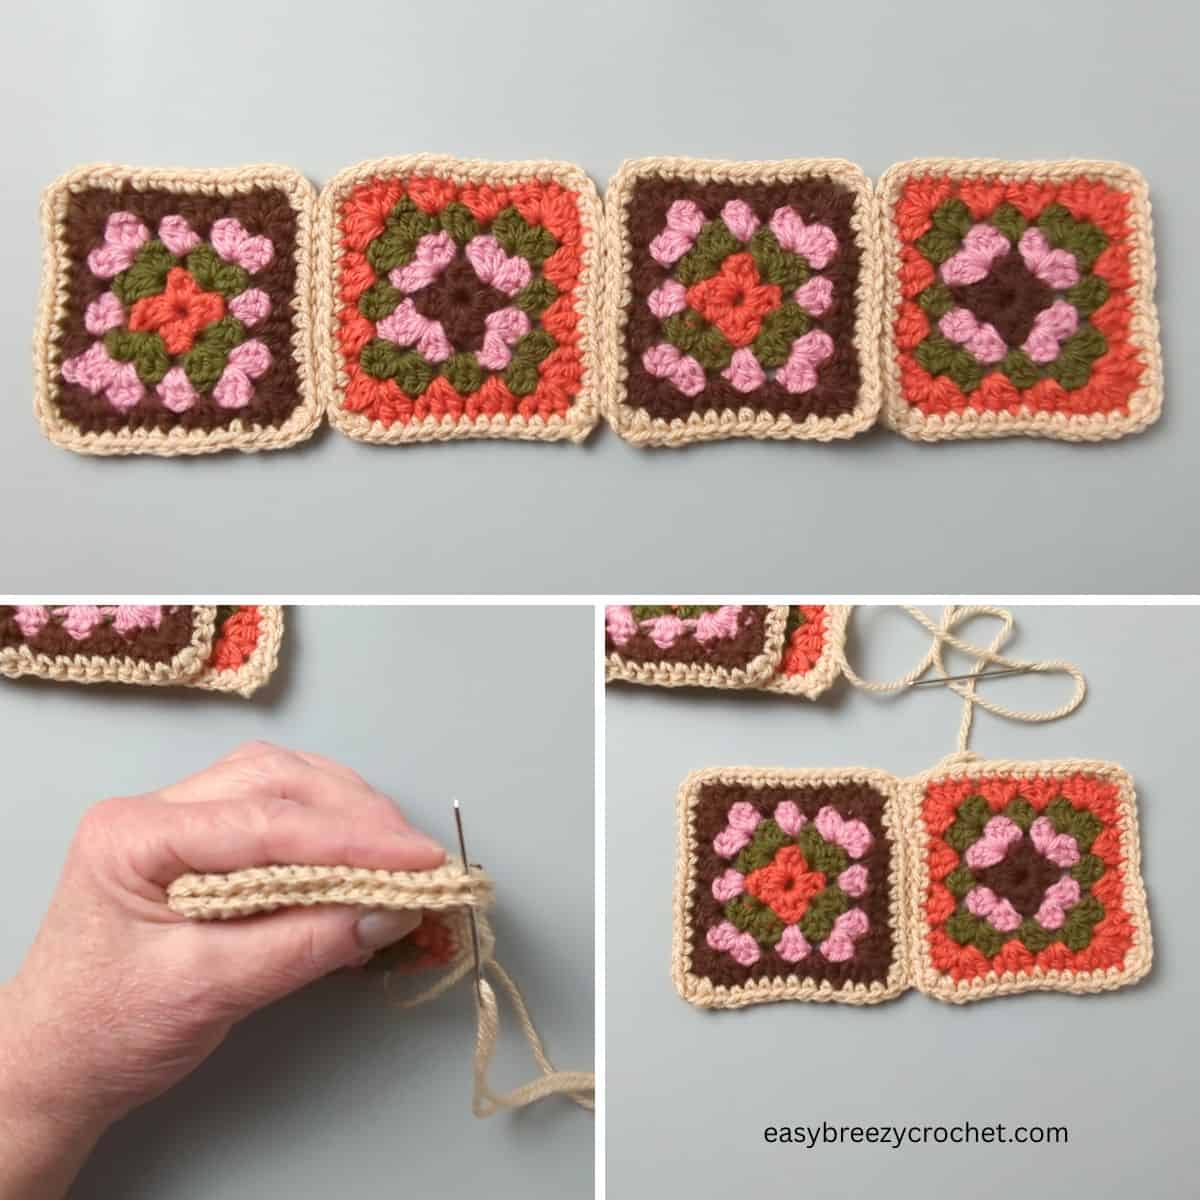
- Lay the squares side by side alternating color combinations (A-B-A-B).
- Cut a length yarn color E and thread on to a needle,
- Take one square A and one square B and place them right sides together
- Start at one corner, join the two squares with whip stitch on one side, by running the needle under the two outer loops of each square, sewing along the 14-sts
- Continue to join the remaining squares alternating the color combinations, then join the first square to the last square to make a ring.
- Turn the piece right side out.
- Add a stitch marker to the bottom edge.
Bottom Extension
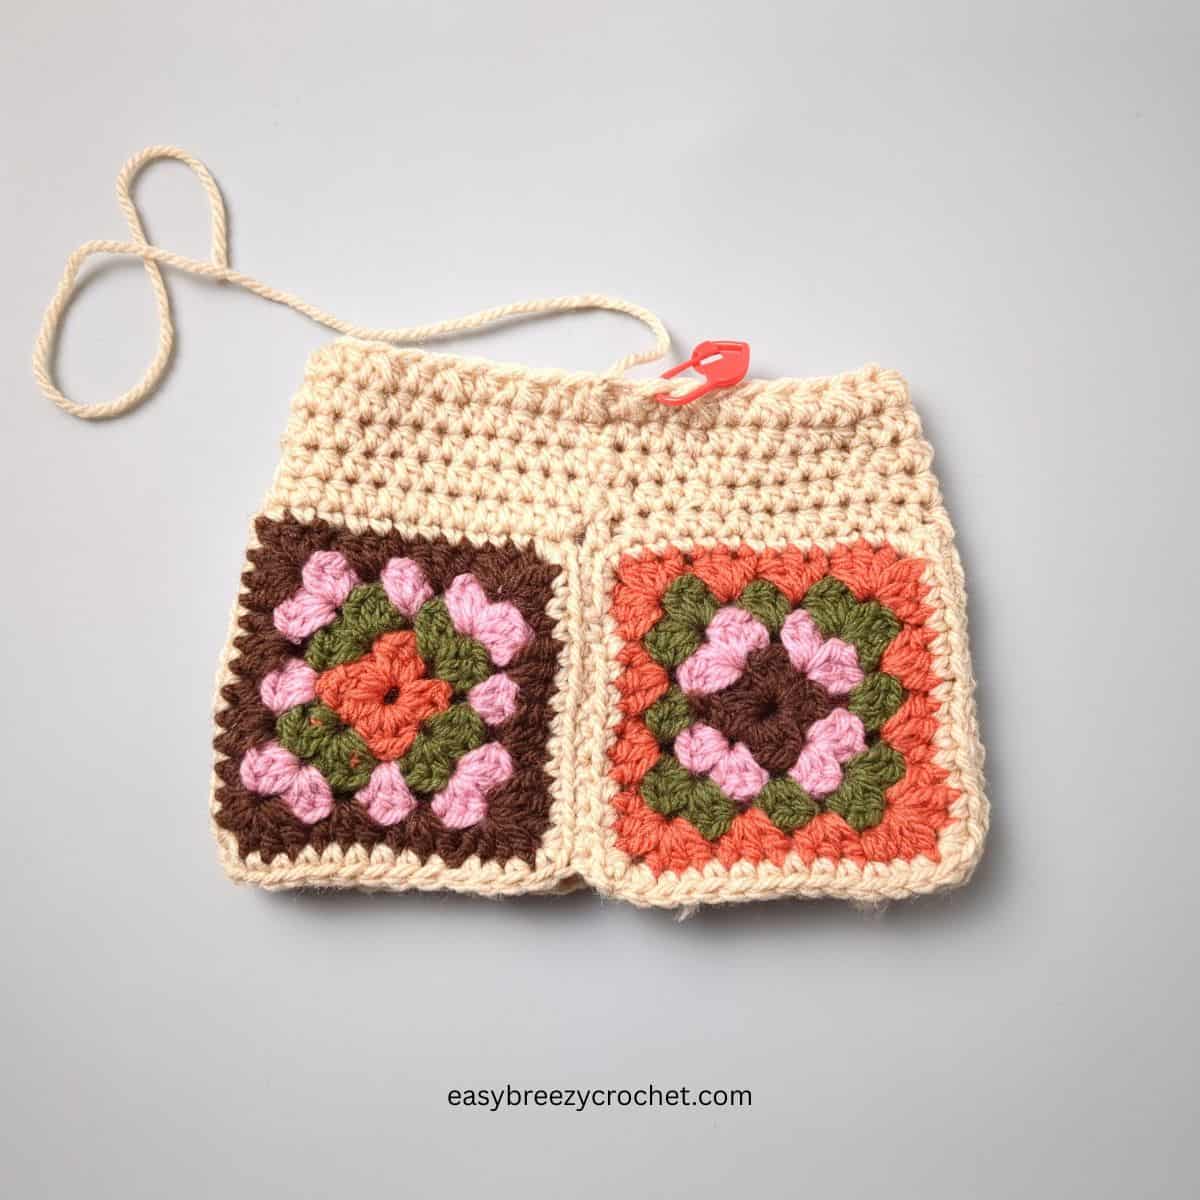
Rnd 1, col D - sl st yarn into any st on an edge, ch1 (not a st), 1hdc in same sp as ch-1, 1hdc in next 113sts, 1hdc in the side seam, *1hdc in next 14-sts, 1hdc in the side seam, rpt from * 3 times, 1hdc in the side seam, sl st into 1st hdc. [60hdc]
Rnds 2-4 - ch1(not counted as a st), 1hdc in same sp as ch-1, 1hdc in each st, sl st into 1st hdc to join. [60hdc]
Rnd 5 - *hdc2tog, 1hdc in next st, rpt from * all around, sl st into 1st hdc to join, cut yarn, leave a long tail for sewing and fasten off.
Top Extension
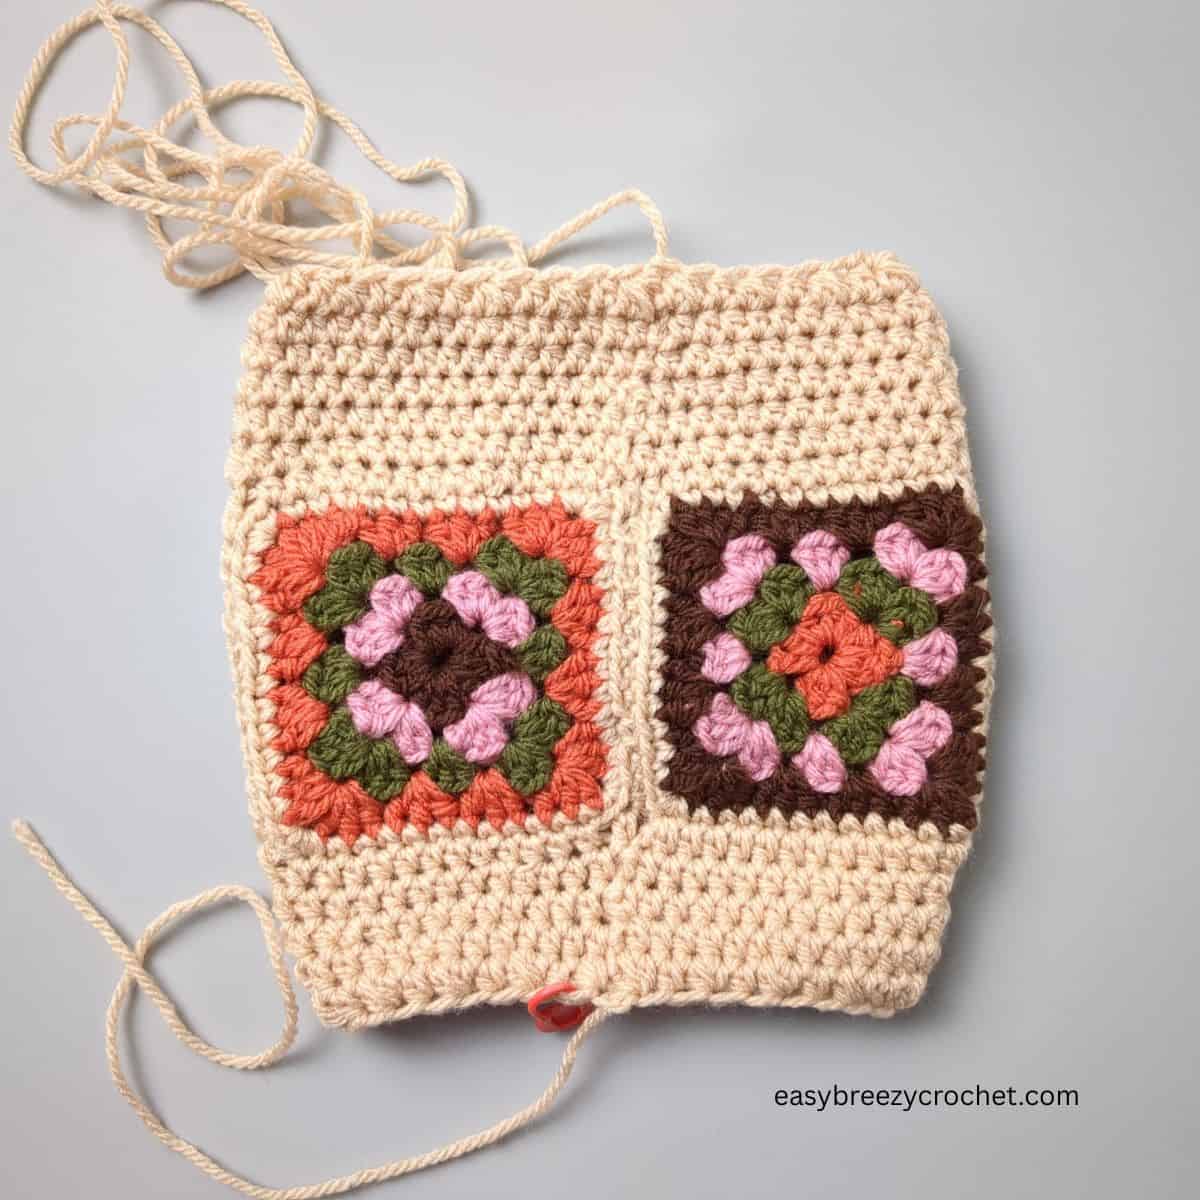
Rnd 1, col D - sl st yarn into any st on an edge, ch1 (not a st), 1hdc in same sp as ch-1, 1hdc in next 113sts, 1hdc in the side seam, *1hdc in next 14-sts, 1hdc in the side seam, rpt from * 3 times, 1hdc in the side seam, sl st into 1st hdc. [60hdc]
Rnds 2-6 - ch1(not counted as a st), 1hdc in same sp as ch-1, 1hdc in each st, sl st into 1st hdc to join. [60hdc]
Rnd 7 - *hdc2tog, 1hdc in next st, rpt from * all around, sl st into 1st hdc to join, cut yarn, leave an extra-long tail for sewing (about 1.5 m) and making shaping pumpkin segments and fasten off.
How To Shape A Crochet Pumpkin
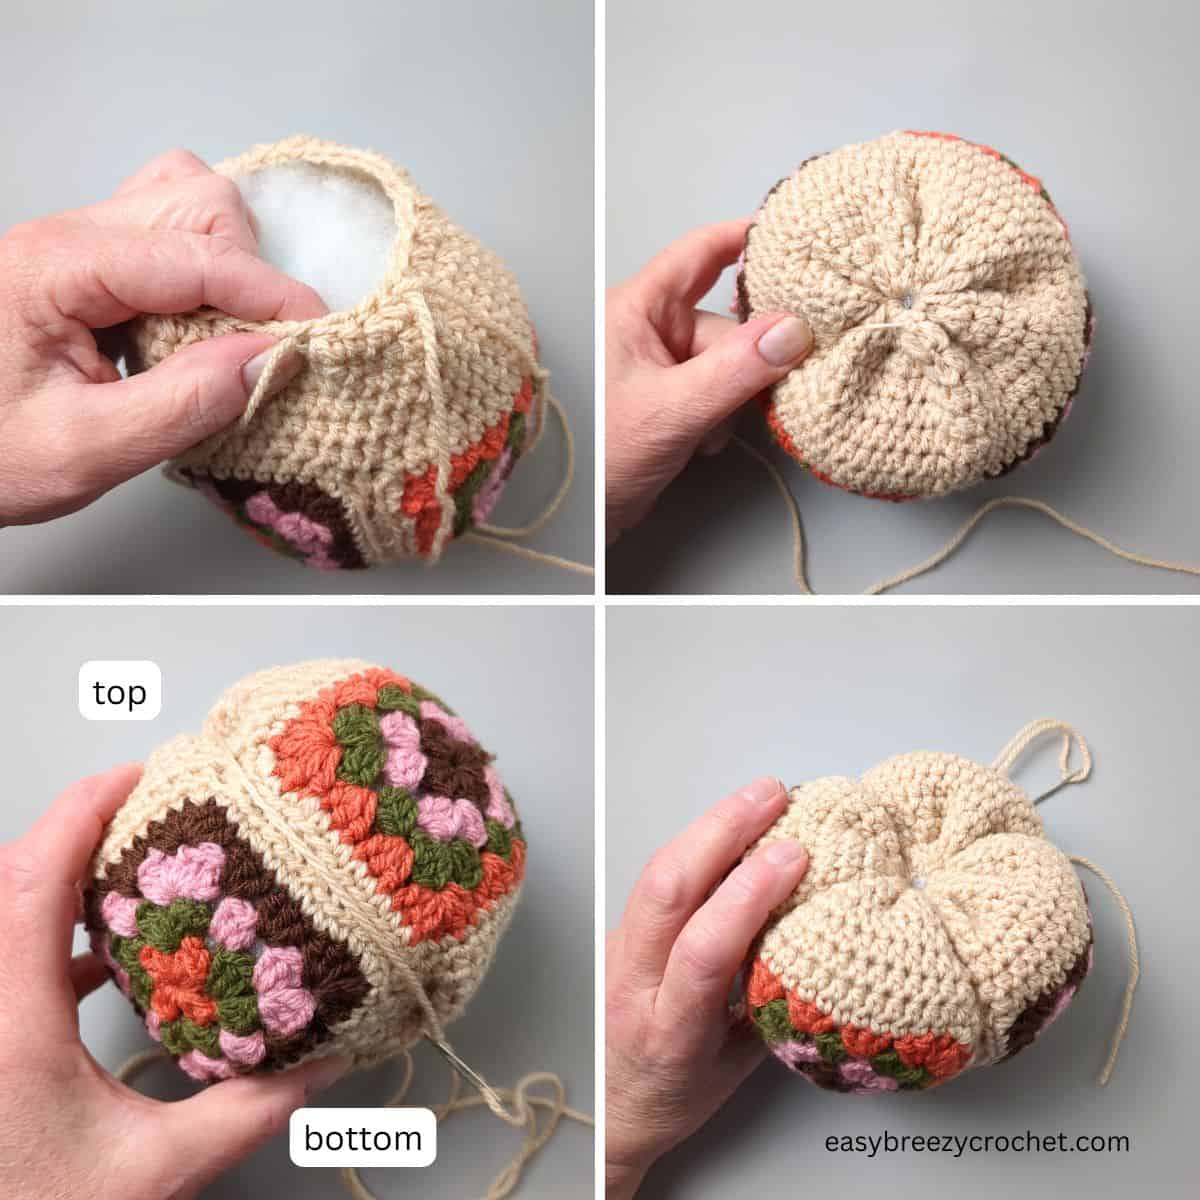
Close the bottom - Thread the yarn tail from the bottom end bottom extension onto a needle and weave it in and out of the stitches along the edge, pull tight to cinch the opening closed, secure the end and weave in the end.
Stuff - Fill the cavity of pumpkin with toy stuffing, but don't over fill.
Close the top - Thread the remaining yarn tail onto a needle and weave and close the top like you did for the bottom. Make a few back stitches to secure in place. Do not cut the yarn tail.
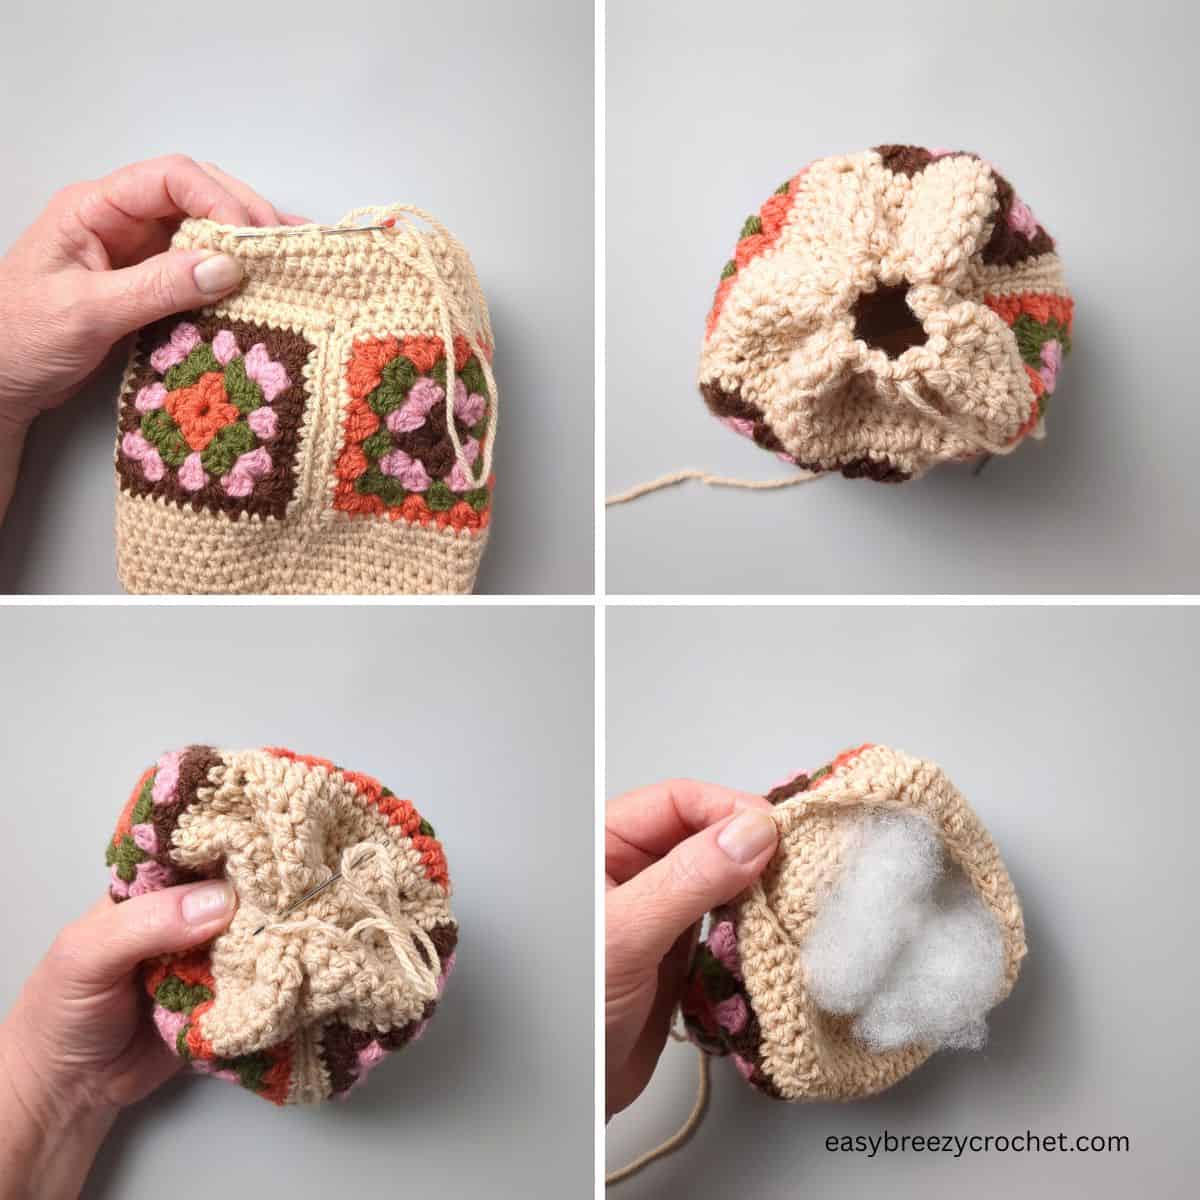
Make Segments
- With yarn tail still intact at the top, bring the yarn around the pumpkin and insert the needle into the centre bottom and back up to the top.
- Line the yarn tail along the side seam between two squares and gently pull the yarn tight to create the first segment, make a few back stitches to secure.
- Repeat the process 3 more times, segmenting sections at the side seam joins between the granny squares. Fasten off and weave in end.
Pumpkin Stem
Foundation, col E - ch3, sl st into 1st st to make a ring.
Rnd 1 - ch1 (not counted as a st),8sc into ring. [8sc]
Rnds 2 - 6 - 1sc in each st. [8sc]
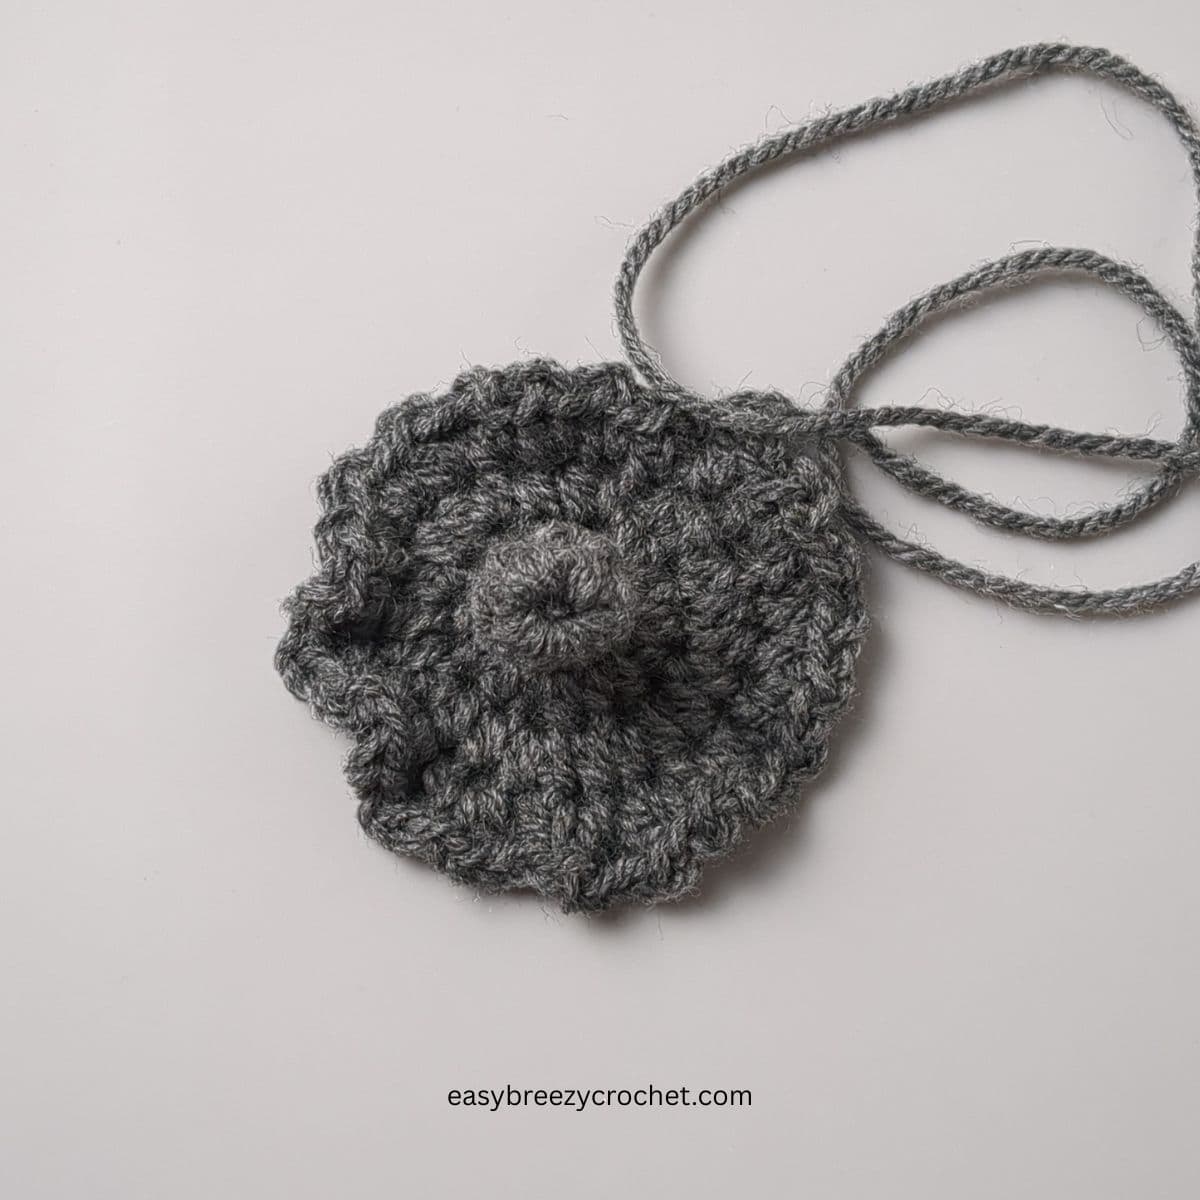
Rnd 7 - 2hdc in each st, sl st into FL of 1st st to join. [16hdc]
Rnd 8 - 2hdc in next st, 1hdc in next, rpt from * 8 times, sl st into 1st st to join. [24hdc]
Rnd 9 - (FLsc, 1ch, FLhdc) in same st, rpt 24 times, then sl st into 1st sc to join, cut yarn leave a long tail for sewing.
Pumpkin Leaf and Tendrils
Foundation, col E - ch3, sl st into 1st st to make a ring.
Rnd 1 - ch1 (not counted as a st),10sc into ring, sl st into 1st sc to join. [10sc]
Rnd 2 - Ch1, (2hdc) in same sp as ch-1, (1hdc, 1dc) in next st, (1dc, 1tr, ch3, sl st) in next st, sl st into next st, (sl st, ch2, 1dc, 1tr) in next st, (1tr, 1dc, ch2, sl st) in next st, sl st in next st, (sl st, ch3, 1tr, 1dc) in next st, (1dc, 1hdc) in next st, (2hdc, ch1, sl st) in next st, sl st in next st,
Tendrils - ch22, 2sc in 2nd ch from hk, 2sc in each st to end, sl st into same sp as start of ch-22, ch32, 2sc in 2nd ch from hk, 2sc in each st to end, sl st into same sp as start of ch-32, cut yarn, leave a long tail for sewing, fasten off.
Weave in starting yarn tail from the leaf.
Thread the remaining yarn tail from the leaf onto a needle and sew it into place at the base of the stem, fasten off and weave in end.
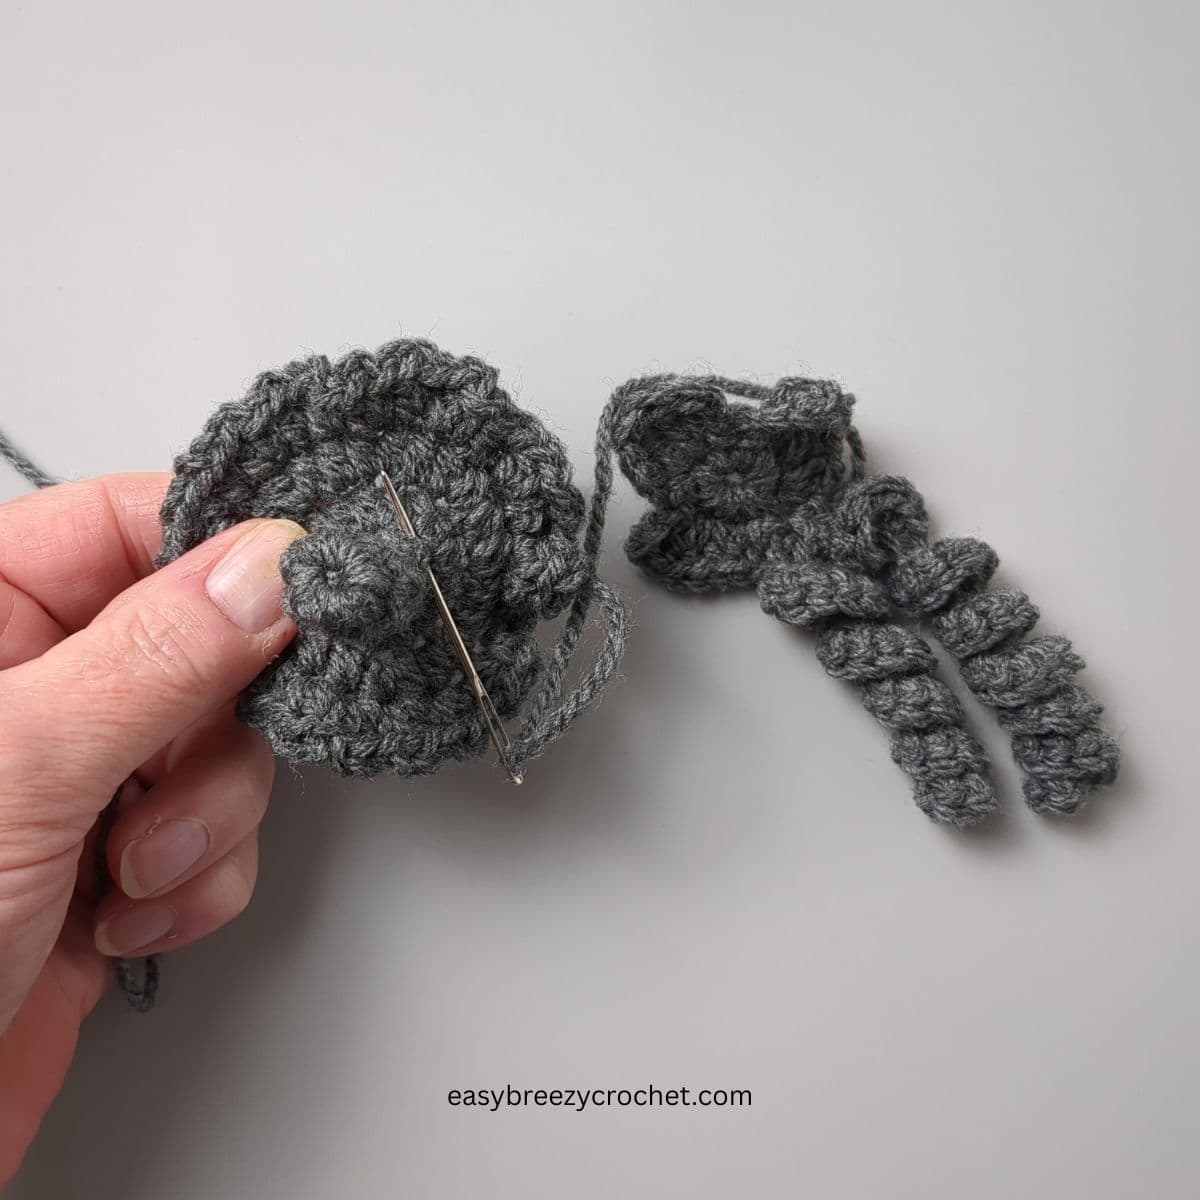
Attach Stem
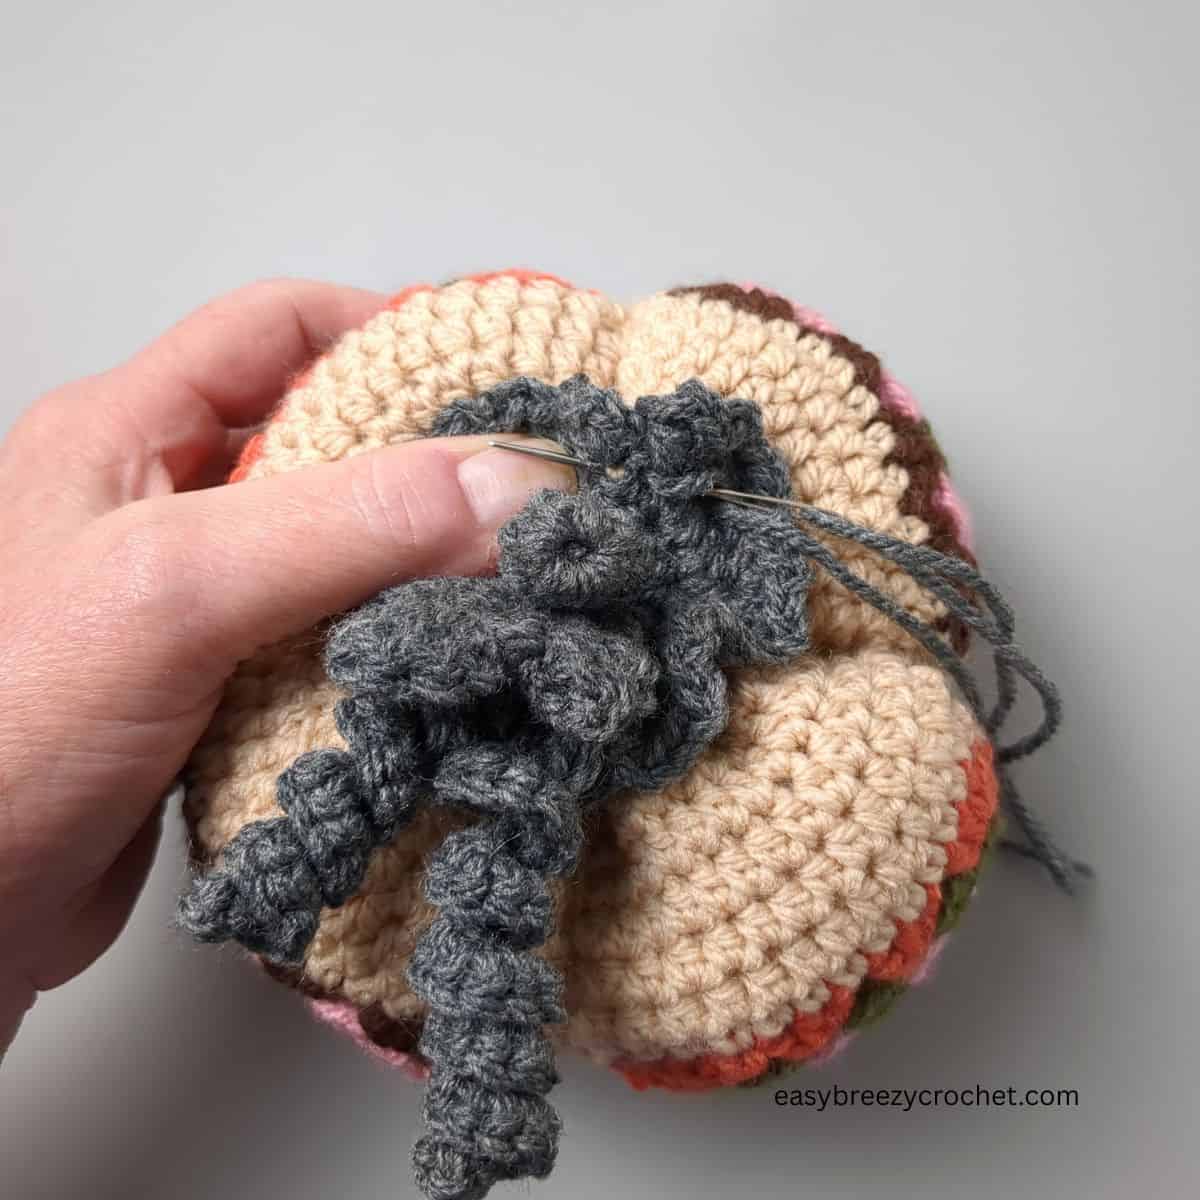
Sew pumpkin stem, leaf and tendrils to top of pumpkin.
Finish
Roll the pumpkin between your hands to give it a better shape.
Perfect For
- Seasonal craft markets
- Fall & autumn home decor
- Thanksgiving table styling
- Cottagecore & rustic interiors
- Handmade gift ideas
Patchwork Crochet Pumpkin FAQs
A Patchwork Granny Square Pumpkin is a crochet pumpkin made by joining multiple granny squares together and shaping them into a stuffed pumpkin. It's a creative way to transform the classic granny square into a unique piece of fall home decor.
Yes! This pattern is suitable for beginners who are familiar with basic crochet stitches and simple seaming techniques. If you've made a granny square before, you'll find this project straightforward and enjoyable.
Definitely! The Patchwork Granny Square Pumpkin makes a charming addition to fall decorating, Thanksgiving tablescapes, tiered trays, mantels, and seasonal displays
Yes. You can make larger granny squares, use thicker yarn, or increase your hook size to create a larger finished pumpkin.
Blocking is optional but can help create neater seams and a more symmetrical finished pumpkin. Learn more about blocking granny squares.
Polyester fiberfill works well, but you can also use yarn scraps, fabric scraps, or other soft stuffing materials.
Yes! This is a fantastic stash-busting project and a great way to use leftover yarn from previous crochet projects.
Traditional autumn colors such as pumpkin orange, burnt orange, mustard yellow, cream, sage green, dusty blue, and rustic brown work especially well. You can coordinate all four squares or make each one unique.
The finished size will vary depending on your yarn, hook size, and tension. Using DK yarn and a 3 mm hook creates a decorative pumpkin that's ideal for shelves, tiered trays, mantels, and table displays.
Most crocheters can complete this project in approximately 2 to 2.5 hours, making it a perfect afternoon crochet project.
This pumpkin is made using four classic granny squares, which are joined together and shaped to create the finished pumpkin.
From Granny Squares To Pumpkin
This granny square pumpkin is a fun, fast project that transforms a simple motif into a seasonal statement piece. With just four squares and a bit of shaping, you can create a cozy autumn decoration that feels both handmade and timeless.
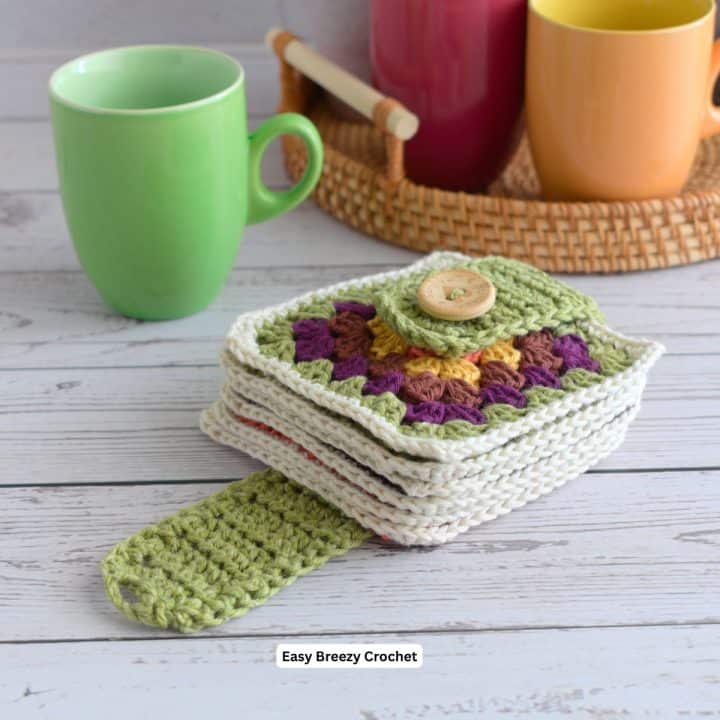
If you are looking for more fast Christmas projects with granny squares, try this easy granny square Christmas tree ornament or this stack and strap granny square coaster set (coming soon).
Don't stop here...
Your next 50 crochet projects are ready inside the Pattern Vault - all printable, ad-free, and ready to download instantly.
Stay Connected
Pin this post - Pin now to and take your skills to the next level.
Leave a comment - We're excited to hear your thoughts! Leave a comment below and let us know what you think.
Share on Instagram or Facebook - Capture the beauty of your finished crochet projects and share it on Instagram or Facebook! Tag us @easybreezycrochet or #ebcrochetcreations so we can see your work!
Copyright Notice - This pattern and its contents are protected by copyright law. It may not be copied, altered, redistributed, resold, translated, or used to produce video tutorials in any format, either in whole or in part.
You are permitted to sell finished items made using this pattern. However, the written pattern itself may not be sold, shared, or distributed in any form. When marketing or displaying your finished items, please photograph your own work and refrain from using any of my original images.
Sharing Guidelines For Roundups - Bloggers you are welcome to include this pattern in roundup posts, as long as you use one photo and link directly back to the original post. For full details, please refer to my Terms of Use page.
Comments
No Comments