
About This Pattern
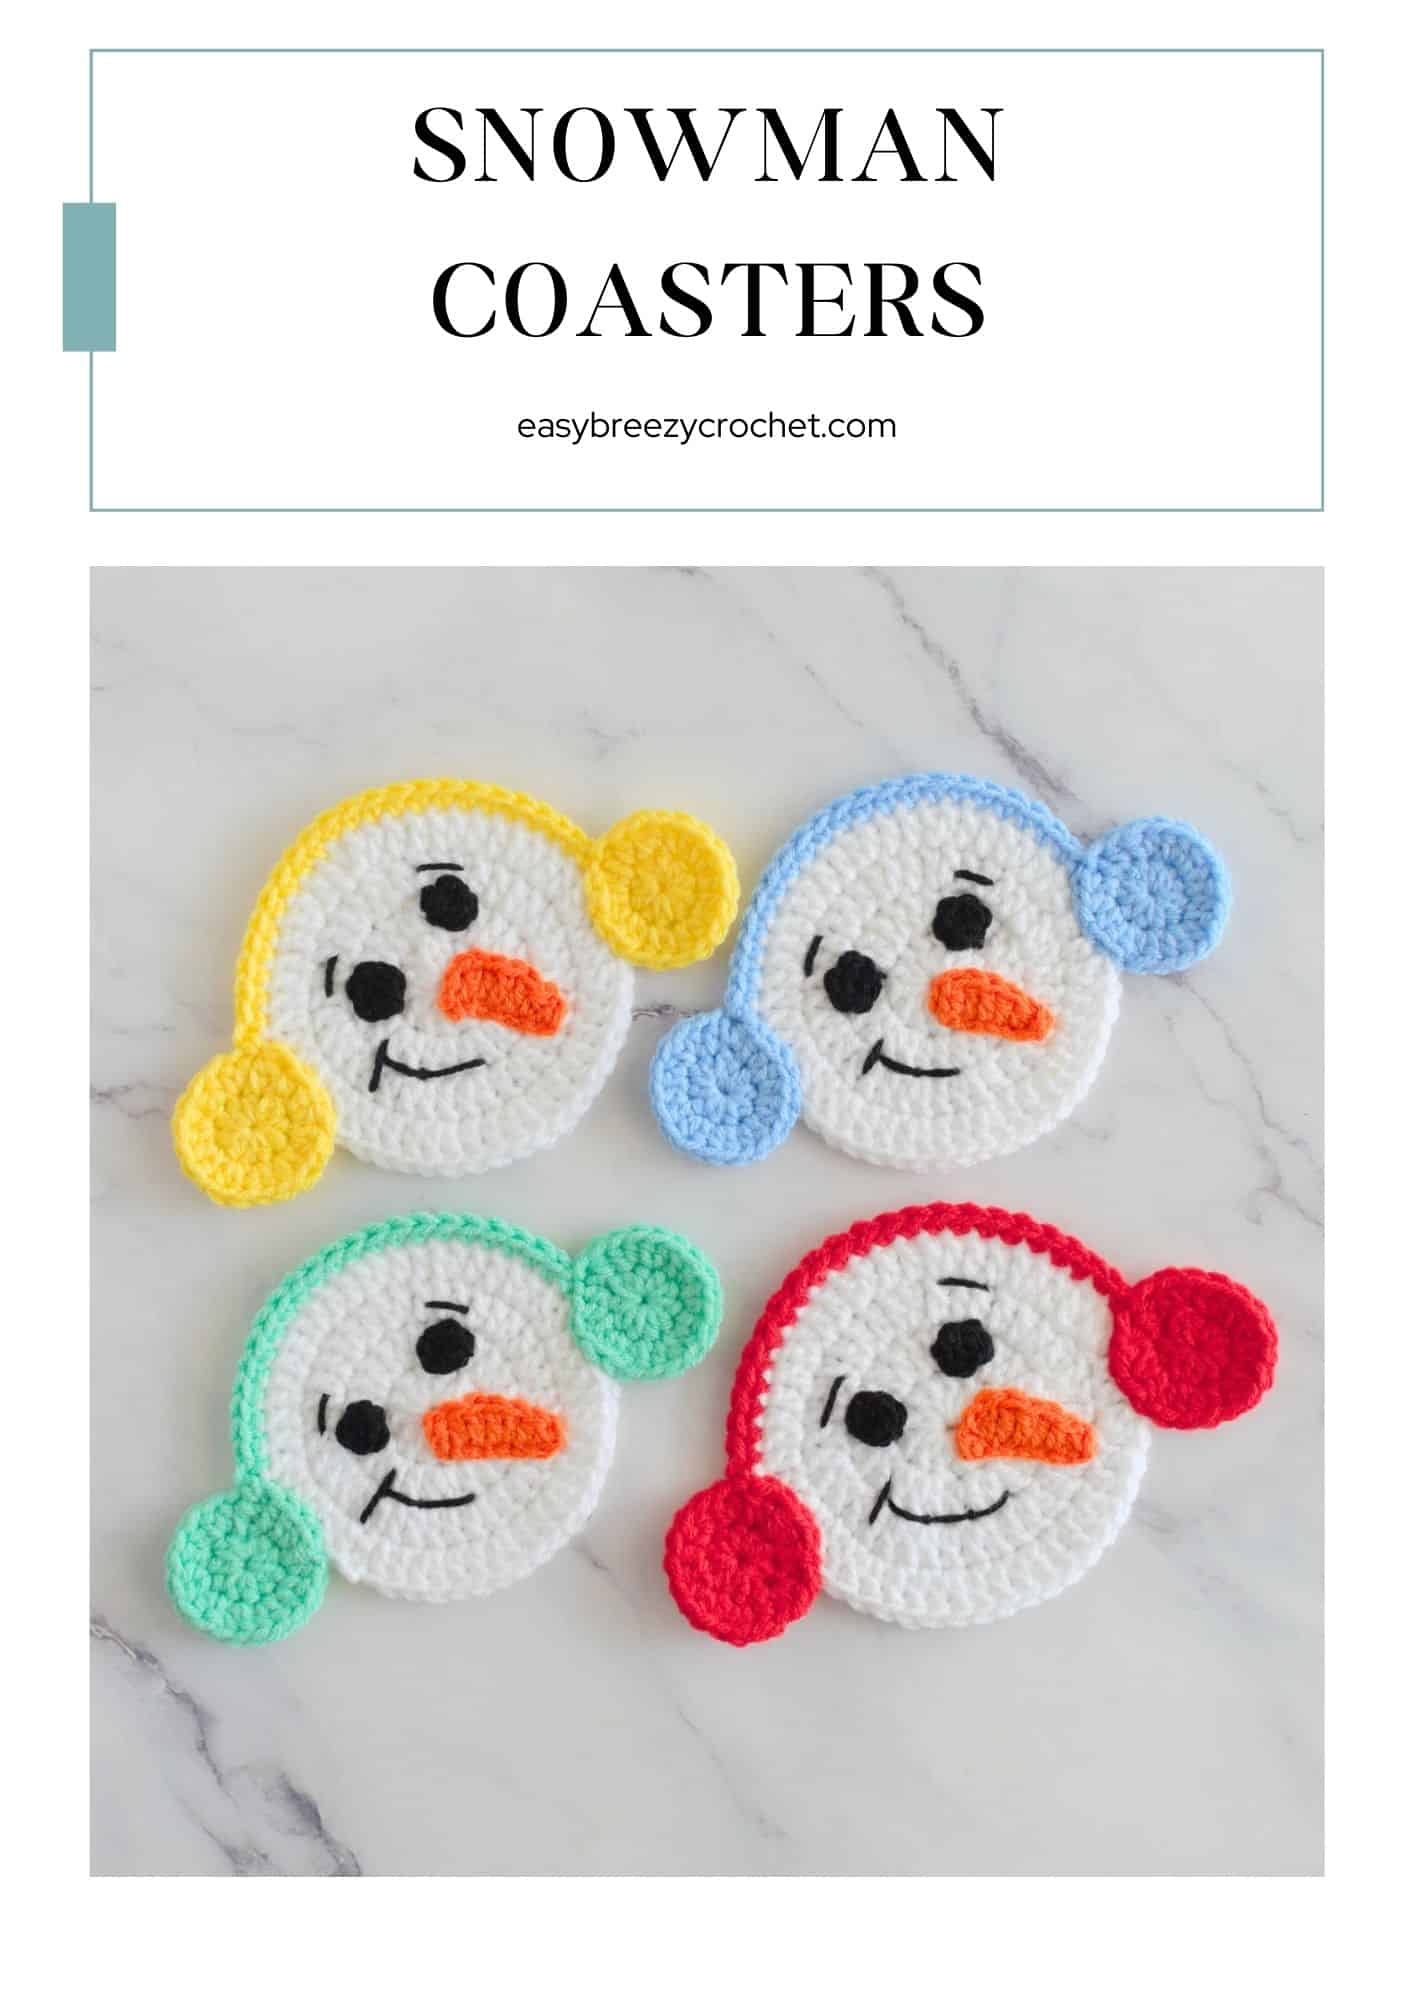
- If you are learning to crochet a circle, this pattern is perfect for you. Not only will you get to practice your circle-crocheting skills, but you'll also create something practical in the process.
- These snowman coasters are quick to make-you can easily complete one in under 30 minutes.
- They are a budget-friendly crochet project that uses very little yarn, making them perfect for stash-busting.
Pattern Details
- Skill Level - Beginner
- Yarn Weight - #4 medium (worsted, Afghan, Aran, 10 ply)
- Hook Size - 4mm and 3.5mm
- Finished Size - 4.5 inches (11.4 cm) in diameter
- Time To Complete - Under 30 minutes for an intermediate beginner
Prefer a printable, ad-free pattern? Members can download this pattern as a clean, easy-to-print PDF.
Table of contents
- About This Pattern
- Pattern Details
- Stitches Used
- Yarn and Hook Info
- What You Will Need
- Finished Size & Gauge
- Stitches and Abbreviations - US Terms
- Pattern Notes
- Pattern Instructions
- Sew on facial features
- More Free Crochet Patterns
- More Easy Crochet Patterns
- Quick Crochet Reference Guide
- Learn To Crochet
- Stay Connected
- Comments
Stitches Used
For this pattern, you will need to know how to chain stitch, single crochet, double crochet, and half double crochet, and slip stitch.
Yarn and Hook Info
For these snowman coasters, we used #4 worsted and #3 light acrylic yarn.
Although the recommended hook size for the #4 worsted yarn is 5mm (H/8), we chose to go down a hook size for a tighter stitch, resulting in a better overall look for the coaster.
You could also use cotton yarn, other blends, or a different yarn weight with an appropriate hook size.
If you choose a heavier yarn like #5 chunky or a lighter yarn like #3, your coasters will turn out larger or smaller, respectively.
What You Will Need
Yarn
#4 medium (worsted, Afgan, Aran, 10 ply) 100% acrylic yarn, with 11 WPI (wraps per inch)
- Color A, white (snowman head) - 9.8 yards (9 meters)
- Color B, red (ear muffs) - 3.2 yards (3 meters)
#3 Light (also known as light worsted, DK, or 8ply) yarn weight, with 12 WPI (wraps per inch)
- Color C, black (eyes) - 1 yards (1 meters)
- Color D, orange (nose) -1 yards (1 meters)
Crochet hook
- Coaster and Ear muffs - 4mm (G/6)
- Eyes and nose - 3.5 mm (E/4)
Notions
- Scissors
- Yarn needle
Finished Size & Gauge

Finished Size
The finished size of this crochet snowman coaster is about 4.5 inches (11.4 cm) in diameter not including the earmuffs.
Gauge
The gauge is not so important for the project.
Stitches and Abbreviations - US Terms
- Ch - chain
- Col - color
- Dc - double crochet
- Hdc - half double crochet
- MR - magic ring
- Rnd - round
- Rpt - repeat
- Sc - single crochet
- Sl st - slip stitch
- St/sts - stitch/stitches
- [ ] - at the end of a round indicates the number of stitches in that round
Pattern Notes
- The pattern is worked in a round do not turn work.
Printable PDF Pattern
Want an ad-free printable version of this crochet pattern?
Join the Easy Breezy Crochet Pattern Vault to get this printable pattern (and more)!
The Pattern Vault is Easy Breezy Crochet's newest exclusive community where you can access a growing library of ad-free printable crochet patterns, and join a community of crocheters around the world.
Pattern Instructions
Coaster - Round One

Round 1, Color A - Magic ring (or chain 4, slip stitch into the 1st chain to join), chain 2 (this is not counted as a stitch), make 12 double crochet stitches into the ring, pull yarn tail to tighten ring, slip stitch into the top of the 1st double crochet to join. [12 double crochet in this round]
Abbreviated Version
Rnd 1, col A - MR (or ch4, sl st into 1st ch to join), ch2 (not counted as a st), 12dc into ring, pull yarn tail to tighten ring, sl st into 1st dc. [12dc]
Round Two

Round 2 - Chain 2 (this is not counted as a stitch), make 1 double crochet in the same space as the chain, then make 2 double crochets in each of the next 11 stitches, then make 1 double crochet into the next stitch, slip stitch into the 1st double crochet to join. [24 double crochet in this round.]
Abbreviated Version
Rnd 2 - Ch2 (not counted as a st), 1dc in same sp as ch-2, 2dc in next 11-sts, 1dc in next st, sl st into 1st dc to join. [24dc]
Round Three

Round 3 - Chain 2 (this is not counted as a stitch), make 1 double crochet in the same space as chain 2, then make * 2 double crochets in the next stitch, then make 1 double crochet in the next, repeat from * 11 times, then make 2 double crochets in the next stitch, slip stitch into the 1st double crochet to join. [36 double crochet in this round.]
Abbreviated Version
Rnd 3 - Ch2 (not counted as a st), 1dc in same sp as ch-2, *2dc in next st, 1dc in next, rpt from * 11 times, 2dc in next st, sl st into 1st dc to join. [36dc]
Round Four

Round 4 - Chain 2 (this is not counted as a stitch), make 1 double crochet in the same space as chain 2, then 1 double crochet in the next stitch, then make * 2 double crochet in the next, and 1 double crochet in each of the next 2 stitches, repeat from * 11 times, then make 2 double crochet in the next stitch, slip stitch into the 1st double crochet to join, chain 1, cut yarn, fasten off and weave in the ends. [48 double crochet in this round.]
Abbreviated Version
Rnd 4 - Ch2 (not counted as a st), 1dc in same sp as ch-2, 1dc in next st *2dc in next st, 1dc in each of the next 2-sts, rpt from * 11 times, 2dc in next st, sl st into 1st dc to join, ch1, cut yarn, fasten off and weave in ends. [48dc]
✨ You're almost there! ✨
To unlock the final steps and complete your pattern, create a free account with Grow.me. below.
Make sure to tick the box to subscribe to our newsletter and stay up to date with the latest patterns, tips, and more!
Once you're signed up, you'll get instant access to finish your project and enjoy exclusive content in the future.
Already signed up? Hit the button below and select 'Switch to Log In' to pick up where you left off and finish your project!

Eyes (make 2) - Round One
Round 1, color C - Magic ring (or chain 4, slip stitch into 1st chain to join), chain 1 (this is not counted as a stitch), make 6 single crochet into the ring, pull the yarn tail to tighten the ring, slip stitch into the 1st single crochet, cut yarn, leave a long tail for sewing, and fasten off. [6 single crochet in this round.]
Abbreviated Version
Rnd 1, col C - MR (or ch4, sl st into 1st ch to join), ch1 (not counted as a st), 6sc into ring, pull yarn tail to tighten ring, sl st into 1st sc, cut yarn leave a long tail for sewing, and fasten off. [6sc]
Finish off eye - Thread the long end yarn tail onto a yarn needle and weave it down to the center of the eye. Knot the starting yarn tail and the end yarn tail together to secure the magic ring. Trim the shorter yarn tail, and use the longer one to attach the eye and create an eyebrow on the face.

Nose - Round One
Round 1, color D - Chain 8, make 1 half double crochet in the 2nd chain from the hook, then half double crochet in the next stitch, make 1 double crochet in each of the next 4 stitches, chain 2, slip stitch into the last stitch, chain 1, cut yarn leaving a long tail for sewing, and fasten off. Weave in the starting yarn tail. [2 half double crochets, 4 double crochets and 1 x chain 2 in this round.]
Abbreviated Version
Rnd 1, col D - ch8, hdc into the 2nd ch from the hk, hdc in next st, 1dc in next 4-sts, ch2, sl st into last st, ch1, cut yarn leaving a long tail for sewing, and fasten off. Weave in the starting yarn tail. [2hdc, 4dc, 1xch2]
Sew on facial features

Nose - Position the nose at the center of the face and have it pointing down and to the right of the face. Thread the yarn tail onto a needle and sew the nose into place.
Eyes - Thread the yarn tail onto a needle. Position the eyes in row two, above and on either side of the nose, and sew them into place. Then, sew on an eyebrow and fasten off.
Mouth - Thread black yarn onto a needle and embroider a half-smile onto the face between rounds two and three, to the left of the nose. Leave long starting and ending yarn tails to knot and fasten off once the mouth is sewn on.
More Free Crochet Patterns
More Easy Crochet Patterns
If you are after more simple Christmas coasters to crochet you might like these crochet patterns for Christmas tree coasters, these crochet star coasters, and these peppermint candy coasters.
Quick Crochet Reference Guide
Not sure which hook to pair with your yarn? This free yarn weight & hook size chart makes it easy, with clear guides for:
- Yarn weights and recommended hook sizes
- Conversions between US, UK, and metric sizes
- Quick references for common projects with each yarn weight
Download your free Yarn Weight & Hook Size Chart (printable PDF)
Print it, save it on your phone, or keep it right next to you while crocheting.
Learn To Crochet
If you are new to crochet and would like to learn more. You might like these:
- Basic crochet stitches for beginners
- How to crochet for beginners
- Crochet terms and abbreviations
- How to read a crochet pattern for beginners
- How to read a yarn label
- How to hold yarn when crocheting
Stay Connected
Pin this post - Pin now to and take your skills to the next level.
Leave a comment - We're excited to hear your thoughts! Leave a comment below and let us know what you think.
Share on Instagram or Facebook - Capture the beauty of your finished crochet projects and share it on Instagram or Facebook! Tag us @easybreezycrochet or #ebcrochetcreations so we can see your work!
Copyright Notice - This pattern and its contents are protected by copyright law. It may not be copied, altered, redistributed, resold, translated, or used to produce video tutorials in any format, either in whole or in part.
You are permitted to sell finished items made using this pattern. However, the written pattern itself may not be sold, shared, or distributed in any form. When marketing or displaying your finished items, please photograph your own work and refrain from using any of my original images.
Sharing Guidelines For Roundups - Bloggers you are welcome to include this pattern in roundup posts, as long as you use one photo and link directly back to the original post. For full details, please refer to my Terms of Use page.



Comments
No Comments