When it comes to joining granny squares with single crochet, there are several different methods you can use.
Depending on the look and texture you want to achieve, you can choose to work in the front loops, all loops, or back loops of each square.

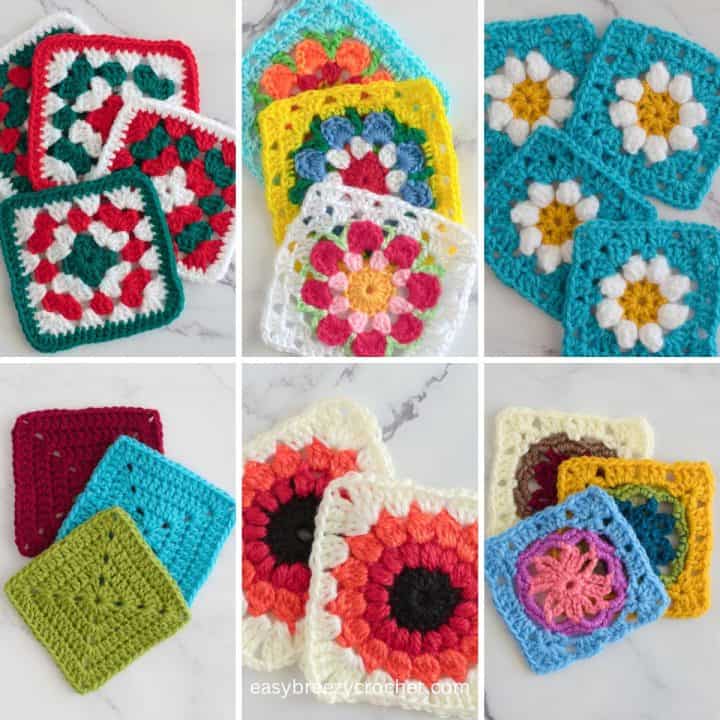
Learn the next step after making your first squares in our joining guide.
Table of contents
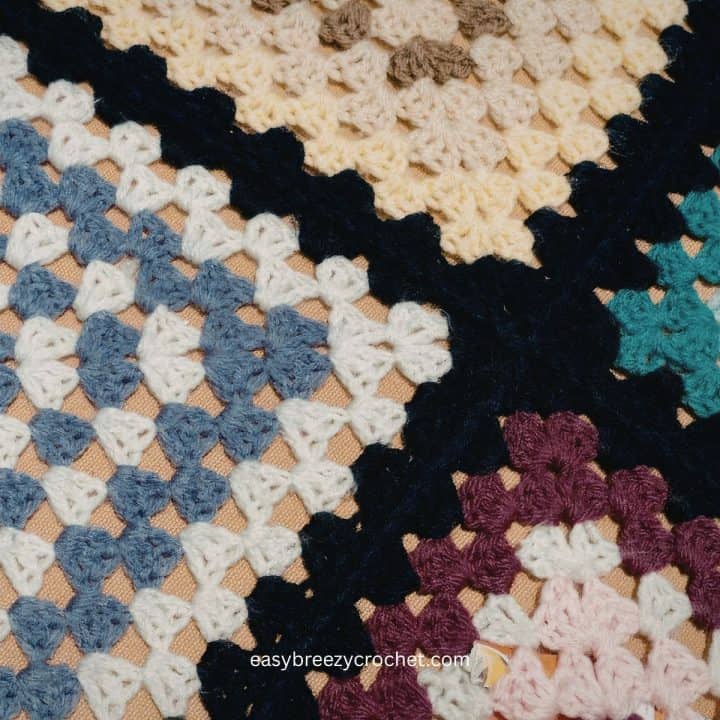
In this post, we'll be showing you how to join your granny squares using the single crochet stitch in the back loop only.
By working in the back loop only, you create a ridge that runs along the top of your seam, adding beautiful detail to your finished blanket.
This method is easy to learn and creates a strong and durable seam that will hold up well over time.
So, grab your hook and some yarn, and let's get started!
Exclusive Printable Crochet Patterns

Ready to take your crochet skills to the next level?
Join us in The Pattern Vault, Easy Breezy Crochet's exclusive community.
Connect with other crocheters from all around the world and gain access to an extensive library of printable PDF crochet patterns.
All patterns are ad-free and available to you when you want, allowing you to crochet in your own time. So, if you're stuck on inspiration or on the hunt for you next crochet project, the Pattern Vault is for you!
1: Arrange Your Squares

Before joining your granny squares together, it's important to arrange them in the pattern you want them to be in.
This will help you keep track of where you are in the project and ensure that the finished blanket looks the way you want it to.
To arrange your squares, you can lay them out on a flat surface such as a table or the floor. Experiment with different arrangements until you find the one you like best.
By taking the time to arrange your squares before joining them, you can avoid mistakes and ensure that your finished blanket is exactly what you had in mind.
2: Choose Your Joining Yarn
When choosing the yarn you want to use for joining granny squares with single crochet, you have a few options.
You can use the same color yarn as the squares, or choose a contrasting color to make the seams stand out.
Depending on the pattern, you may be asked to use the same yarn weight and hook size as your granny squares so that the seams lay flat and the finished blanket has an even appearance.
But don't shy away from experimenting with another yarn weight and hook size to achieve the look you want for your creation, like we did with our lacy daisy granny square blanket.
For this project, we used chunky yarn and a 9 mm hook for the squares but joined them with a yarn weight half the thickness of the squares and a 5.5 mm hook.
The end result was a lovely looking single crochet join that sits in the ditch between the squares rather than being chunky and raised.
3: Join Your Squares
Joining your granny squares together requires patience and attention to detail.
To ensure that your seams are neat and even, it's important to follow a methodical approach.
Here's how to join your squares using the single crochet stitch in the back loop only:

Step 1 - Start by picking up your first two granny squares and lay them on top of each other with the right sides facing out. Make a slip knot in your yarn and secure it onto your hook.

Step 2 - Insert your hook into the corner of the granny squares from front to back, yarn over your hook, and pull through to make a slip stitch.
Then insert your hook back into the same corner, from back to front, and make a single crochet.

Step 3 - Next, insert your hook into the back loops of the next two corresponding stitches from front to back.
Yarn over your hook and pull up a loop, then yarn over again and pull through both loops to make a single crochet.

Step 4 - Continue in this way, working single crochet stitches in the back loop only along each side of the squares until you reach the next corner.
When you reach the next corner space, work a single crochet stitch into the corner stitch.

Step 5 - Then, pick up two more squares and work a single crochet into the corner stitch of the second square.
Continue to make single crochets in the back loops to join more squares as you go.

Step 6 - When you reach the end of the seam for the column, make a chain 1, and cut your yarn leaving a tail of a few inches.
Pull the tail through the loop on your hook to secure the stitch. You have now joined two columns together.

Step 7 - Repeat the steps above to attach the third column to the second column, and so on, until you've joined all the columns.
Remember to have the right sides of the squares facing out.

Step 8 - Once you've joined all the columns, repeat the process to join the rows together.
However, when you get to a corner join, don't make a single crochet in the join, instead chain 3, skip over the join and continue working in the back loops.
4: Finish off
Once you have completed all the joins, use a daring needle to weave in the loose ends.
Don't stop here...
Your next 50 crochet projects are ready inside the Pattern Vault - all printable, ad-free, and ready to download instantly.

Related Guides
- Learn how to assemble your squares with our how to join granny squares guide.
- Explore more designs in our ultimate granny square guide.
- Looking for project ideas? Visit our crochet gifts and small projects hub.
Stay Connected
Pin this post - Pin now to and take your skills to the next level.
Leave a comment - We're excited to hear your thoughts! Leave a comment below and let us know what you think.
Share on Instagram or Facebook - Capture the beauty of your finished crochet projects and share it on Instagram or Facebook! Tag us @easybreezycrochet or #ebcrochetcreations so we can see your work!
Copyright Notice - This pattern and its contents are protected by copyright law. It may not be copied, altered, redistributed, resold, translated, or used to produce video tutorials in any format, either in whole or in part.
You are permitted to sell finished items made using this pattern. However, the written pattern itself may not be sold, shared, or distributed in any form. When marketing or displaying your finished items, please photograph your own work and refrain from using any of my original images.
Sharing Guidelines For Roundups - Bloggers you are welcome to include this pattern in roundup posts, as long as you use one photo and link directly back to the original post. For full details, please refer to my Terms of Use page.

Comments
No Comments