Looking for a cute and quick crochet project? Try this small crochet turtle pattern! It's simple, perfect for beginners, and you can complete it in just 1-2 hours.
In this pattern, we will guide you step-by-step through creating your adorable turtle using basic crochet stitches.
It is a perfect project to add a touch of charm to your décor or to gift to someone special.

Table of contents
- About This Small Crochet Turtle Pattern
- Meet Zippy The Small Crochet Turtle
- Crochet Stitches In This Pattern
- Amigurumi Tips for Beginners
- More Fun Crochet Project Ideas
- Type Of Yarn To Use
- Skill Level
- What You Will Need
- Finished Size & Gauge
- Stitches And Abbreviations - US Terms
- Special Stitches
- Pattern Notes
- Instructions
- Easy Amigurumi Patterns
- Easy Go-To Stitch Guide
- Related Guides
- Stay Connected
- Comments
About This Small Crochet Turtle Pattern
- Quick to make - you can make this in about 1-2 hours depending on your skill level.
- Beginner-friendly - This project is great for beginners who are learning basic crochet stitches. It is manageable in size and helps build skills without being overwhelming.
- Its a great gift idea - If you need something quick to crochet as a last minute gift consider this. They also make lovely Valentine's Day gifts for young children.
Meet Zippy The Small Crochet Turtle
In a quiet pond, there was a turtle named Zippy who loved sports. Unlike other turtles, Zippy was super speedy.
He challenged everyone to races and always surprised them with his quickness.
Zippy's favorite race partner was an otter named Ollie. Together, they organized races around the pond, and soon everyone wanted to join in.
One day, an old tortoise named Grandpa Turt told Zippy, "Speed is fun, but remember, it's the joy of racing that matters."
Zippy realized Grandpa Turt was right. From then on, Zippy raced not just to win but to enjoy every moment with his friends.
And so, in that little pond, Zippy taught everyone that racing is about friendship and having a good time.
With each race, Zippy's excitement and spirit shone brighter than ever.
Exclusive Printable Crochet Patterns
Be inspired and keep creating!
Join us in The Pattern Vault, Easy Breezy Crochet's exclusive community.
Connect with other crocheters from all around the world and gain access to an extensive library of printable PDF crochet patterns.
All patterns are ad-free and available to you when you want, allowing you to crochet in your own time. So, if you're stuck on inspiration or on the hunt for you next crochet project, the Pattern Vault is for you!
Crochet Stitches In This Pattern
To make this amigurumi turtle pattern you will need to know some basic crochet stitches like how to make a magic ring, how to chain stitch, and how to single crochet.
Invisible Decrease (invdec)
In this pattern, you will need to do something called 'invisible decreases. Do not worry if you are not sure how to do it! Check out our post on making a single crochet invisible decrease to learn all about it. It is easy, I promise!
Front Loops (FLO) And Back Loops (BLO)
In this pattern, you will need to know the difference between the front or back loops of stitches. If you are not sure what this means, check out our blog post understanding front and back loops in crochet. It explains everything in a super easy way.
Amigurumi Tips for Beginners
New to amigurumi? Check out our blog post for beginner-friendly tips! Learn essential techniques and troubleshoot common challenges to make your crochet projects a success.
More Fun Crochet Project Ideas
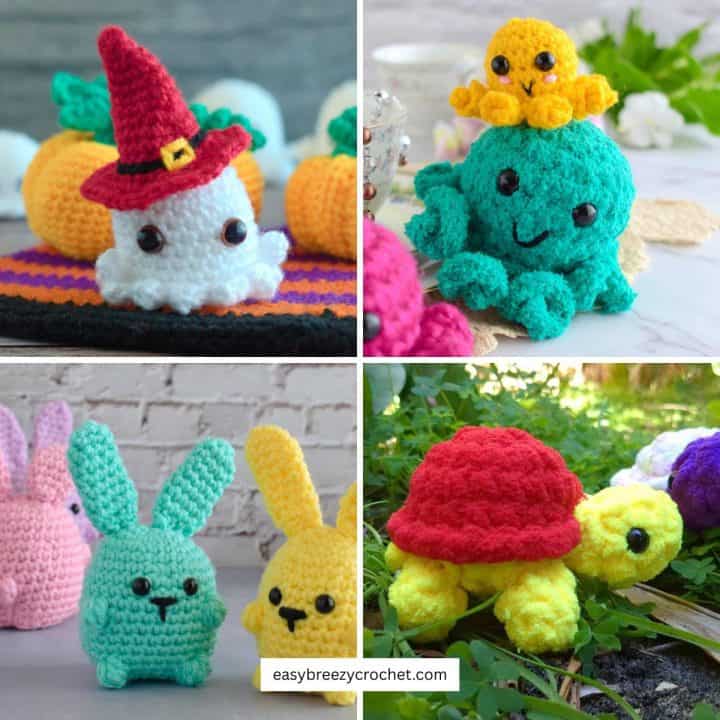
If you like this cute turtle you might also like Wilbur a small crochet bunny, this mini crochet octopus, or this free amigurumi pattern for a sitting crochet angel.
Type Of Yarn To Use
We made this small crochet turtle using a #6 chenille blanket yarn. But you can use a similar, thicker, or lighter-weight yarn to make these larger or smaller.
Skill Level
Beginner
What You Will Need
We used an acrylic/polyester blend, #6 super bulky blanket yarn with 5 WPI (wraps per inch):
- Color A (shell top) -15.3 yards (14 meters) of yarn
- Color B (under shell, head, legs, and tail) - 15.3 yards (14 meters) of yarn
Crochet Hook
- 6mm (J/10)
Notions
- Scissors
- Yarn needle
- 2 x 10 mm safety eyes
- Fiberfill toy stuffing.
Finished Size & Gauge

Finished Size
This small crochet turtle is about 3 inches (7.6 cm) tall and about 4.5 inches (11.4 cm) long using the above yarn weight and hook size.
Gauge
For this project, you don't have to worry about the gauge, but it's crucial to keep the stitches tight.
This stops the stuffing from popping out. If you see the filling showing, try using a smaller hook to make the stitches tighter.
Stitches And Abbreviations - US Terms
- MR - magic ring
- ch - chain stitch
- sc - single crochet
- invdec - invisible decrease - see special stitches below
- sp - space
- st/sts - stitch/stitches
- rpt - repeat
- hk - hook
- YO - yarn over
- FLO - front of loop
- BLO - back of loop
- lp/loops - loop/loops
- [ ] - at the end of a round indicates the number of stitches in that round
Special Stitches
invdec - Insert hk in FLO of next st, then in FLO of next st, YO, pull through 2-lps, YO, pull through 2-lps.
Pattern Notes
- This pattern is worked in a spiral, so do not join the rounds as you go, unless otherwise stated in the pattern.
- Use a stitch maker to mark the first stitch of each round. This will help you keep track of the start and end of a round.
- Ensure the pattern stays accurate by counting the stitches in each round.
Instructions
Head - Round One
Round 1, color B - Make 6 single crochet into a magic ring, and pull the yarn tail tight to close the circle. [6 single crochet in this round.]
Abbreviated version
Rnd 1, col B - 6sc in MR. [6sc]
Round Two
Round 2 - *1 single crochet in the next stitch, then make 2 single crochet in the next, repeat from * 3 times. [9 single crochet in this round.]
Abbreviated version
Rnd 2 - *1sc in next st, 2sc in next, rpt from * 3 times. [9sc]
Round Three
Round 3 - Make 1 single crochet in each of the next 9 stitches. [9 single crochet in this round.]
Abbreviated version
Rnd 3 - 1sc in next 9-sts. [9sc]
Attach safety eyes - Position the eyes between rounds 2 and 3 on opposite sides of the head.
Round Four
Round 4 - Make 1 single crochet in the next stitch, then make an invisible decrease, and repeat from * 3 times. [ 6 single crochet in this round.]
Abbreviated version
Rnd 4 - 1sc in next st, invdec, rpt from * 3 times. [6sc]
Round Five
Round 5 - Make 1 single crochet in the next 6 stitches, cut yarn, leave a long yarn tail for sewing, and fasten off. [6 single crochet in this round.]
Abbreviated version
Rnd 5 - 1sc in next 6-sts, cut yarn, leave a long yarn tail for sewing, and fasten off. [6sc]
Stuff - Fill the head with stuffing. Then thread the yarn tail onto a tapestry needle and sew the head opening closed, leaving the yarn tail uncut for sewing to the body later.

Shell Top - Round One
Round 1, color A - Make 12 single crochet in a magic ring, and pull the yarn tail tight to close the ring. [12 single crochet in this round.]
Abbreviated version
Rnd 1, col A - 12sc in magic ring. [12sc]
Round Two
Round - *1 single crochet in the next stitch, then make 2 single crochet in the next, repeat from * 6 times. [18 single crochet in this round.]
Abbreviated version
Rnd 2 - *1sc in next st, 2sc in next, rpt from * 6 times. [18sc]
Rounds Three to Four
Rounds 3-4 - Make 1 single crochet in the next 18 stitches. [18 single crochet in this round.]
Abbreviated version
Rnds 3-4 - 1sc in next 18-sts. [18sc in each rnd]
✨ You're almost there! ✨
To unlock the final steps and complete your pattern, create a free account with Grow.me. below.
Make sure to tick the box to subscribe to our newsletter and stay up to date with the latest patterns, tips, and more!
Once you're signed up, you'll get instant access to finish your project and enjoy exclusive content in the future.
Already signed up? Hit the button below and select 'Switch to Log In' to pick up where you left off and finish your project!
Round Five
Round 5 - Make 1 single crochet in the front loops of the 18 stitches in round 4, cut yarn, leave a tail, and fasten off. [18 single crochet in this round.]
Abbreviated version
Rnd 5 - 1sc in FLO of 18-sts of rnd 4, cut yarn, leave a tail, and fasten off. [18sc]

Under Shell - Round Six

Round 6, Color B - Make 1 single crochet in the back loops of the 18 stitches of round 4. [18 single crochet in this round.]
Abbreviated version
Rnd 6, col B - 1sc in BLO of the 18-st of rnd 4. [18sc]
Round Seven
Round 7 - *1 single crochet in the next stitch, then make an invisible decrease, and repeat from * 6 times. [12 single crochet in this round.]
Abbreviated version
Rnd 7 - *1sc in next st, invdec, rpt from * 6 times. [12sc]
Round Eight
Round 8 - Make * an invisible decrease, repeat from * 6 times, cut yarn, leave a tail for sewing, and fasten off. [6 single crochet in this round.]
Abbreviated version
Rnd 8 - *invdec, rpt from * 6 times, cut yarn, leave a tail for sewing, fasten off. [6sc]

Stuff - Fill the shell with fiberfill stuffing.
Close opening - Thread the yarn tail onto a tapestry needle and sew the opening closed. To close the opening, slip the needle under each of the front loops of the stitches in the last round, pull tight to close, and weave the yarn tail inside the shell.

Attach head - Thread the yarn tail from the head onto a tapestry needle. Position the head near the yarn tail of color A (top of shell).
Sew the base of the head to the underside of the shell along a round 6 (the first round of the undershell) and fasten off.
Sew the head to the shell - Thread the yarn tail of color A onto the needle, insert it into the shell, and draw the yarn up between rounds 3 and four of the shell directly behind the head.
Next, push the head back towards the shell insert the needle into the head catching a few stitches, and pull it tight so the head is drawn back to the shell, make a few more stitches to secure the head, and fasten it off.
Tail
Leave a long starting yarn tail. On the opposite side to the head, slip stitch yarn color B into a stitch in round 6 (the 1st round of the undershell), chain 4, cut yarn leave a long tail for sewing, and fasten off.
Thread the end yarn tail onto a needle and insert the needle into the same stitch as the starting slip stitch, this will form a loop for the tail.
Weave in the end of the yarn tail, and tie the two ends on the inside of the shell to fasten it off.

Legs (Make 4) - Round One
Round 1, Color B - Chain 2, make 5 single crochet in the 2nd chain from the hook. [5 single crochet in this round.]
Abbreviated version
Rnd 1, col B - ch2, 5sc in 2nd ch from hk. [5sc]
Round Two
Round 2 - Make 1 single crochet in each of the next 5 stitches. [5 single crochet in this round.]
Abbreviated version
Rnd 2 - 1sc in next 5-sts. [5sc]
Round Three
Round 3 - Make 1 single crochet in the next 5 stitches, slip stitch into the next stitch, cut yarn leave a long tail for sewing. [5 single crochet in this round.]
Abbreviated version
Rnd 3 - 1sc in next 5-sts, sl st into next st, cut yarn leave a long tail for sewing. [5sc]
Stuff - lightly stuff the leg with a small amount of filling.
This completes one leg. Repeat rounds 1 - 3 to make 3 more.

Attach legs - Thread the yarn tail onto a needle, and sew the opening closed.
Sew the legs to the underside of the shell (color B side). Position two legs near the neck on opposite sides and two legs at the rear near the tail on opposite sides.
Don't stop here...
Your next 50 crochet projects are ready inside the Pattern Vault - all printable, ad-free, and ready to download instantly.
Easy Amigurumi Patterns
- Cute Amigurumi Patterns You Can Make
- Chubby Chick - Crochet Chicken Pattern
- Cute Crochet Bat Pattern - (Free Halloween Amigurumi, Small & Easy)
- Crochet Mini Octopus Pattern


Thank you for crocheting along with me to make this cute small crochet turtle! I hope you had fun making it.
I'd love to hear about your experience. Did you face any challenges? Learn something new? Please share in the comments below. Your thoughts can help me write better patterns and others who are also trying this pattern.
If you enjoyed making this crochet turtle pattern, consider saving this post by pinning it to your Pinterest board.
That way, more people can discover and enjoy this crochet project!

Easy Go-To Stitch Guide
New to crochet? Make every stitch count! Grab this free crochet cheat sheet with easy-to-follow guides for basic stitches (US terms) and more-perfect for tackling any pattern with confidence.
Download your free Crochet Cheat Sheet (printable PDF)
Print it, save it on your phone, or keep it right next to you while crocheting.
Related Guides
- Discover more quick makes in our crochet gifts and small projects hub.
- Explore themed ideas in our seasonal crochet projects hub.
Stay Connected
Pin this post - Pin now to and take your skills to the next level.
Leave a comment - We're excited to hear your thoughts! Leave a comment below and let us know what you think.
Share on Instagram or Facebook - Capture the beauty of your finished crochet projects and share it on Instagram or Facebook! Tag us @easybreezycrochet or #ebcrochetcreations so we can see your work!
Copyright Notice - This pattern and its contents are protected by copyright law. It may not be copied, altered, redistributed, resold, translated, or used to produce video tutorials in any format, either in whole or in part.
You are permitted to sell finished items made using this pattern. However, the written pattern itself may not be sold, shared, or distributed in any form. When marketing or displaying your finished items, please photograph your own work and refrain from using any of my original images.
Sharing Guidelines For Roundups - Bloggers you are welcome to include this pattern in roundup posts, as long as you use one photo and link directly back to the original post. For full details, please refer to my Terms of Use page.


Suzie says
These were so fun to make and the pattern is so easy to follow
Elaine says
Made this for my daughter and she loves it. Thank you so much for such a lovely pattern.