This easy amigurumi pumpkin is a quick crochet project that's perfect for fall decor and a great way to use up scrap yarn

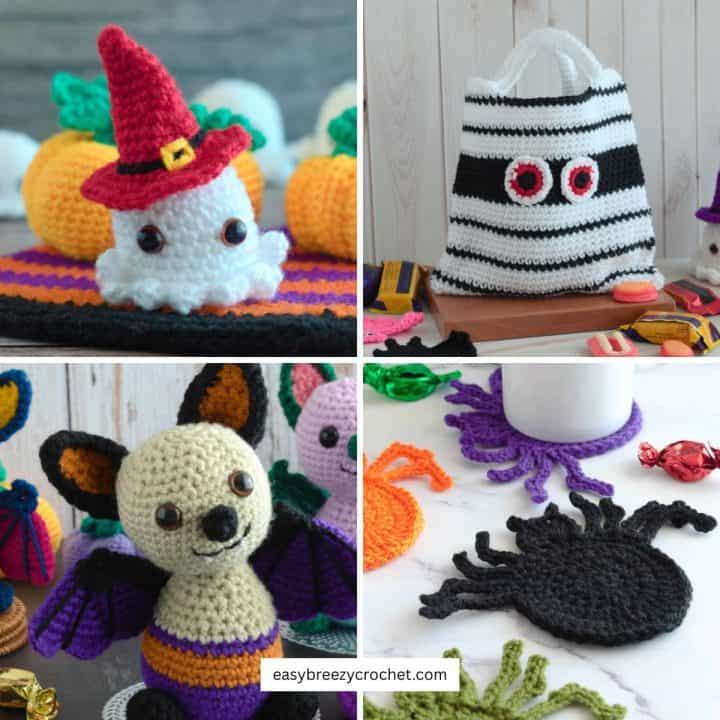
Find more themed designs in our Halloween crochet projects.
Table of contents
- About This Mini Amigurumi Pumpkin Pattern
- What Type Of Yarn To Use
- What size crochet hook for pumpkins?
- Crochet Stitches
- How to Make Crochet Pumpkins in Different Sizes
- Crochet Pumpkin Decor Ideas
- Amigurumi Tips for Beginners
- Skill Level
- What You Will Need
- Finished Size
- Gauge
- Stitches and Abbreviations Used - US Terms
- Pattern Notes
- Instructions For This Easy Amigurumi Pumpkin
- FAQ: Amigurumi Pumpkin (Crochet Pattern)
- More Quick Crochet Projects
- Easy Go-To Stitch Guide
- Related Guides
- Stay Connected
- Comments
About This Mini Amigurumi Pumpkin Pattern
- You can make this cute crochet pumpkin in different sizes by using different yarn weights.
- This small crochet pumpkin features a wide-based stem for the top and a small circular crochet end for the bottom. These are the perfect finish for your pumpkin because they hide the holes on the top and bottom of the pumpkin.
- The pumpkin is made in a spiral, so use a stitch marker to mark the first stitch of every round and count the stitches as you go.
- If you like this crochet pumpkin pattern you might also like these pumpkin coasters.
Exclusive Printable Crochet Patterns
Be inspired and keep creating!
Join us in The Pattern Vault, Easy Breezy Crochet's exclusive community.
Connect with other crocheters from all around the world and gain access to an extensive library of printable PDF crochet patterns.
All patterns are ad-free and available to you when you want, allowing you to crochet in your own time. So, if you're stuck on inspiration or on the hunt for you next crochet project, the Pattern Vault is for you!
What Type Of Yarn To Use
You can use almost any kind of yarn for amigurumi, but it is best to a type that does not stretch too much.
This way, you will create a firm fabric that keeps the stuffing inside.
The thickness of the yarn you choose will change how big or small your item turns out.
Chunky and bulky weight yarns make things quite large, while worsted weight yarn makes them somewhat medium size and lighter ones like DK and sports yarn make them smaller.
When selecting your yarn, do not use the suggested hook size. Instead, choose a hook size that is one or two sizes smaller. This way, your stitches will be tight and neat.
What size crochet hook for pumpkins?
If you are a beginner and just starting out learning amigurumi you might want to make the pattern as stated using a 3.5mm hook.
If you feel up for a little challenge, use a 3.0mm or 2.5mm hook instead and the same yarn weight as stated in the pattern.
The pumpkin will be smaller and it will help you become comfortable with working with smaller pieces of amigurumi.
Crochet Stitches
You will need to know a few basic crochet stitches like chain stitch, single crochet, half double crochet and slip stitch to make this amigurumi pumpkin.
Single Crochet Decrease (scdec or sc2tog)
This pattern uses single crochet decrease. If you are a new crocheter and do not know how to make this stitch check out our easy guide on how to sc2tog!
Front Loops (FLO) And Back Loops (BLO)
In this pattern, you will need to know the difference between the front or back loops of stitches. If you are not sure what this means, check out our blog post understanding front and back loops in crochet. It explains everything in a super easy way.
How to Make Crochet Pumpkins in Different Sizes
You can make crochet pumpkins in different sizes by adjusting your yarn weight, hook size, or number of rounds. Thicker yarn and larger hooks create bigger pumpkins, while thinner yarn produces smaller, mini versions.
Crochet Pumpkin Decor Ideas
Crochet pumpkins are super versatile and can be styled in lots of fun ways around your home.
- Try placing a mix of small and large pumpkins on a table or shelf to create a cozy fall display.
- You can also pair them with candles, dried leaves, or rustic baskets for a seasonal centerpiece.
- For a more playful look, use different yarn colors like orange, cream, green, or even pastel shades to match your decor style.
- Crochet pumpkins also work great as garlands, mantel decorations, or handmade gifts for friends and family during the autumn season.
Amigurumi Tips for Beginners
New to amigurumi? Check out our blog post for beginner-friendly tips! Learn essential techniques and troubleshoot common challenges to make your crochet projects a success.
Skill Level
Beginner
What You Will Need
Yarn
#3 light (light worsted, DK, 8ply) 100% Acrylic, or similar yarn.
- Pumpkin - about 18.5 yards (17 meters) of orange yarn.
- Stem and tendril - 8.2 yards (7.5 meters) of green yarn.
- Leaf - about 3.2 yards (3 meters) of green yarn.
- Pumpkin end - about 0.54 yards (0.5 meters) of green yarn.
Crochet Hook
- 3.5 mm (E-4)
- If using another yarn weight, use a hook 1 -2 sizes smaller than recommended for the yarn.
Notions
- Scissors
- Yarn needle
- Fiberfill for stuffing
Finished Size

The finished size of these pumpkins is about 4 inches (10 cm) in diameter and about 3 inches (7.6 cm) tall to the top of the pumpkin stem with a 3.5mm sized hook.
This pattern will work well with other yarn weights or hooks, but note that they can end up smaller or larger depending on the yarn weight used.
Gauge
The gauge is not so important for this pattern.
Stitches and Abbreviations Used - US Terms
- MR - magic ring
- ch - chain
- sc - single crochet
- hdc - half double crochet
- sl st - slip stitch
- hk - hook
- FLO - front loop only
- sc2tog - single crochet 2 together
- st/sts - stitch/stitches
- rpt - repeat
- YO - yarn over
Pattern Notes
- This amigurumi pumpkin is crocheted in a spiral, so do not join the rounds.
- Use a stitch marker to make the first stitch of each round as you go.
Instructions For This Easy Amigurumi Pumpkin
Pumpkin
Round One
Round 1, orange yarn - Work 6 single crochet stitches into a magic ring. [6 single crochets in this round]
Abbreviated version
Round 1, orange yarn - 6sc in MR. [6sc]
Round Two
Round 2 - Work 2 single crochets in each stitch.
[You should now have 12 single crochets in this round.]
Abbreviated version
Round 2 - 2sc in each st. [12sc]
Round Three
Round 3 - (Work 2 single crochets in the next stitch, and 1 single crochet in the next), repeat the instructions in the brackets 6 times.
[You should now have 18 single crochet in this round]
Abbreviated version
Round 3 - (2sc in next st, 1sc in next) rpt 6 times. [18sc]
Round Four
Round 4 - (Work 2 single crochets in the next stitch, and 1 single crochet in each of the next 2 stitches), repeat the instructions in the brackets 6 times.
[You should now have 24 single crochet in this round.]
Abbreviated version
Round 4 - (2sc in next st, 1sc in next 2-sts) rpt 6 times. [24sc]
Round Five
Round 5 - (Make 2 single crochets in the next stitch, then 1 single crochet in each of the next 3 stitches), repeat the instructions in the brackets 6 times.
[There should be 30 single crochet this round.]
Abbreviated version
Round 5 - (2sc in next st, 1sc in each of the next 3-sts) rpt 6 times. [30sc
Round Six
Round 6 - (Make 2 single crochets in the next stitch, then 1 single crochet in each of the next 4 stitches), repeat the instructions in the brackets 6 times.
[There should be 36 single crochet this round.]
Abbreviated version
Round 6 - (2sc in next st, 1sc in each of the next 4-sts) rpt 6 times. [36sc]
✨ You're almost there! ✨
To unlock the final steps and complete your pattern, create a free account with Grow.me. below.
Make sure to tick the box to subscribe to our newsletter and stay up to date with the latest patterns, tips, and more!
Once you're signed up, you'll get instant access to finish your project and enjoy exclusive content in the future.
Already signed up? Hit the button below and select 'Switch to Log In' to pick up where you left off and finish your project!
Round Eight
Round 8 - (Make 2 single crochets in the next stitch, then 1 single crochet in each of the next 6 stitches), repeat the instructions in the brackets 6 times.
[There should be 48 single crochet this round.]
Abbreviated version
Round 8 - (2sc in next st, 1sc in each of the next 6-sts) rpt 6 times. [48sc]
Round Nine

Round 9 - (Make 2 single crochets in the next stitch, then 1 single crochet in each of the next 7 stitches), repeat the instructions in the brackets 6 times.
[There should be 54 single crochet this round.]
Abbreviated version
Round 9 - (2sc in next st, 1sc in each of the next 7-sts) rpt 6 times. [54sc]
Rounds Ten - Twenty
Rounds 10-20 - Single crochet in each stitch. [54 single crochets in each of these rounds.]
Abbreviated version
Rounds 10-20 - Sc in each st. [54sc]

Round Twenty One
Round 21 -(Single crochet 2 together - see special instructions above, then single crochet in each of the next 7 stitches), repeat the instructions in the brackets 6 times.
[You should have 48 single crochets in this round.]
Abbreviated version
Round 21 - (sc2tog, 1sc in each of the next 7-sts) rpt 6 times. [48sc]
Round Twenty Two
Round 22 -(Single crochet 2 together, then single crochet in each of the next 6 stitches), repeat the instructions in the brackets 6 times.
[You should have 42 single crochets in this round.]
Abbreviated version
Round 22 - (sc2tog, 1sc in each of the next 6-sts) rpt 6 times. [42sc]
Round Twenty Three
Round 23 -(Single crochet 2 together, then single crochet in each of the next 5 stitches), repeat the instructions in the brackets 6 times.
[You should have 36 single crochets in this round.]
Abbreviated version
Round 23 - (sc2tog, 1sc in each of the next 5-sts) rpt 6 times. [36sc]
Round Twenty Four
Round 24 -(Single crochet 2 together, then single crochet in each of the next 4 stitches), repeat the instructions in the brackets 6 times.
[You should have 30 single crochets in this round.]
Abbreviated version
Round 24 - (sc2tog, 1sc in each of the next 4-sts) rpt 6 times. [30sc]
Round Twenty Five
Round 25 - (Single crochet 2 together, then single crochet in each of the next 3 stitches), repeat the instructions in the brackets 6 times.
[You should have 24 single crochets in this round.]
Abbreviated version
Round 25 - (sc2tog, 1sc in each of the next 3-sts) rpt 6 times. [24sc]
Round Twenty Six

Round 26 - (Single crochet 2 together, then single crochet in each of the next 2 stitches), repeat the instructions in the brackets 6 times.
[You should have 18 single crochets in this round.]
Abbreviated version
Round 26 - (sc2tog, 1sc in each of the next 2-sts) rpt 6 times. [18sc]
Fill with stuffing.
Round Twenty Seven
Round 27 - (Single crochet 2 together, then single crochet in the next stitch), repeat the instructions in the brackets 6 times.
[You should have 12 single crochets in this round.]
Abbreviated version
Round 27 - (sc2tog, 1sc in the next sts) rpt 6 times. [12sc]
Round Twenty Eight
Round 28 -(Single crochet 2 together), repeat the instructions in the brackets 6 times.
[You should have 6 single crochets in this round.]
Abbreviated version
Round 28 - (sc2tog) rpt 6 times. [6sc]
Cut yarn, leaving a long tail about 23 inches (60cm) for shaping the pumpkin segments.
Making The Pumpkin Ribs

To make the pumpkin sections, follow these steps:
- Thread the yarn tail to the yarn needle.
- Start by inserting the needle through the bottom center of the pumpkin and bring it up to the middle of the top.
- Press the top and bottom of the pumpkin together with your fingers to create a small dent in the center of both sides. Pull the yarn tight.
- Now, wrap the yarn around the side of the pumpkin and insert the needle back down from the bottom center to the middle of the top, while keeping that center dent intact.
- Pull the yarn to create a shallow or deep groove line on the side; this forms the first rib line.
- Keep making each rib line by sewing through the center of the pumpkin and pulling the yarn tight each time.
- Use the crochet increase lines as a guide to create 6 even ribs around the pumpkin.
- Once you have made the last section, secure the yarn and tie it off.
Stem and Tendril
Round One
Round 1, green yarn - Work 8 single crochet into a magic ring.
[8 single crochets in this round.]
Abbreviated version
Round 1, green yarn - 8sc into MR, tighten magic ring. [8sc]
Rounds Two - Six
Rounds 2-6 - Single crochet into each stitch.
[8 single crochets in each round.]
Abbreviated version
Rounds 2 - 6 - Sc in each st. [8sc]
Rounds Seven
Round 7 - Work 2 half double crochets into each stitch, then slip the stitch into the 1st stitch.
[16 half-double crochets in this round.]
Abbreviated version
Round 7 - 2hdc in each st, sl st into 1st st. [16hdc]
Push the yarn tail into the cavity.
Rounds Eight
Round 8 (Work stitches for this round in the front loops only) - *(Make 1 single crochet, chain 1, and 1 half double crochet) in same stitch, repeat the instructions in the brackets 16 times, then 1sc into 1st st.
Abbreviated version
Round 8 (Work stiches in the FLO) - (1sc, 1ch, 1hdc) in same st, rpt 16 times, then 1sc into 1st st.
Round Nine
Round 9 (making the tendril) - Chain 21, then make 2 single crochets in the 2nd chain from the hook, then make 2 single crochets in each of the next 20 chains, chain 1. Cut yarn and fasten off, leaving a long tail yarn for attaching.
Abbreviated version
Round 9 (making the tendril) - Ch21, 2sc in 2nd ch from hk, 2sc in each st down next 20-sts, ch1.

Cut yarn and fasten off, leaving a long tail yarn for attaching.
Thread the yarn tail onto a needle secure the vine end to the base of the stem, and then tack into place on the underside.
Then sew the stem to the top of the pumpkin.
Pumpkin Leaf

You can find written instructions for the pumpkin leaf on the printable pattern below.
If you need a step-by-step guide, go to our pumpkin leaf pattern page.
Sew the leaf to the base of the pumpkin stem.
Pumpkin End
Round One

Round 1, grey/sliver - Work 6 single crochet stitches into a magic ring.
[6 single crochets in this round.]
Abbreviated version
Round 1, grey/sliver - 6sc in MR. [6sc]
Round Two
Round 2 - Work 2 single crochets in each stitch.
[You should now have 12 single crochets in this round.]
Abbreviated version
Round 2 - 2sc in each st, sl st into 1st to join. [12sc] Cut yarn and fasten off, leaving a long tail yarn for attaching.
Sew the pumpkin end to the underside of the pumpkin to cover the center indentation.
Don't stop here...
Your next 50 crochet projects are ready inside the Pattern Vault - all printable, ad-free, and ready to download instantly.
FAQ: Amigurumi Pumpkin (Crochet Pattern)
Yes, this amigurumi pumpkin pattern is beginner-friendly and uses basic stitches like single crochet, increases, and decreases. It's a great project for those new to amigurumi or looking for a quick fall crochet idea.
Cotton or acrylic yarn both work well for crochet pumpkins. Cotton yarn gives better structure and stitch definition, while acrylic yarn creates a softer, more plush look.
The finished size will depend on your yarn weight and hook size, but most small amigurumi pumpkins are palm-sized. You can make larger pumpkins by using thicker yarn or a bigger hook.
Polyester fiberfill is the most common stuffing because it is lightweight and easy to shape. You can also use yarn scraps or fabric scraps as an alternative.
Yes, crochet pumpkins are perfect for fall and Halloween decor. They are reusable, customizable, and can be displayed on shelves, tables, or as part of seasonal arrangements.
Absolutely. You can change the size, colors, and even add details like leaves, vines, or stems to create different pumpkin styles.
More Quick Crochet Projects


Easy Go-To Stitch Guide
New to crochet? Make every stitch count! Grab this free crochet cheat sheet with easy-to-follow guides for basic stitches (US terms) and more-perfect for tackling any pattern with confidence.
Download your free Crochet Cheat Sheet (printable PDF)
Print it, save it on your phone, or keep it right next to you while crocheting.
Related Guides
- Explore more quick projects in our crochet gifts and small projects.
- Discover decorative projects in our crochet home and storage.
Stay Connected
Pin this post - Pin now to and take your skills to the next level.
Leave a comment - We're excited to hear your thoughts! Leave a comment below and let us know what you think.
Share on Instagram or Facebook - Capture the beauty of your finished crochet projects and share it on Instagram or Facebook! Tag us @easybreezycrochet or #ebcrochetcreations so we can see your work!
Copyright Notice - This pattern and its contents are protected by copyright law. It may not be copied, altered, redistributed, resold, translated, or used to produce video tutorials in any format, either in whole or in part.
You are permitted to sell finished items made using this pattern. However, the written pattern itself may not be sold, shared, or distributed in any form. When marketing or displaying your finished items, please photograph your own work and refrain from using any of my original images.
Sharing Guidelines For Roundups - Bloggers you are welcome to include this pattern in roundup posts, as long as you use one photo and link directly back to the original post. For full details, please refer to my Terms of Use page.


Comments
No Comments