Learn how to crochet this simple mitered granny square. This granny square is a great one to have fun with the colors because these squares look great in pastels, muted, or dark colors.

This square is featured in our granny square sizes and uses guide, which breaks down all common sizes and their uses.
Table of contents
- Mix And Match Details
- What Is A Mitered Granny Square
- Tips For Making Granny Squares
- Skill Level
- What You Will Need
- Finished Size
- Stitches and Abbreviations Used - US Terms
- Pattern Notes
- Mitered Granny Square Step-By-Step Phot Tutorial
- Finishing
- Easy Ways To Join Granny Squares Together
- Related Guides
- Stay Connected
- Comments
Mix And Match Details
- Yarn weight: #3 Light, with12 WPI (wraps per inch)
- Hook size: 5mm (H/5)
- Finished size: 6 x 6 inches (15 x 15 cm)
- Number of rounds: 9
- Stitch count per side: total 23 stitches (18 stitches + 5 chain 1 spaces) and chain 2 corners
Exclusive Printable Crochet Patterns
Be inspired and keep creating!
Join us in The Pattern Vault, Easy Breezy Crochet's exclusive community.
Connect with other crocheters from all around the world and gain access to an extensive library of printable PDF crochet patterns.
All patterns are ad-free and available to you when you want, allowing you to crochet in your own time. So, if you're stuck on inspiration or on the hunt for you next crochet project, the Pattern Vault is for you!
What Is A Mitered Granny Square
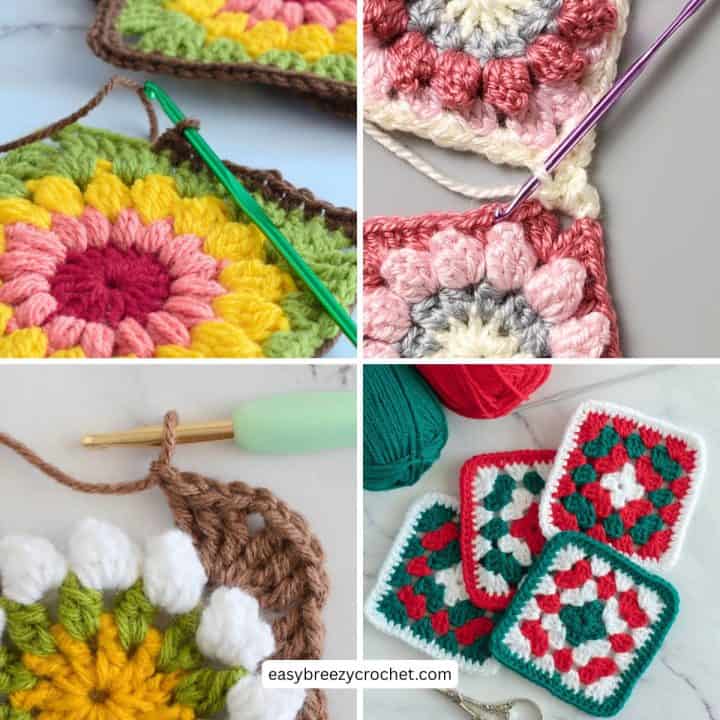
This mitered granny square pattern showcases a small two-round granny square nestled in the corner, it is surrounded by rounds of colorful colors that are worked on two sides of the square, creating a distinctive and sophisticated mitered effect. The design is then framed with a single-color border.
Tips For Making Granny Squares
Tighten the starting ring - If you have used a magic circle to start the granny square, pull it tight to close the center, and securely weave in the end to ensure it does not work itself open in the future.
Be consistent with your tension - Having an even stitch tension will make the square look good, and the squares will be relatively consistent in size.
Count stitches - Regularly count your stitches to catch mistakes early.
Choose the right yarn - When learning to crochet, choose a smooth, medium-weight yarn it will be easier for you to identify stitches and easier to work with.
Block Your Squares - Block your finished squares for a neater, more professional look.
Weave in ends - Weave in yarn ends as you go to save time later.
Read patterns carefully - When crocheting a new granny square pattern for the first time, take your time and read the pattern before starting. This will help you become aware of any new stitches or terms you may need to know before starting the pattern.
Don't stress mistakes - Mistakes happen, don't be afraid to undo and redo a few stitches or rounds if they happen.
Yarn color change - When making the color changes, pull the new color through the last two loops of the last stitch of the round - by doing this, the pattern will flow like it would when using a single color.

Skill Level
This mitered granny square is easy to make but you will need to know how to change colors in crochet.
What You Will Need
Yarn
We used a #3 Light (light worsted, DK, 8ply) yarn weight, with 12 WPI (wraps per inch) in the following colors:
- Color A - amber
- Color B - blue
- Color C - green
- Color D - sand
- Color E - cream
Hook
- A 5mm (H/5) hook was used to make the square.
Note - You can use other colors and yarn weights and use the hook size recommended on the yarn label.
Notions
- Scissors
- Yarn needle
Finished Size

This is a medium-sized granny square that measures about 6 inches (15 cm) unblocked, using the yarn weight and hook size mentioned above.
Stitches and Abbreviations Used - US Terms
- ch - chain
- hdc - half double crochet
- dc - double crochet
- prv - previous
- sl st - slip stitch
- st/sts - stitch/stitches
- sp/sps - space/spaces
- rnd - round
- rpt - repeat
- [ ] - at the end of a round, indicates the number of stitches in that round
Pattern Notes
- The foundation on this square is made with a chain 4 ring, however, the foundation can also be started with a magic ring.
- When making the color changes, pull the new color through the last two loops of the last stitch of the round - by doing this, the pattern will flow like it would when using a single color.
- image
Mitered Granny Square Step-By-Step Phot Tutorial
The first two rounds create the square in the corner of this mitered granny square.
Foundation, Color A - Chain 4, slip stitch into the 1st chain to join.
Abbreviated version
Foundation, color A - Ch4, sl st in 1st ch to join.
Round One

Round 1 - Chain 3 (this counts as a double crochet stitch), then make 2 double crochets into the ring, then chain 2, next * make 3 double crochets and chain 2 into the ring and repeat the instructions from * 2 more times, then make a half double crochet (this will count as a chain 2 space) into the top of the chain 3 to join. turn the work. [You should have 12 double crochets and 4 x chain 2 spaces.]
Abbreviated version
Rnd 1 - Ch3 (counts as dc), 2dc into the ring, ch2, * 3dc, ch2, rpt from * 2 more times, hdc (counts as a ch-2 sp) into the top of ch-3 to join, turn. [12dc, 4 x ch-2sps]
Round Two

Round 2 - Chain 3, then make 2 double crochets into the chain 2 space, then chain 1, next make * (3 double crochets, chain 2 and 3 double crochets) into the next chain 2 space, chain 1, repeat the pattern from * 2 more times, then make 3 double crochets into the next chain 2 space, then chain 2, then make a half double crochet (which counts as chain 2) into the top of the chain 3 to join, turn the work.
[You should have 24 double crochets, and 4 x chain 1 spaces, and 4 x chain 2 spaces]
Abbreviated version
Rnd 2 - Ch3, 2dc into the ch-2 sp, ch1, * (3dc, ch2, 3dc) into the next ch-2 sp, ch1, rpt from * 2 more times, 3dc into next ch-2 sp, ch2, hdc (counts as ch-2) in top of ch-3 to join, cut yarn and fasten off, turn. [24dc and 4 x ch-1 sps, and 4 x ch-2 sps]
✨ You're almost there! ✨
To unlock the final steps and complete your pattern, create a free account with Grow.me. below.
Make sure to tick the box to subscribe to our newsletter and stay up to date with the latest patterns, tips, and more!
Once you're signed up, you'll get instant access to finish your project and enjoy exclusive content in the future.
Already signed up? Hit the button below and select 'Switch to Log In' to pick up where you left off and finish your project!
Round Three
Rounds 3 - 8 form the miter of this square and the rounds are worked on two sides of the square.

Round 3, color B - Chain 3 (this counts as double crochet), then make 2 double crochets in the chain 2 space, chain 1, then make 3 double crochets in the chain 1 space, then make (3 double crochets, chain 2, 3 double crochets) in the chain 2 space, then chain 1, then make 3 double crochets in the chain 1 space, then make 3 double crochets in the chain 2 space and turn the work. [You should have 18 double crochets and 4 x chain 1 spaces, and 1 x chain 2 space]
Abbreviated version
Rnd 3, color B - Ch3 (counts as a dc), 2dc in ch-2 sp, ch1, 3dc in ch-1 sp, (3dc, ch2, 3dc) in ch-2 sp, ch1, 3dc in ch-1 sp, 3dc in ch-2 sp, turn. [18dc and 4 x ch-1 sps, 1 x ch-2 sp]
Round Four
Round 4 - Chain 4 (this counts as 1 double crochet and a chain 1), make (3 double crochet and chain 1) in the next 2 chain 1 spaces, then make (3 double crochets, chain 2 and 3 double crochets) in the chain 2 space, chain 1, the make (3 double crochets and chain 1) in the next 2 chain 1 spaces, make 1 double crochet on top of the chain 3 of the previous round, turn the work. [There should be 20 double crochets, 6 x chain 1 spaces, and 1 x chain 2 space in this round.]
Abbreviated version
Rnd 4 - Ch4 (counts as 1dc and ch1), (3dc, ch1) in the next 2 ch-1 sps, (3dc, ch2, 3dc) in ch-2 sp, ch1, (3dc, ch1) in the next 2 ch-1 sps, 1dc in top of ch-3 of prv rnd, turn. [20dc and 6 x ch-1 sps, and 1 x ch-2 sp]
Round Five

Round 5, color C - Chain 3 (this counts as double crochet), make 2 double crochets in the same space, then chain 1, next make (3 double crochets and chain 1) in the next 2 chain 1 spaces, then make (3 double crochets, chain 2 and 3 double crochets) in the chain 2 space, and chain 1, then make (3 double crochets and chain 1) in the next 2 chain 1 spaces, then make 3 double crochets in the chain 2 space, turn your work.
[You should have 24 double crochets, 6 x chain 1 spaces, and 1 x chain 2 space.]
Abbreviated version
Rnd 5, color C - Ch3 (counts as dc), 2dc in same sp, ch1, (3dc, ch1) in the next 2 ch-1 sps, (3dc, ch2, 3dc) in ch-2 sp, ch1, (3dc, ch1) in the next 2 ch-1 sps, 3dc in ch-2 sp, turn. [24dc, 6 x ch-1 sp, 1 x ch-2 sp]
Round Six
Round 6 - Chain 4 (this counts as 1 double crochet and a chain 1), make (3 double crochets and chain 1) in the next 3 chain 1 spaces, then make (3 double crochets, chain 2, and 3 double crochets) in the chain 2 space, then chain 1, make (3 double crochets and chain 1) in the next 3 chain 1 spaces, then make 1 double crochet on top of the chain 3 of the previous round, turn the work. [You should have 26 double crochets, 8 x chain-1 spaces, and 1 x chain 2 spaces.]
Abbreviated version
Rnd 6 - Ch4 (counts as 1dc and ch1), (3dc, ch1) in the next 3 ch-1 sps, (3dc, ch2, 3dc) in ch-2 sp, ch1, (3dc, ch1) in the next 3 ch-1 sps, 1dc in top of ch-3 of prv rnd, turn. [26dc, 8 x ch-1 sps, 1 x ch-2 sp]
Round Seven

Round 7, color D - Chain 3 (this counts as double crochet), make 2 double crochets in the chain 1 space, then chain 1, make (3 double crochets and chain 1) in the next 3 chain 1 spaces, then make (3 double crochets, chain 1 and 3 double crochets) in the chain 2 space, then chain 1, then make (3 double crochets and chain 1) in the next 4 chain 1 spaces, and turn the work. [You should have 30 double crochets, 8 x chain 1 spaces, and 1 x chain 2 space.]
Abbreviated version
Rnd 7, color D - Ch3 (counts as dc), 2dc in ch-1 sp, ch1, (3dc, ch1) in the next 3 ch-1 sps, (3dc, ch2, 3dc) in ch-2 sp, ch1, (3dc, ch1) in the next 4 ch-1 sps, turn. [30dc, 8 x ch-1 sps, and 1 x ch-2 sp]
Round Eight

Round 8 - Chain 4 (this counts as 1 double crochet and chain 1), then make (3 double crochets and chain 1) in the next 4 chain 1 spaces, then make (3 double crochets, chain 2, and 3 double crochets) in the chain 2 space, then chain 1, then make (3 double crochets and chain 1) in the next 4 chain 1 spaces, then make 1 double crochet in top of the chain 3 of the previous round, turn the work. [You should have 32 double crochets, 10 x chain 1 spaces, and 1 x chain 2 space.]
Abbreviated version
Rnd 8 - Ch4 (counts as 1dc and ch1), (3dc, ch1) in the next 4 ch-1 sps, (3dc, ch2, 3dc) in ch-2 sp, ch1, (3dc, ch1) in the next 4 ch-1 sps, 1dc in top of ch-3 of prv rnd, turn. [32dc, and 10 x ch-1 sps, and 1 x ch-2 sp]
Round Nine
Border this is worked around all four sides of the mitered square.

Round 9 - Chain 3 (this counts as double crochet), make 2 double crochets in the chain 1 space, then chain 1, then make * (3 double crochets and chain 1) in the next 4 chain 1 spaces, then make (3 double crochets, chain 2 and 3 double crochets) in the chain 2 space, chain 1, repeat the pattern from * 1 more time, then make (3 double crochets and chain 1) into each of the next 4 turning chain 3 spaces, then make (3 double crochets, chain 2 and 3 double crochets) in the chain 2 space, then chain 1, and make (3 double crochets, and chain 1) into each of the next 4 turning chain 3 spaces, then make (3 double crochet and chain 2) in last corner, slip stitch in top of the chain 3 to join, chain 1, cut the yarn and fasten off. [You should have 72 double crochets, 20 x chain 1 spaces, and 4 x chain 2 spaces]
Abbreviated version
Rnd 9, color E - Ch3 (counts as dc), 2dc in ch-1 sp, ch1, * (3dc, ch1) in next 4 ch-1 sps, (3dc, ch2, 3dc) in ch-2 sp, ch1, rpt from * 1 more time, (3dc, ch1) into each of the next 4 turning ch-3 sps, (3dc, ch2, 3dc) in ch-2 sp, ch1, (3dc, ch1) into each of the next 4 turning ch-3 sps, (3dc, ch2) in last corner, sl st in top of ch-3 to join, ch1, cut yarn and fasten off. [72dc, 20 x ch-1 sps, and 4 x ch-2 sps]

Finishing
Use a yarn needle to weave in the loose ends and if necessary block the squares to ensure that they are of an even size and shape to make joining easier
Don't stop here...
Your next 50 crochet projects are ready inside the Pattern Vault - all printable, ad-free, and ready to download instantly.
Easy Ways To Join Granny Squares Together
Once you have completed multiple granny squares, the next step is to join them together to create a larger project.
And there are many ways to do this, depending on the desired final product and the look you want to achieve.
Here are a few techniques for joining granny squares:
- Whipstitch - This simple method use a needle and thread to sew the squares together. The stitches are worked through the back loops of each square, creating an invisible seam on the front.
- Single crochet join - This method involves using a single crochet stitch to join the squares together. The squares are held with the wrong sides facing each other, and the single crochet stitches are worked through the back loops of the squares to create a decorative border.
- Slip stitch join - This method involves using a slip stitch to join the squares together. The squares are held with the right sides facing each other, and the slip stitch is worked through the back loops of each square to create a decorative ridge on the front.
- Join-as-you-go - This method involves crocheting the squares together as you work on each square. This creates a continuous seam that eliminates the need to sew the squares together later.

Related Guides
- Related Guides
- Learn how to assemble your squares with our how to join granny squares guide.
- Explore more designs in our ultimate granny square guide.
- Looking for project ideas? Visit our crochet gifts and small projects hub.
Stay Connected
Pin this post - Pin now to and take your skills to the next level.
Leave a comment - We're excited to hear your thoughts! Leave a comment below and let us know what you think.
Share on Instagram or Facebook - Capture the beauty of your finished crochet projects and share it on Instagram or Facebook! Tag us @easybreezycrochet or #ebcrochetcreations so we can see your work!
Copyright Notice - This pattern and its contents are protected by copyright law. It may not be copied, altered, redistributed, resold, translated, or used to produce video tutorials in any format, either in whole or in part.
You are permitted to sell finished items made using this pattern. However, the written pattern itself may not be sold, shared, or distributed in any form. When marketing or displaying your finished items, please photograph your own work and refrain from using any of my original images.
Sharing Guidelines For Roundups - Bloggers you are welcome to include this pattern in roundup posts, as long as you use one photo and link directly back to the original post. For full details, please refer to my Terms of Use page.
Comments
No Comments