This simple crochet bat applique pattern is easy to make and a great beginner-friendly project that can be quickly made for Halloween.
Use it as an applique for bags, cushions, blankets, clothing, or let your imagination soar to craft adorable wall decor, garlands, keychains, and more.

Explore more themed motifs in our Halloween crochet patterns hub.
Table of contents
- About This Easy Crochet Bat Motif
- What Yarn To Use
- About The Hook Size
- Crochet Stitches
- Ways to Use Your Crochet Bat Appliqué
- Styling & Customization Ideas
- Size Guide: How to Resize Your Appliqué
- Skill Level
- What You Will Need
- Finished Size
- Gauge
- Stitches and Abbreviations Used - US Terms
- Instructions For This Beginner Crochet Bat Applique
- Finishing
- FAQ: Crochet Bat Appliqué Pattern
- Easy Go-To Stitch Guide
- More Halloween Crochet Ideas
- Related Guides
- Stay Connected
- Comments
About This Easy Crochet Bat Motif
- This super cute beginner crochet bat applique pattern is easy to make and suitable for someone new to crochet and wanting to improve their skills.
- The pattern is made up of four main parts, the body, head, and wings one and two.
- You will need to know how to treble crochet, double crochet, and single crochet.
- This pattern is quick to make and requires very little yarn, making it great for stash-busting.
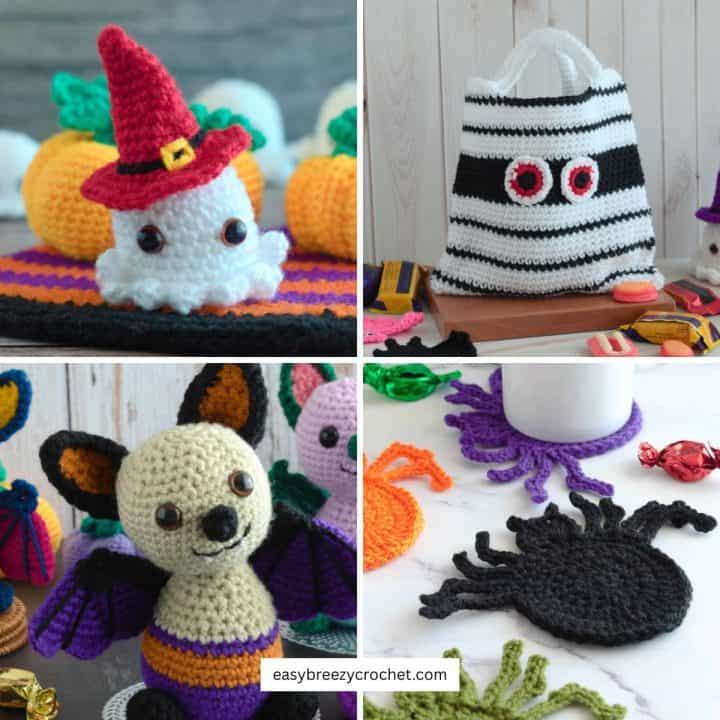
- Use it as an applique for a Halloween trick or treat bag, make a Halloween bat garland, or stick them to walls or windows for easy Halloween décor, the possibilities are endless.
- If you like this pattern you might also like to see more free Halloween crochet patterns.
Exclusive Printable Crochet Patterns
Be inspired and keep creating!
Join us in The Pattern Vault, Easy Breezy Crochet's exclusive community.
Connect with other crocheters from all around the world and gain access to an extensive library of printable PDF crochet patterns.
All patterns are ad-free and available to you when you want, allowing you to crochet in your own time. So, if you're stuck on inspiration or on the hunt for you next crochet project, the Pattern Vault is for you!
What Yarn To Use
You can use just about any yarn type and yarn weight to make this Halloween crochet applique.
Fine yarn weights like #1 super fine, #2 fine, and #3 light are ideal for this because the appliques will be small and not too bulky.
If you use thicker yarns the appliques will be chunkier and heavier looking.
I used #3 light (light worsted, DK, 8-ply), and 100% acrylic yarn to make these bat appliques.
About The Hook Size
The yarn I used recommended using a 5mm hook, but I used a 3.5mm hook to make these.
Using a smaller hook creates a tighter stitch, and also causes the wings to curl a little, which can be easily pressed down flat with your hands as you sew them onto another fabric.
If you don't like the look of the tight fabric, experiment with different hook sizes to get the look you are after.
Crochet Stitches
You will need to know a few basic crochet stitches like chain stitch, single crochet, double crochet, treble crochet and slip stitch to make this free Halloween crochet motif pattern.
Crochet Picot Stitch
This easy crochet project uses a picot stitch as a decorative feature. If you do not know how to make this read our blog post on how to crochet picot stitch to learn more.
Ways to Use Your Crochet Bat Appliqué
Crochet bat appliqués are small but highly versatile Halloween embellishments.
- Decorate hats, beanies, or headbands
- Add to tote bags or backpacks
- Sew onto blankets or cushions
- Use in Halloween garlands or bunting
- Customize clothing or costumes
Styling & Customization Ideas
You can easily customize your crochet bat appliqué to match different Halloween styles.
- Use different yarn colors (black, purple, orange, pastel)
- Add embroidered facial expressions
- Make mini and large versions
- Combine with pumpkins or ghost appliqués
- Use sparkly yarn for a magical effect
Size Guide: How to Resize Your Appliqué
You can adjust the size of your crochet bat appliqué by changing yarn weight, hook size, or stitch count. Thicker yarn and larger hooks create bigger motifs, while thinner yarn produces smaller decorative appliqués. This makes it easy to match any project size.
Skill Level
Beginner
What You Will Need
#3 Light (light worsted, DK, 8-ply), 100% acrylic yarn, in any color.
- You will need about 9.3 yards (8.5 meters) of yarn
Crochet Hook
- 3.5 mm crochet hook or a smaller size than recommended for the yarn you are using.
Notions
- Scissors
- Yarn needle
- Googly eyes, or white and black felt circles, or white yarn for eyes.
- Glue
Finished Size

These cute spooky crochet bat motifs are about 3.74 inches (9.5 cm) wide at the widest part of the wings, and about 2.75 inches (7 cm) tall.
Gauge
The gauge is not that important for this project.
Stitches and Abbreviations Used - US Terms
- MR - magic ring
- ch - chain
- sc - single crochet
- dc- double crochet
- tr - treble crochet
- hk - hook
- Picot - picot
- sl st - slip stitch
- sk - skip
- st/sts - stitch/stitches
- YO - yarn over hook
Instructions For This Beginner Crochet Bat Applique
Foundation - MR, or chain 3 and slip stitch into 1st stitch to join and form a circle.
Abbreviated version
Foundation - MR, or ch3, sl st into 1st st to join and form a circle
Body

Body - Chain 3 (this is not counted as a stitch), make 16 treble stitches in the ring, tighten the ring, and slip stitch into the top of the 1st treble stitch to join. [16 trebles stitches in this round.]
Abbreviated version
Body - Ch3 (not a stitch), 16tr in ring, tighten ring, sl st into 1st tr to join. [16tr]
Head

Head - Chain 2 (this counts as a double crochet), in the same space as chain 2, make 1 double crochet, picot, 3 double crochets, picot, and 2 double crochets, then slip stitch into the same space. [7dc and 2 picot stitches form the head]
Abbreviated version
Head - Ch2 (counts as dc), make (1dc, picot, 3dc, picot, 2dc) in the same space as ch-2, then sl st into the same sp. [7dc, and 2 picots]
✨ You're almost there! ✨
To unlock the final steps and complete your pattern, create a free account with Grow.me. below.
Make sure to tick the box to subscribe to our newsletter and stay up to date with the latest patterns, tips, and more!
Once you're signed up, you'll get instant access to finish your project and enjoy exclusive content in the future.
Already signed up? Hit the button below and select 'Switch to Log In' to pick up where you left off and finish your project!
Wing #1 and Claws

Wing #1 and claws - Chain 10, single crochet in 2nd chain from the hook, single crochet in each of the next 9 chain stitches, slip stitch into the next stitch on the body, chain 1, and turn.
Single crochet in each of the next 6 stitches, turn, make a picot (this forms the tip of the wing), then single crochet in each of the next 6 stitches, slip stitch into next stitch on the body, chain 1, and turn.
Single crochet in each of the next 4 stitches, turn, make a picot, then single crochet in each of the next 4 stitches, and slip stitch into the next stitch on the body, chain 1, and turn.
Single crochet in each of the next 2 stitches, turn, make a picot, then single crochet in the next 2 stitches, slip stitch into each of the next 5 stitches on the body, make a picot (for claw 1), slip stitch in next 2 stitches, picot (for claw 2), slip stitch in next 7 stitches on the body (the last slip stitch should be in the same space as the chain 3 of the head), and turn.
Abbreviated version
Wing #1 and claws - Ch10, sc in 2nd ch from hk, sc in each of the next 9-ch sts, sl st into next st on the body, ch1, turn.
Sc in each of the next 6-sts, turn, picot (this forms the tip of the wing), sc in each of the next 6-sts, sl st into next st on the body, ch1, turn.
Sc in each of the next 4-sts, turn, picot, sc in each of the next 4-sts, sl st into the next st on the body, ch1, turn.
Sc in next 2-sts, turn picot, sc in next 2-sts, sl st into each of the next 5-sts on the body, picot (for claw 1), sl st in next 2-sts, picot (for claw 2), sl st in next 7-sts on the body (the last sl st should be in the same sp as the ch-3 of the head), and turn.
Wing #2

Wing #2 - Chain 10, single crochet in the 2nd chain from the hook, single crochet in each of the next 9 chain stitches, slip stitch into the next stitch on the body, chain 1, and turn.
Single crochet in each of the next 6 stitches, turn, make a picot, single crochet in each of the next 6 stitches, then slip stitch into next stitch on body, chain 1, and turn.
Single crochet in each of the next 4 stitches, turn, make a picot, single crochet in each of the next 4 stitches, then slip stitch into the next stitch on the body, chain 1, and turn
Single crochet in next 2 stitches, turn, and make a picot, Single crochet in next 2 stitches, then slip stitch into next stitch on the body, chain 1, cut yarn, and fasten off.
Abbreviated version
Wing #2 - ch10, sc in 2nd ch from hk, sc in each of the next 9-ch sts, sl st into next st on the body, ch1, turn.
Sc in each of the next 6-sts, turn, picot, sc in each of the next 6-sts, sl st into next st on body, ch1, turn.
Sc in each of the next 4-sts, turn, picot, sc in each of the next 4-sts, sl st into the next st on the body, ch1, turn
Sc in next 2-sts, turn, picot, sc in next 2-sts, sl st into next st on the body, ch1, cut yarn, and fasten off.
Finishing
Use a yarn needle to weave in the loose ends.
If necessary block or press them lightly on the wrong side with a warm iron, to stop them from curling up.
Then glue or sew eyes to the bat head.
FAQ: Crochet Bat Appliqué Pattern
Yes, this crochet bat appliqué pattern is beginner-friendly and uses simple stitches like single crochet, increases, and basic shaping. It's a quick and easy Halloween crochet project.
What can I use a crochet bat appliqué for?
Crochet bat appliqués can be used to decorate hats, bags, blankets, clothing, garlands, or Halloween home decor. They are perfect for adding a spooky seasonal touch to any project.
Yes, most crochet appliqués are sewn or stitched onto fabric or crochet pieces using a yarn needle. This ensures they stay securely attached.
Don't stop here...
Your next 50 crochet projects are ready inside the Pattern Vault - all printable, ad-free, and ready to download instantly.
Easy Go-To Stitch Guide
New to crochet? Make every stitch count! Grab this free crochet cheat sheet with easy-to-follow guides for basic stitches (US terms) and more-perfect for tackling any pattern with confidence.
Download your free Crochet Cheat Sheet (printable PDF)
Print it, save it on your phone, or keep it right next to you while crocheting.

Related Guides
- Discover seasonal ideas in our seasonal crochet hub.
- Explore decorative designs in our crochet flowers and motifs hub.
Stay Connected
Pin this post - Pin now to and take your skills to the next level.
Leave a comment - We're excited to hear your thoughts! Leave a comment below and let us know what you think.
Share on Instagram or Facebook - Capture the beauty of your finished crochet projects and share it on Instagram or Facebook! Tag us @easybreezycrochet or #ebcrochetcreations so we can see your work!
Copyright Notice - This pattern and its contents are protected by copyright law. It may not be copied, altered, redistributed, resold, translated, or used to produce video tutorials in any format, either in whole or in part.
You are permitted to sell finished items made using this pattern. However, the written pattern itself may not be sold, shared, or distributed in any form. When marketing or displaying your finished items, please photograph your own work and refrain from using any of my original images.
Sharing Guidelines For Roundups - Bloggers you are welcome to include this pattern in roundup posts, as long as you use one photo and link directly back to the original post. For full details, please refer to my Terms of Use page.
Comments
No Comments