Ready to create something adorable? Whether you are just starting out or have some experience under your belt, this free crochet bunny rabbit pattern is tailor-made for beginners, especially those eager to explore the world of amigurumi.
In this straightforward tutorial, we will guide you through crafting your very own fluffy friend using simple shapes like cylinders, hearts, and balls.
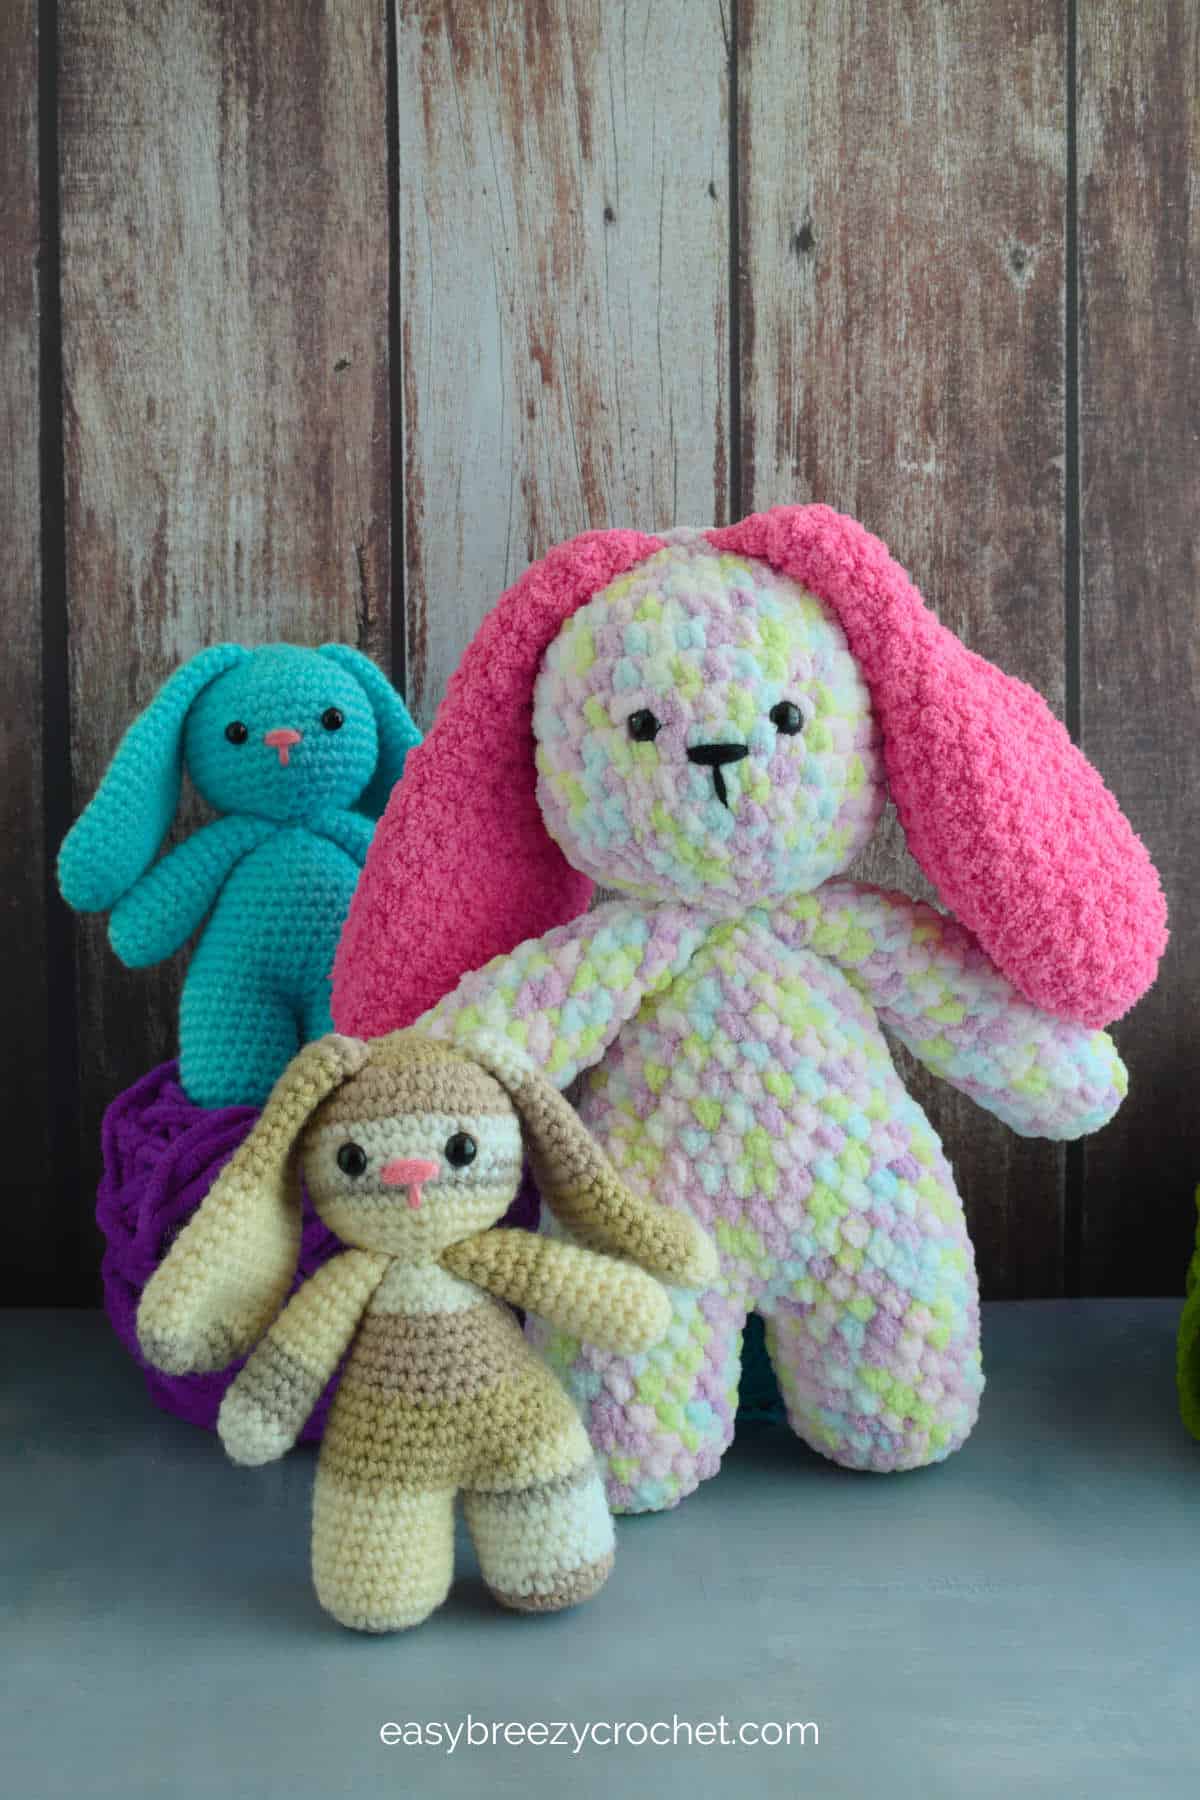
Table of contents
- About This Crochet Bunny Pattern
- Meet Polly The Crochet Bunny
- Exclusive Printable Crochet Patterns
- Different Yarns For Making Crochet Animals
- Crochet Stitches
- Amigurumi Tips for Beginners
- How to Crochet This Bunny Rabbit Step-By-Step
- Skill Level
- What You Will Need
- Finished Size
- Gauge
- Stitches and Abbreviations Used - US Terms
- Special Stitches
- Pattern Notes
- Bunny Body And Legs Pattern
- Bunny Arms Pattern (make 2)
- Bunny Head Pattern
- Bunny Ears Crochet Pattern (make 2)
- Crochet Bunny Tail
- More Free Crochet Patterns
- Quick Crochet Reference Guide
- Amigurumi
- Stay Connected
- Learn To Crochet
- Comments
Crocheting offers a delightful way to express creativity while fashioning something both charming and functional.
With just a few basic stitches and soft yarn, you will quickly bring this lovable bunny to life.
Whether it is a gift for a friend or a personal project, this crochet bunny rabbit promises to spread joy wherever it goes.
About This Crochet Bunny Pattern
This delightful free crochet bunny rabbit pattern is perfect for beginners, as it is made up of simple amigurumi shapes - a crochet heart that forms the legs and body, a spherical crochet ball for the head and bunny tail, and crochet cylinders form the arms and bunny ears.
Another great thing about this pattern is that the pieces are not too small, which makes them easy to handle.
If you like this easy bunny crochet pattern you might also like this cute easy crochet bunny pattern, it is also made with simple crochet shapes.
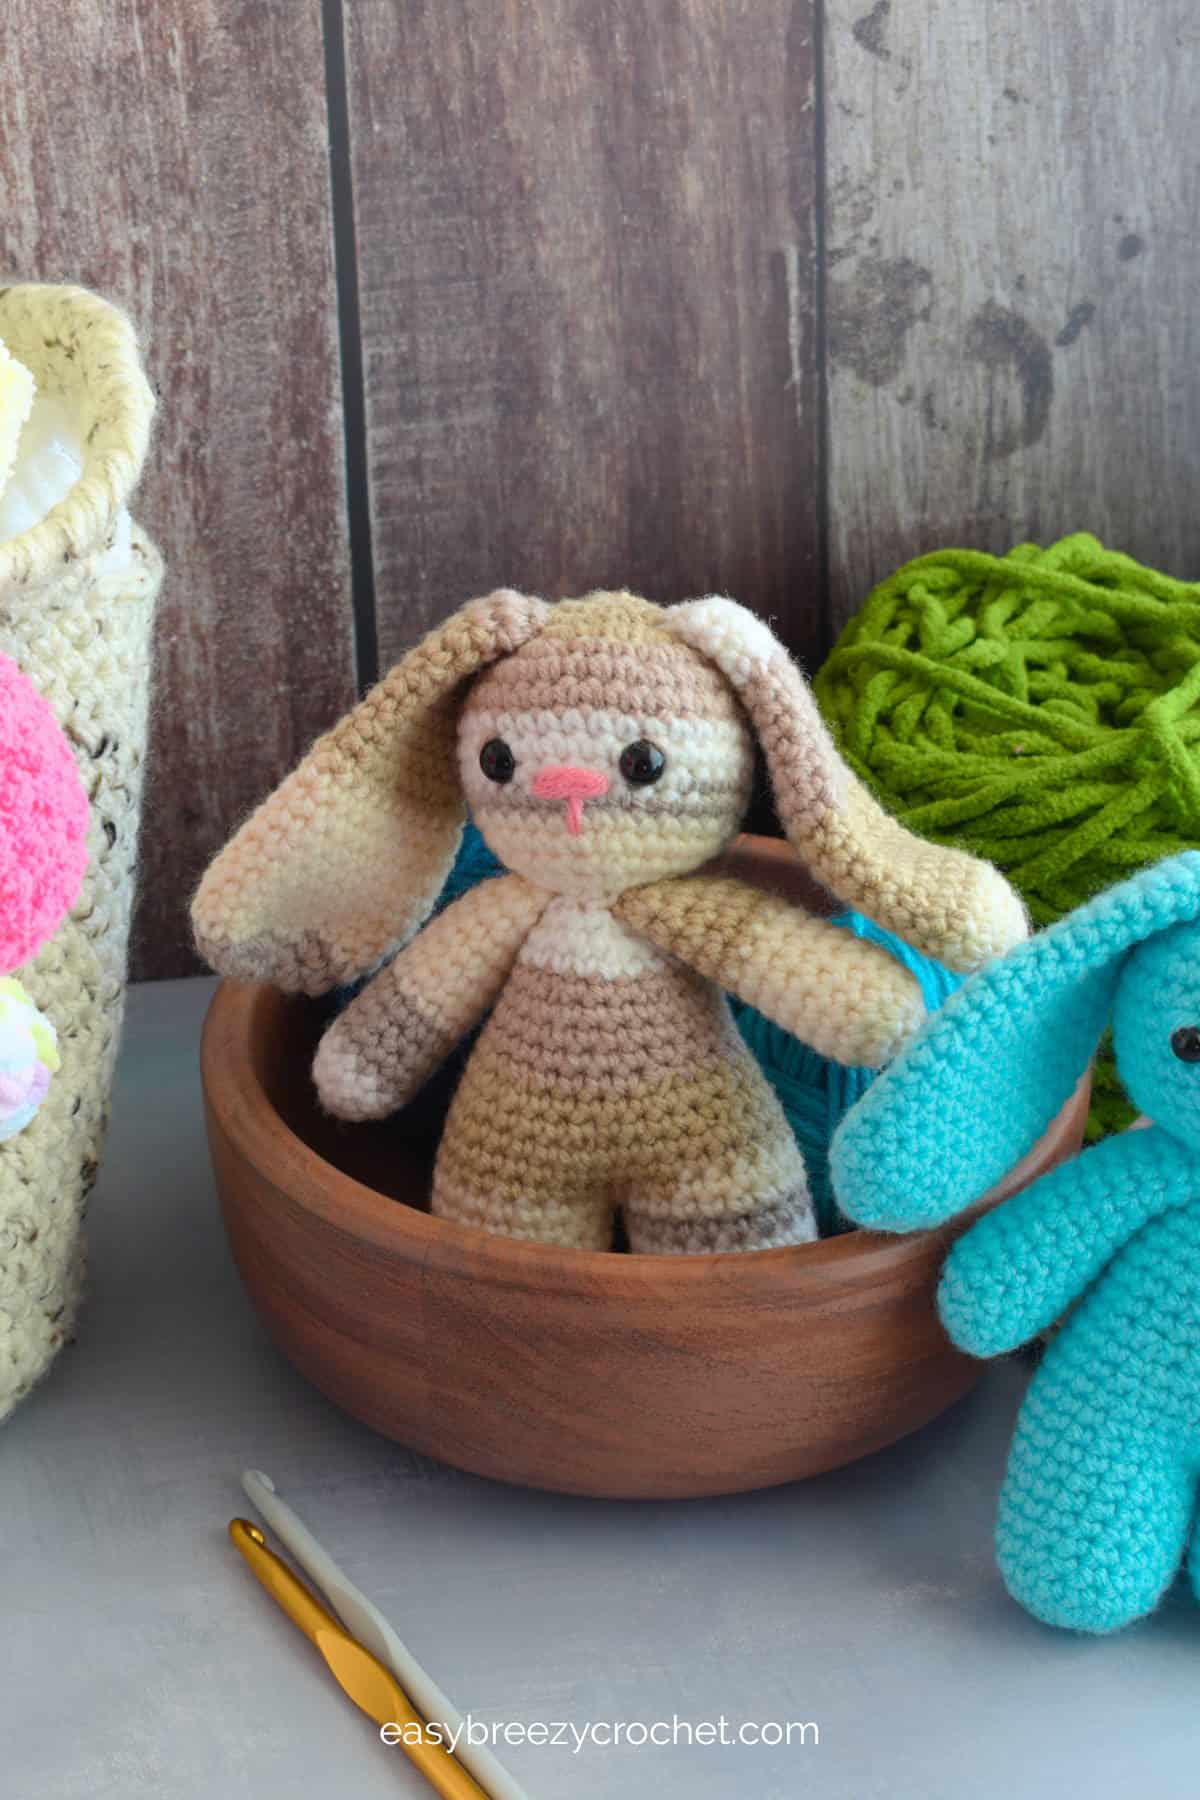
Meet Polly The Crochet Bunny
Once upon a time, in a cozy yarn basket, lived Polly, a crochet bunny with a heart-shaped body. Created by Mrs. Smith's skilled hands, Polly was soft and cuddly, with big black eyes that sparkled with joy.
Excited to explore, Polly hopped into the arms of Mrs. Smith's granddaughter, Lily. Together, they went on adventures, sharing tea parties and bedtime stories.
Though made of yarn, Polly's heart overflowed with love. With each stitch, she brought happiness to all who held her close, forever cherished in the hearts of those who adored her.
Exclusive Printable Crochet Patterns
Ready to take your crochet skills to the next level?
Join us in the Pattern Vault, Easy Breezy Crochet's exclusive community.
Connect with other crocheters from all around the world and gain access to a growing library of printable PDF crochet patterns.
All patterns are ad-free and available to you when you want, allowing you to crochet in your own time. So, if you're stuck on inspiration or on the hunt for your next crochet project, then the Pattern Vault is for you!
Different Yarns For Making Crochet Animals
We created two versions of this bunny rabbit pattern. One was made with #4 acrylic worsted-weight yarn, and the other with a chenille blanket #6 super bulky yarn. But you can use different kinds of yarn to crochet this.
You can make this bunny rabbit in various sizes. For small ones, you can use #1 super fine or #3 light yarn. For bigger and cozier ones, you can use #7 jumbo yarn.
Crochet Stitches
In this amigurumi pattern, you will need to be familiar with the single crochet stitch, and how to make a magic ring also known as a magic circle to start the crochet pieces.
Invisible Decrease (invdec)
In this pattern, you will need to do something called 'invisible decreases. Do not worry if you are not sure how to do it! Check out our post on making a single crochet invisible decrease to learn all about it. It is easy, I promise!
Front Loops (FLO) And Back Loops (BLO)
In this pattern, you will need to know the difference between the front or back loops of stitches. If you are not sure what this means, check out our blog post understanding front and back loops in crochet. It explains everything in a super easy way.
Amigurumi Tips for Beginners
New to amigurumi? Check out our blog post for beginner-friendly tips! Learn essential techniques and troubleshoot common challenges to make your crochet projects a success.
How to Crochet This Bunny Rabbit Step-By-Step
Skill Level
Intermediate beginner
What You Will Need
For the small bunny
We used #4 medium acrylic yarn (also known as worsted, Afghan, Aran, or 10 ply) with 11 WPI (wraps per inch).
- Body - blue yarn (or another color for bunny) - 109 yards (100 meters)
Crochet Hook
- 4 mm (G/6) hook for the body and ears.
For the large bunny
We used #6 super bulky chenille yarn with 5 WPI (wraps per inch) for the body.
- multi pastel rainbow color - 197 yards (180 meters)
For the ears and tail we use #5 bulky microfiber yarn with 8 WPI WPI (wraps per inch). You could also use the same yarn weight as the body for the ears and tail.
- Hot pink - 106 yards (96.2 meters)
Crochet hook
- 6mm crochet hook for the body
- 7mm crochet hook for the ears and tail.
Note: This pattern allows for flexibility with yarn weights. Adjust your hook size to be 1-2 sizes smaller than the recommended size for your chosen yarn. Doing so will create a tighter fabric, preventing the stuffing from showing through.
Notions
- Scissors
- Yarn Needle
- Small bunny, 2 x 9 mm, safety eyes or black yarn to embroider eyes
- Large bunny, 2 x 12mm, safety eyes or black yarn to embroider eyes
- Nose - pink or black #3 light worsted yarn or embroidery floss - about 19 inches (50cm)
- Toy stuffing
Finished Size
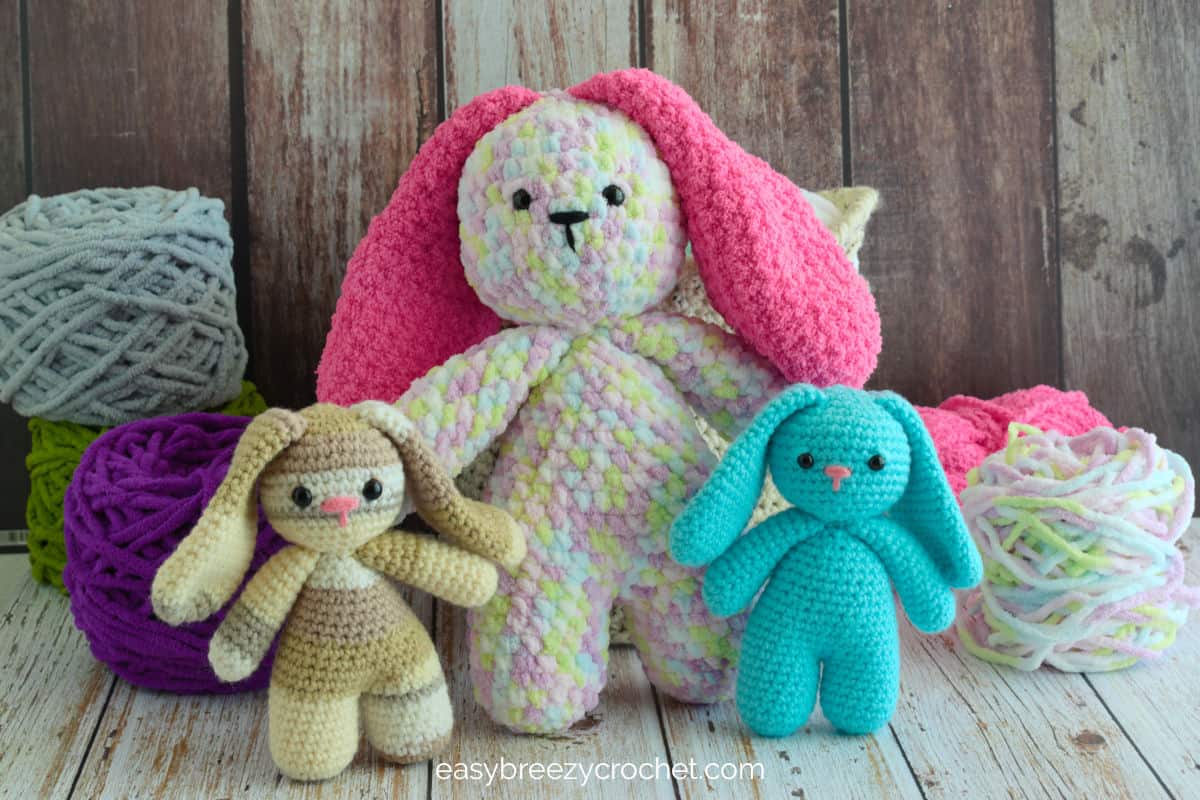
The finished size of the small crochet rabbit made in #4 worsted yarn is about 6.5 inches (16.5cm) tall using the yarn weight and hook size mentioned above.
The finished size of the large crochet bunny rabbit made in #6 super buly yarn is about 13 inches (33.2 cm) tall using the yarn weight and hook size mentioned above.
Gauge
The gauge is not important for this project, but making sure the stitches are tight is important.
This prevents the toy stuffing from peeking through. If you notice the filling showing through, consider using a smaller hook size to achieve tighter stitches.
Stitches and Abbreviations Used - US Terms
- MR - magic ring
- sc - single crochet
- invdec - invisible decrease, see special stitches below
- st/sts - stitch/stitches
- hk - hook
- rnd - round
- rpt - repeat
- lp/lps - loop/loops
- FLO - front of loop
- YO - yarn over
- [ ] - at the end of a round, indicates the number of stitches in that round
Special Stitches
invdec - Insert hk in FLO of next st, then in FLO of next st, YO, pull through 2-lps, YO, pull through 2-lps.
Pattern Notes
- This pattern is worked in a spiral, so do not join the rounds as you go.
- Use a stitch maker to mark the first stitch of each round. This will help you keep track of the start and end of a round.
- The pattern below is for both the small and large bunny, just remember to use the correct hook size for the yarn you are using.
- If making the large rabbit color change when you come to the ears and tail.
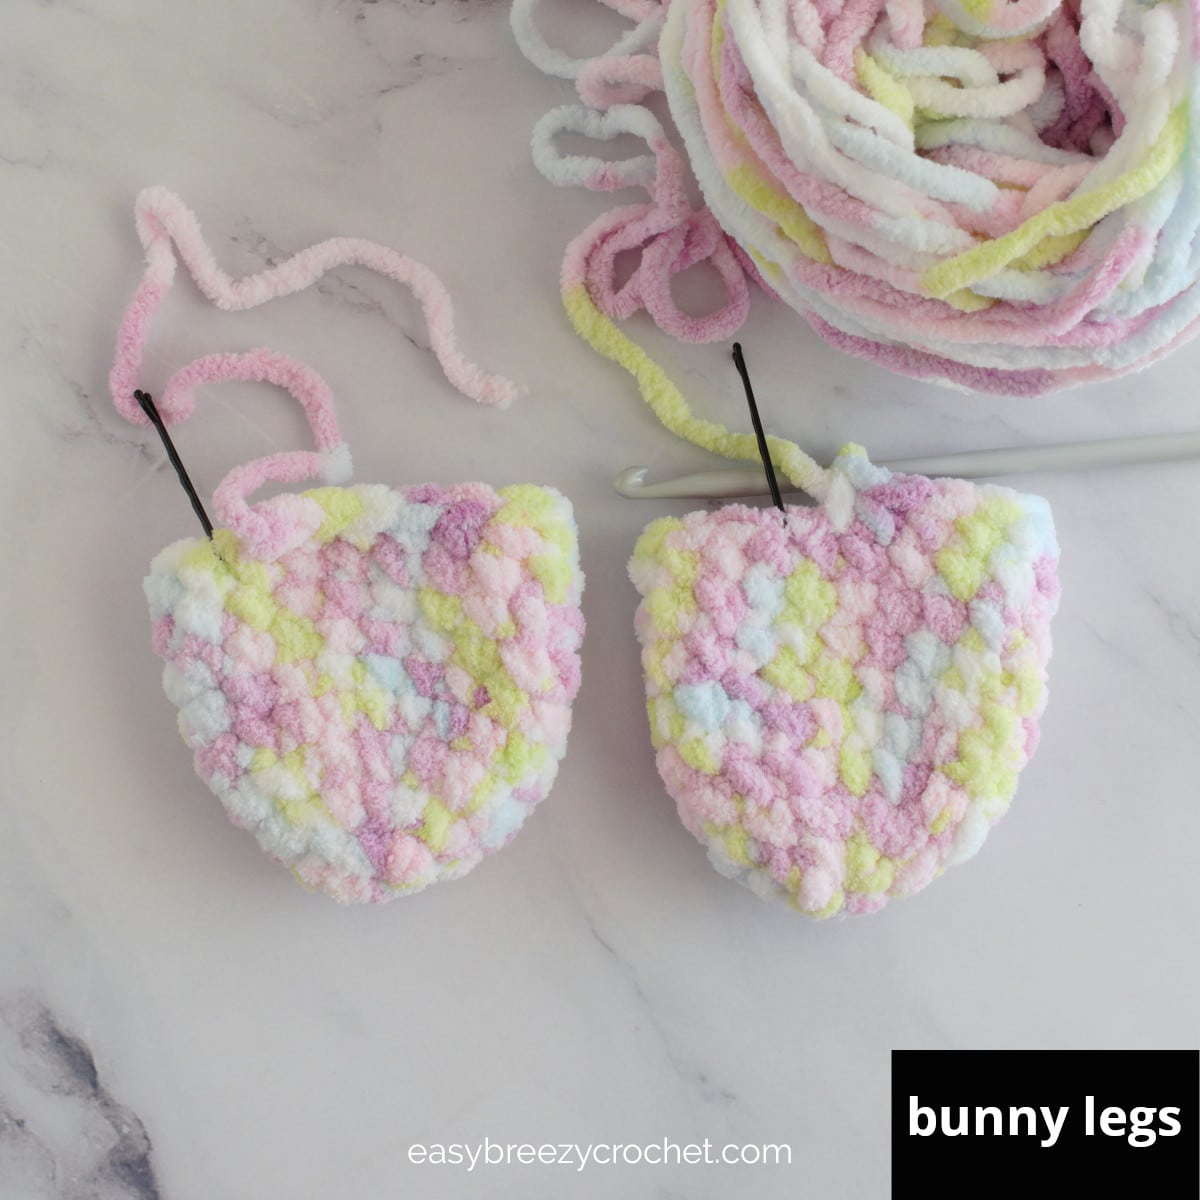
Bunny Body And Legs Pattern
The body and legs on this bunny pattern are based on an inverted and elongated crochet heart, it is simple to make.
To start with you will be making two cylinder pieces for the heart top (which will form the legs). These pieces are then crocheted together, working in continuous rounds to form the rabbit body.
Make the first leg
Round One
Round 1 - Make 6sc into a magic ring, and pull the ring tight. [6 single crochet in this round]
Abbreviated version
Rnd 1 - 6sc in MR, pull ring tight. [6sc]
Round Two
Round 2 - Make 2 single crochet stitches in each of the next 6 stitches. [12 single crochets in this round.]
Abbreviated version
Rnd 2 - * 2sc in next st, rpt from * 6 times. [12sc]
Round Three
Round 3 - * Make 1 single crochet in the next stitch, then 2 single crochet in the next stitch, repeat from* 6 times. [18 single crochets in this round.]
Abbreviated version
Rnd 3 - * 1sc in next st, 2sc in next st, rpt from * 6 times. [18sc]
Rounds Four to Nine
Rounds 4-9 - Make 1 single crochet in each of the next 18 stitches. [18 single crochets in each round.]
Abbreviated version
Rnds 4-9 - 1sc in each of the next 18-sts. [18sc in each rnd]
This completes the first bunny leg - Chain 1 and fasten off, leaving a 6-inch (15cm) yarn tail to be used for sewing later.
This completes the first bunny leg - Chain 1, place a stitch marker in this stitch and fasten off, leaving a 6-inch (15cm) yarn tail to be used for sewing later.
Make the second leg by repeating rounds 1-9, but don't cut the yarn after round 9.
✨ You're almost there! ✨
To unlock the final steps and complete your pattern, create a free account with Grow.me. below.
Make sure to tick the box to subscribe to our newsletter and stay up to date with the latest patterns, tips, and more!
Once you're signed up, you'll get instant access to finish your project and enjoy exclusive content in the future.
Already signed up? Hit the button below and select 'Switch to Log In' to pick up where you left off and finish your project!
Round Ten
Joining the legs and shaping the bunny body
Round 10 - After making round 9 of the second leg, single crochet into the marked stitch on the first leg piece. Then single crochet into the 18 stitches around the first leg and then single crochet into each of the 18 stitches around the second leg. [There will be 36 single crochets in this round]
Abbreviated version
Rnd 10 - After making rnd 9 of the 2nd leg, sc into the marked st on the 1st leg piece, 1sc into the next 18-sts around leg piece 1, then 1sc into the next 18-sts around leg piece 2. [36sc]

Rounds Eleven - Thirteen
Rounds 11-13 - Make 1 single crochet into each of the next 36 stitches. [36 single crochets in each round.]
Abbreviated version
Rnds 11-13 - 1sc in next 36-sts. [36sts]
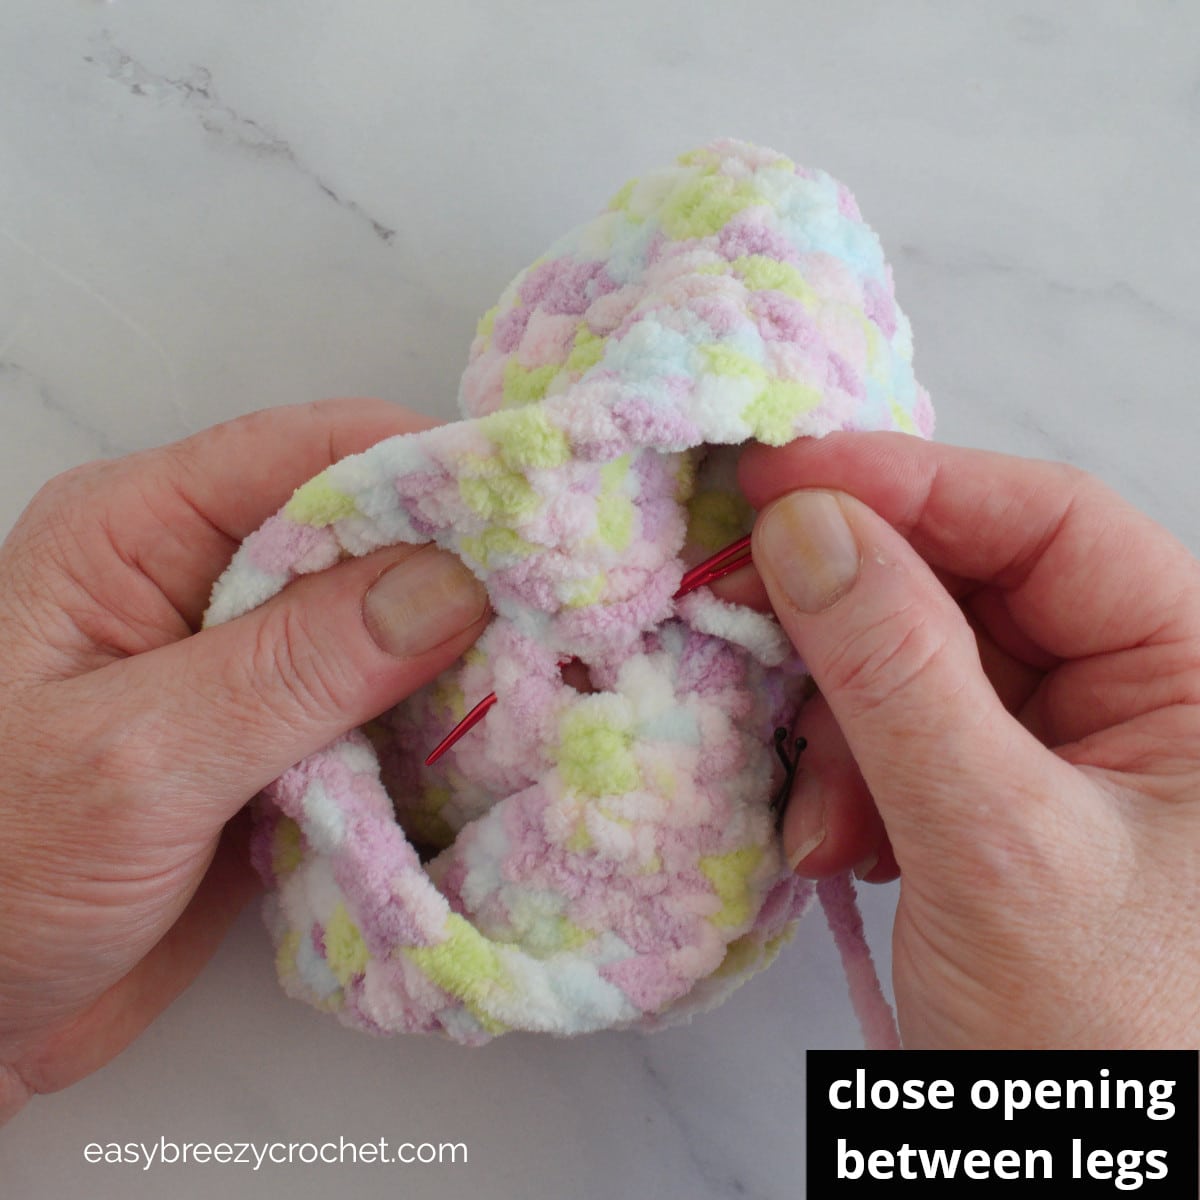
Before moving on to the next rounds, thread the yarn tail from leg piece 1 onto a tapestry needle.
Then stitch closed the small opening at the joint between leg pieces 1 and 2, and secure the end.
No need to cut the excess yarn just tuck it into one of the leg pieces.
Round Fourteen
Round 14 - * Make 1 single crochet in each of the next 4 stitches, then an invisible decrease, repeat from * 6 times. [You should now have 30 single crochets in this round.]
Abbreviated version
Rnd 14 - * 1sc in next 4-sts, invdec, rpt from * 6 times. [30sc]
Round Fifteen
Round 15 - 1 single crochet in each of the next 30 stitches. [30 single crochets in this round.]
Abbreviated version
Rnd 15 - 1sc in next 30-sts. [30sc]
Round Sixteen
Round 16 - * Make 1 single crochet in each of the next 4 stitches, then an invisible decrease, repeat from * 5 times. [You should now have 25 single crochets in this round.]
Abbreviated version
Rnd 16 - * 1sc in next 4-sts, invdec, rpt from * 5 times. [25sc]
Rounds Seventeen to Nineteen
Rounds 17-19 - 1sc in each of the next 25 stitches. [25 single crochets in each round.]
Abbreviated version
Rnds 17-19 - 1sc in next 25-sts. [25sc in each rnd]
Round Twenty
Round 20 - * Make 1 single crochet in each of the next 3 stitches, then make an invisible decrease, repeat from * 5 times. [You should now have 20 single crochets in this round.]
Abbreviated version
Rnd 20 - * 1sc in next 3-sts, invdec, rpt from * 5 times. [20sc]
Round Twenty One
Rounds 21 - 1sc in each of the next 20 stitches. [20 single crochets in each round.]
Abbreviated version
Rnds 21 - 1sc in next 20-sts. [20sc in each rnd]
Round Twenty Two
Round 22 - * Make 1 single crochet in each of the next 3 stitches, then make an invisible decrease, repeat from * 4 times. [You should now have 16 single crochets in this round.]
Abbreviated version
Rnd 22 - * 1sc in next 3-sts, invdec, rpt from * 6 times. [16sc]
Round Twenty Three
Round 23 - * Make 1 single crochet in the next stitch, then make an invisible decrease, repeat from * 4 times, slip stitch into the next stitch, chain 1, cut yarn leaving a 6-inch (15cm) yarn tail, and fasten off. [You should now have 12 single crochets in this round.]
Abbreviated version
Rnd 23 - * 1sc, invdec, rpt from * 4 times, sl st into next st, ch1, cut yarn leaving a 6 inch (15cm) yarn tail and fasten off. [12sc]
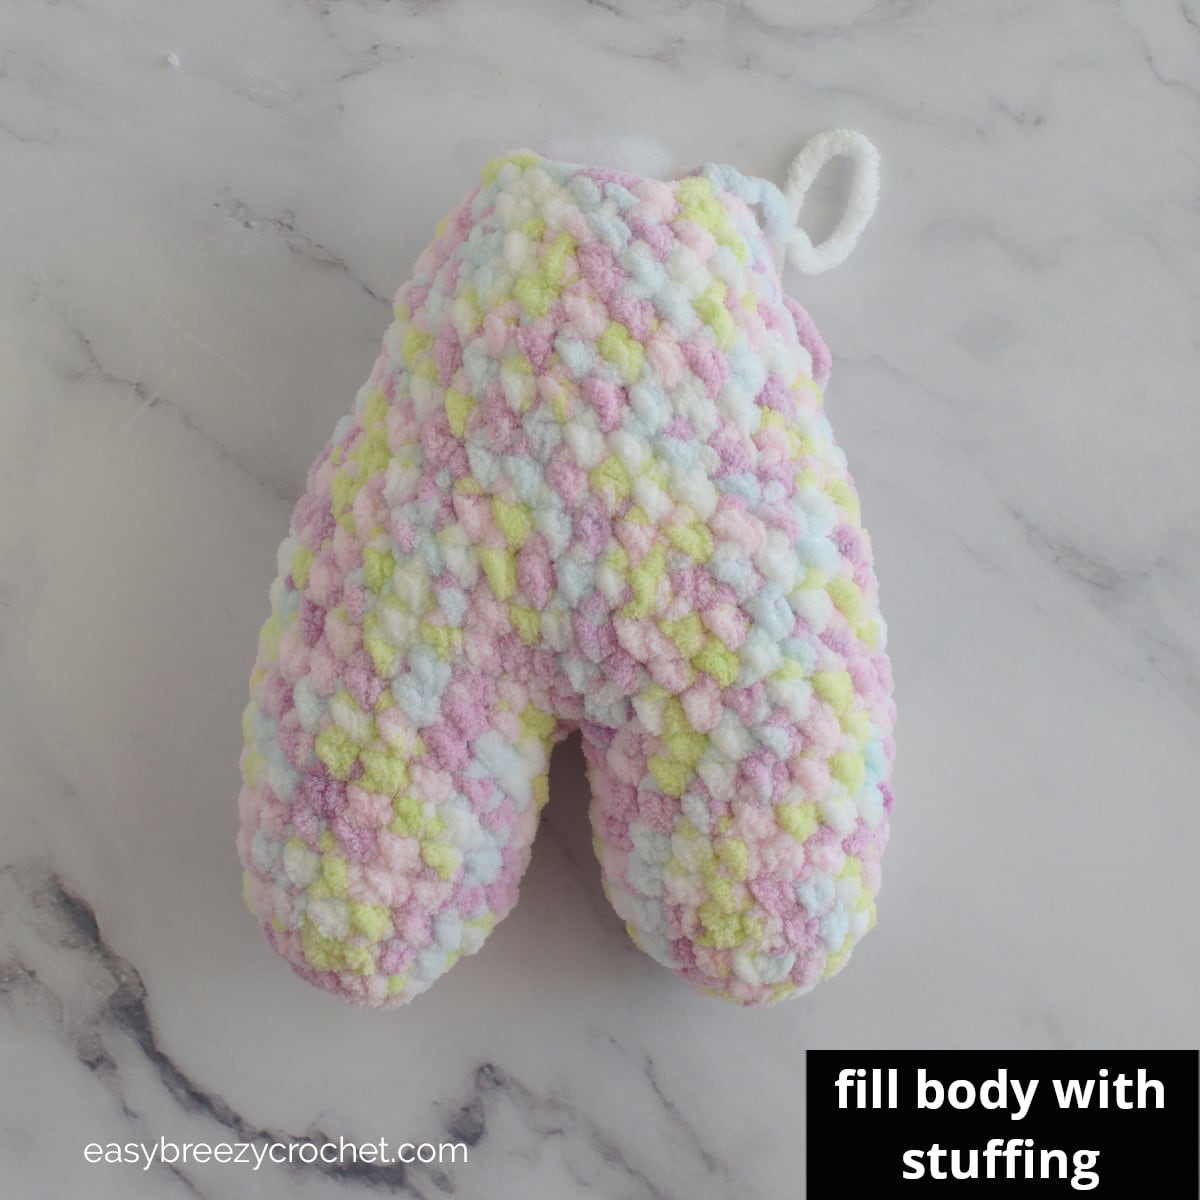
Fill with stuffing, and put aside for later.
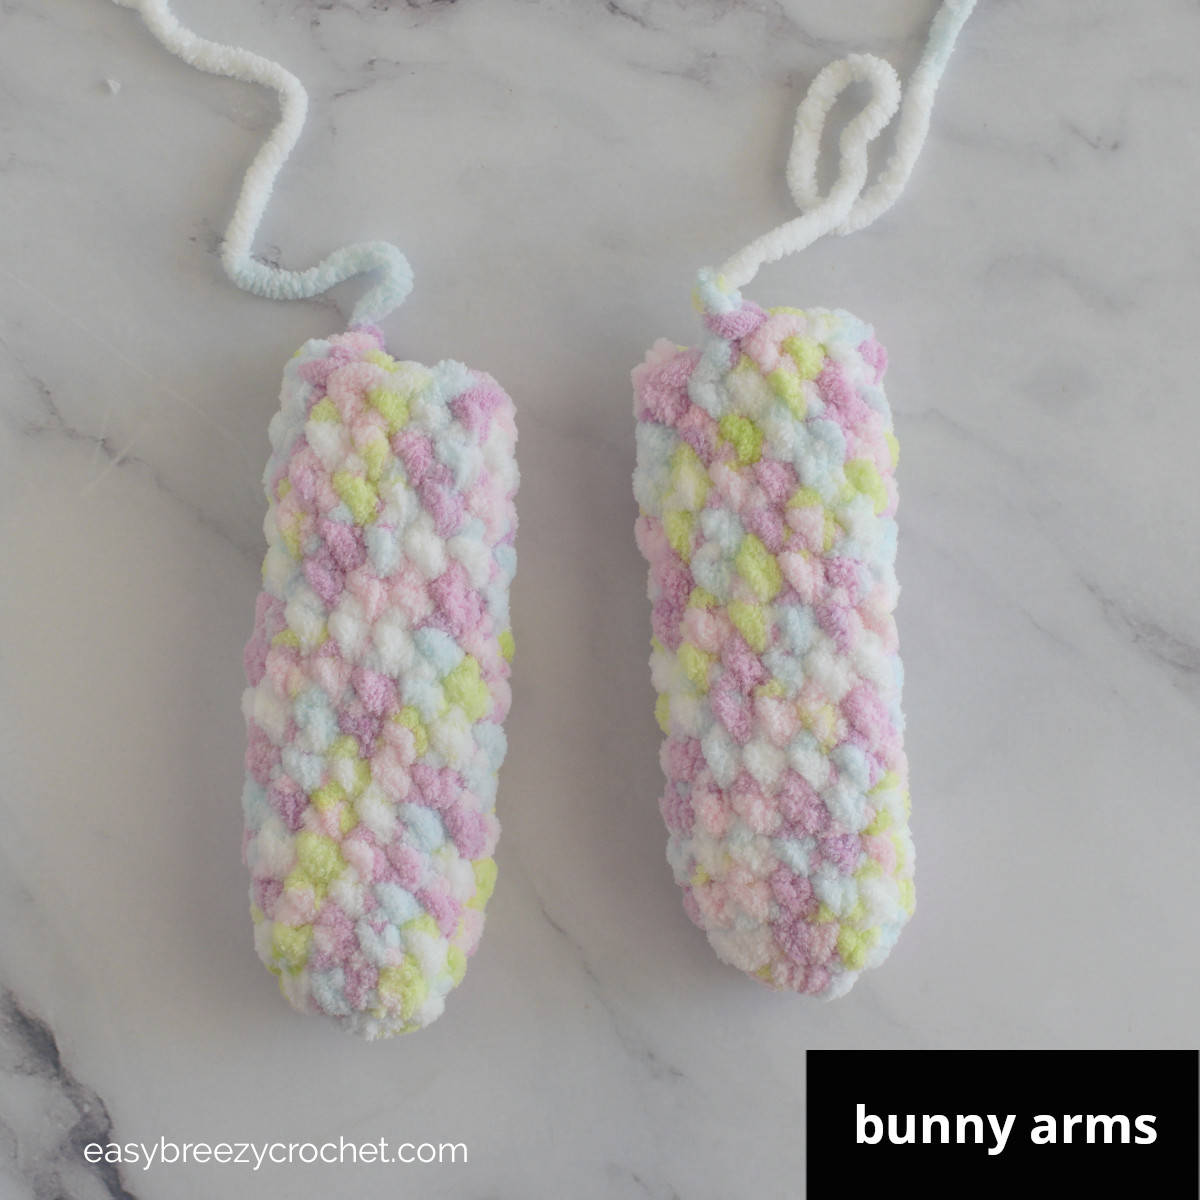
Bunny Arms Pattern (make 2)
The bunny arms are made by crocheting a cylinder, it starts in the same way as the bunny legs but is made longer.
Round One
Round 1 - Make 6sc into a magic ring, and pull the ring tight. [6 single crochet in this round]
Abbreviated version
Rnd 1 - 6sc in MR, pull ring tight. [6sc]
Round Two
Round 2 - Make 2 single crochet stitches in each of the next 6 stitches. [12 single crochets in this round.]
Abbreviated version
Rnd 2 - * 2sc in next st, rpt from * 6 times. [12sc]
Rounds Three to Fourteen
Rounds 3-14 - 1sc in each of the next 12 stitches. [12 single crochets in each round.]
Abbreviated version
Rnds 3-14 - 1sc in next 12-sts. [12 sc in each rnd]
Found Fifteen
Round 15 - 1sc in each of the next 12 stitches, slip stitch into next the stitch, then chain 1, cut yarn leaving a 6 inch (15cm) yarn tail, and fasten off. [12 single crochets in each round.]
Abbreviated version
Rnd 15 - 1sc in next 12-sts, sl st into next st, ch1, cut yarn leaving a 6 inch (15cm) yarn tail and fasten off. [12 sc in each rnd]
This finishes one arm, repeat rounds 1 - 15 to make a second arm.
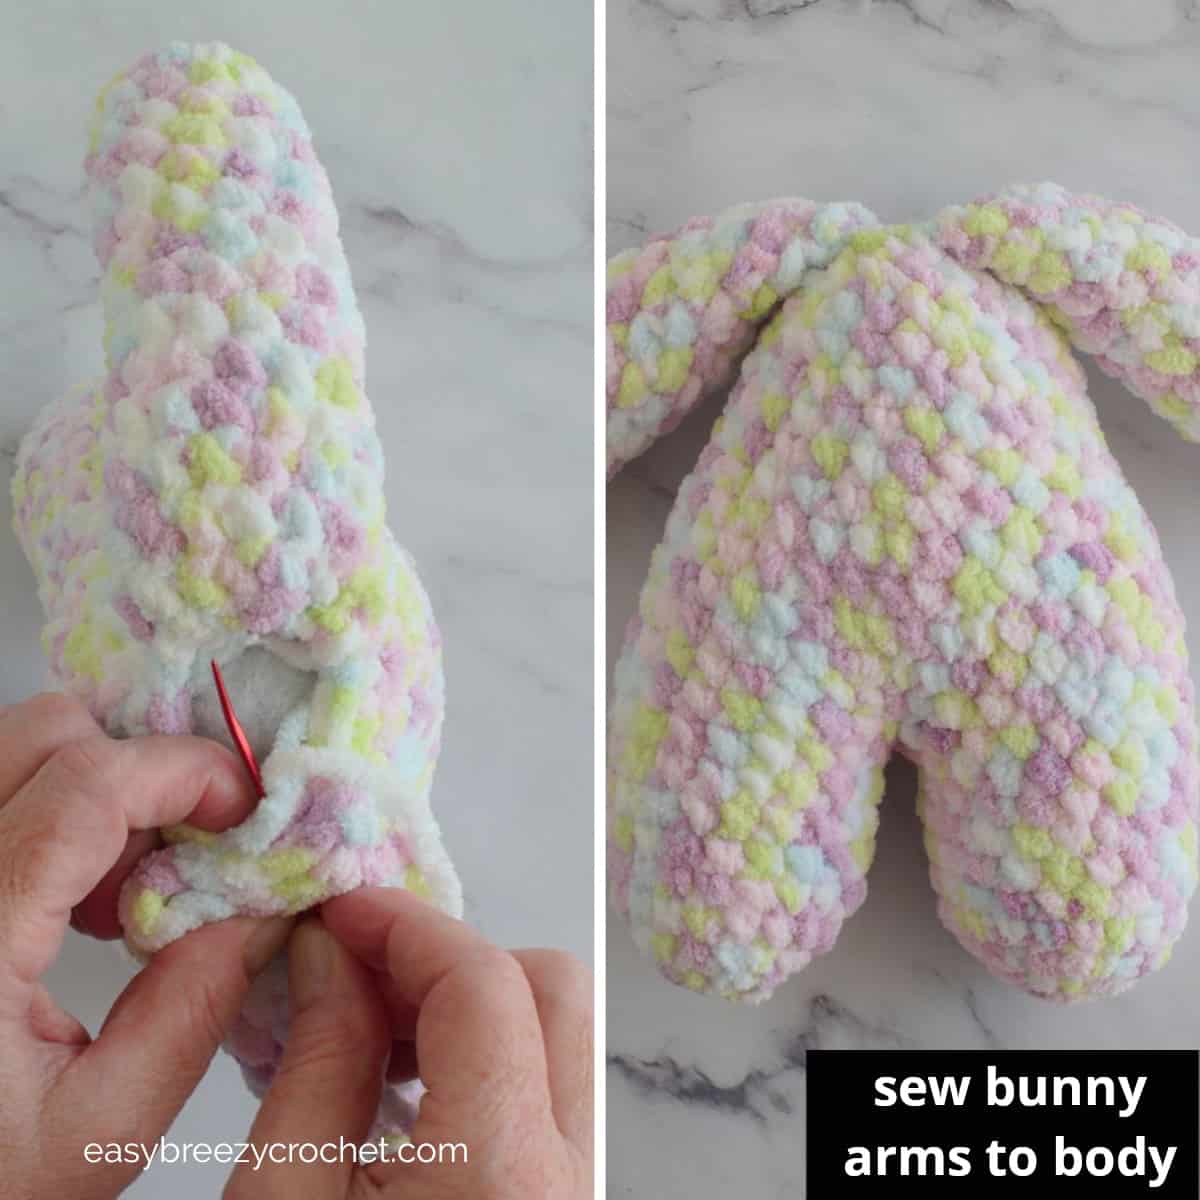
Finish the arms
Finishing the arms - Lightly stuff the arms, placing a little more stuffing at the bottom of the arms, reducing the stuffing as you get to about rounds 11 or 12, leaving the remaining arm section unstuffed.
Attach the arms to the side of the body at the neckline with a tapestry needle threaded with the yarn tail on each arm.
Bunny Head Pattern
The bunny head is made from a crochet sphere also known as an amigurumi ball.
Round One
Round 1 - Make 6sc into a magic ring, and pull the ring tight. [6 single crochet in this round]
Abbreviated version
Rnd 1 - 6sc in MR, pull ring tight. [6sc]
Round Two
Round 2 - Make 2 single crochet stitches in each of the next 6 stitches. [12 single crochets in this round.]
Abbreviated version
Rnd 2 - * 2sc in next st, rpt from * 6 times. [12sc]
Round Three
Round 3 - * Make 1 single crochet in the next stitch, then 2 single crochet in the next stitch, repeat from* 6 times. [18 single crochets in this round.]
Abbreviated version
Rnd 3 - * 1sc in next st, 2sc in next st, rpt from * 6 times. [18sc]
Round Four
Round 4 - * Make 1 single crochet in each of the next 2 stitches, then 2 single crochet in the next stitch, repeat from* 6 times. [24 single crochets in this round.]
Abbreviated version
Rnd 4 - * 1sc in each of next 2-sts, 2sc in next st, rpt from * 6 times. [24sc]
Round Five
Round 5 - * Make 1 single crochet in each of the next 3 stitches, then 2 single crochet in the next stitch, repeat from* 6 times. [30 single crochets in this round.]
Abbreviated version
Rnd 5 - * 1sc in each of next 3-sts, 2sc in next st, rpt from * 6 times. [30sc]
Round Six
Round 6 - * Make 1 single crochet in each of the next 4 stitches, then 2 single crochet in the next stitch, repeat from* 6 times. [36 single crochets in this round.]
Abbreviated version
Rnd 6 - * 1sc in each of next 4-sts, 2sc in next st, rpt from * 6 times. [36sc
Rounds Seven to Twelve
Rounds 7-12 -1 single crochet in each of the next 36 stitches. [36 single crochet in each round.]
Abbreviated version
Rnds 7-12 - 1sc in next 36-sts. [36sc in each rnd]
Round Thirteen
Round 13 - * Make 1 single crochet in each of the next 4 stitches, then make an invisible decrease, repeat from * 6 times. [You should now have 30 single crochets in this round.]
Abbreviated version
Rnd 13 - * 1sc in next 4-sts, invdec, rpt from * 6 times. [30sc]
Round Fourteen
Round 14 - * Make 1 single crochet in each of the next 3 stitches, then make an invisible decrease, repeat from * 6 times. [You should now have 24 single crochets in this round.]
Abbreviated version
Rnd 14 - * 1sc in next 3-sts, invdec, rpt from * 6 times. [24sc]
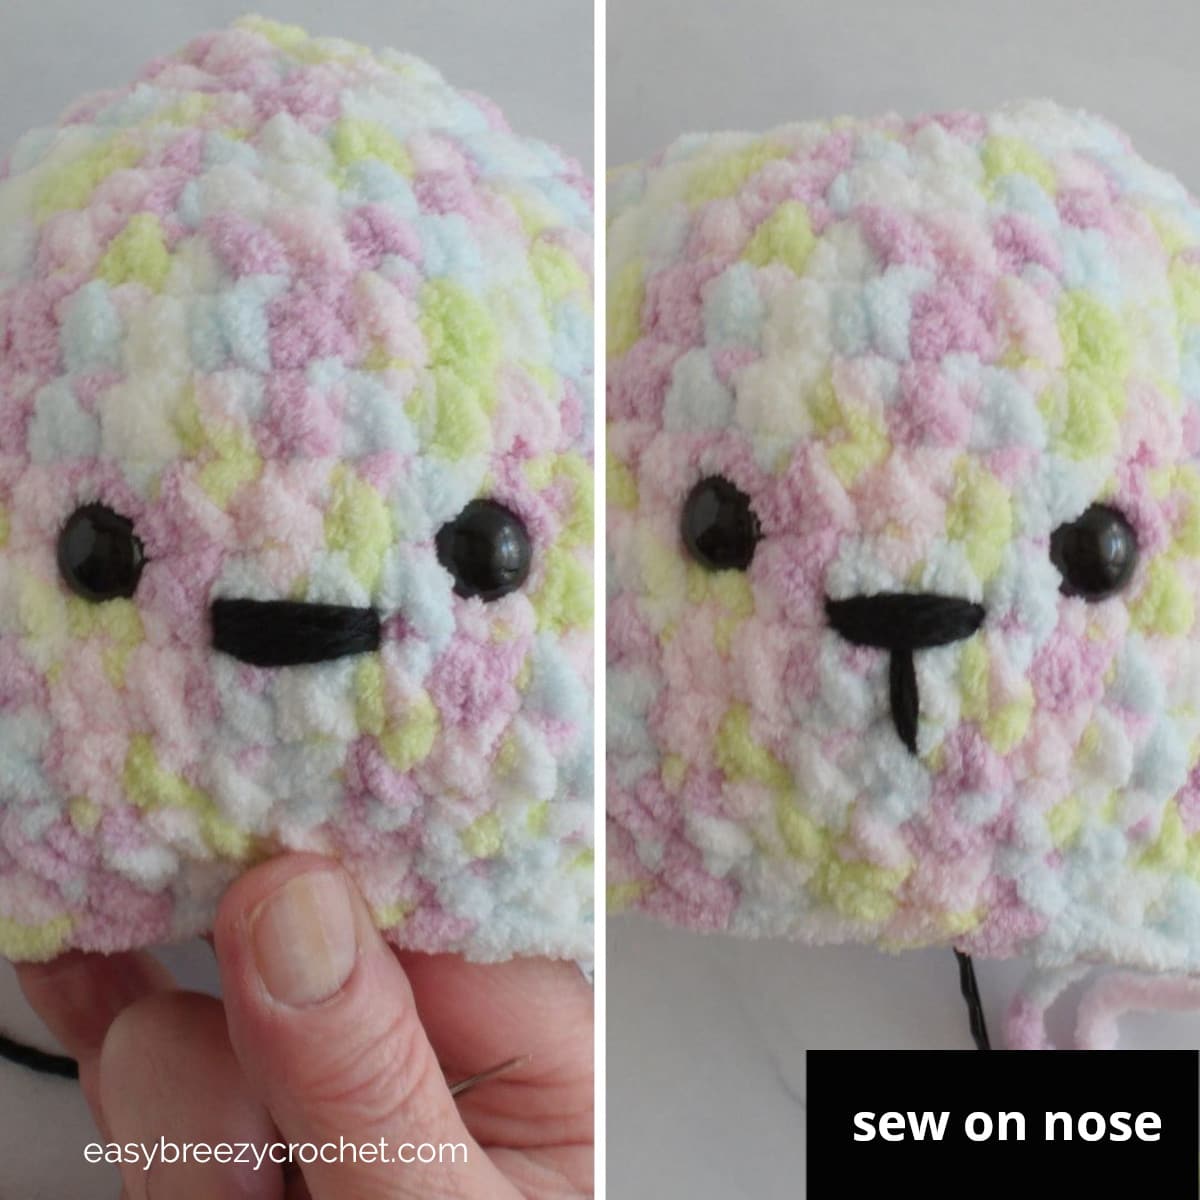
Attach the eyes - Position the safety eyes between rounds 9 and 10, spacing them 5 stitches apart.

Embroider the nose - Position the nose between rounds 10 and 11 and evenly between the eyes.
Using pink or black yarn, make three back stitches between three single crochet stitches in the space between rounds 10 and 11, entering and exiting the stitches in the same space. Then create two long downward backstitches to complete the nose.
Round Fifteen
Round 15 - * Make 1 single crochet in each of the next 2 stitches, then make an invisible decrease, repeat from * 6 times. [You should now have 18 single crochets in this round.]
Abbreviated version
Rnd 15 - * 1sc in next 2-sts, invdec, rpt from * 6 times. [18sc]
Round Sixteen
Round 16 - * Make 1 single crochet next stitch, then make an invisible decrease, and repeat from * 6 times. [You should now have 12 single crochets in this round.]
Abbreviated version
Rnd 16 - * 1sc in next st, invdec, rpt from * 6 times. [12sc]
Firmly fill the head with toy stuffing.
Round Seventeen
Round 17 - * Invisible decrease, repeat 6 times, chain 1, cut yarn leaving a 6-inch (15cm) yarn tail, and fasten off. [You should now have 6 single crochets in this round.]
Abbreviated version
Rnd 17 - * Invdec, rpt from * 6 times, ch1, cut yarn leaving a 6-inch (15cm) yarn tail and fasten off. [6sc]
Attach head to body - Thread the yarn tail from the head onto a tapestry needle and stitch the head to the body between the arms.

Bunny Ears Crochet Pattern (make 2)

Round One
Round 1, color B - Make 7sc into a magic ring, and pull the ring tight. [7 single crochet in this round]
Abbreviated version
Rnd 1, col B - 7sc in MR, pull ring tight. [7sc]
Round Two
Round 2 - Make 2 single crochet stitches in each of the next 7 stitches. [14 single crochets in this round.]
Abbreviated version
Rnd 2 - * 2sc in next st, rpt from * 7 times. [14sc]
Round Three
Round 3 - * Make 1 single crochet in the next stitch, then 2 single crochet in the next stitch, repeat from* 7 times. [21 single crochets in this round.]
Abbreviated version
Rnd 3 - * 1sc in next st, 2sc in next st, rpt from * 7 times. [21sc]
Rounds Four to Thirteen
Rounds 4-13 - Make 1 single crochet in each of the next 21 stitches. [21 single crochets in each round.]
Abbreviated version
Rnds 4-13 - 1sc in each of the next 21-sts. [21sc in each rnd]
Round Fourteen
Round 14 - * Make 1 single crochet in each of the next 2 stitches, then make an invisible decrease, repeat from * 5 times, then make 1 single crochet. [You should now have 16 single crochets in this round.]
Abbreviated version
Rnd 14 - * 1sc in next 2-sts, invdec, rpt from * 5 times, 1sc. [16sc]
Rounds Fifteen to Twenty Two
Rounds 15-22 -Make 1 single crochet in each of the next 16 stitches. [16 single crochets in each round.]
Abbreviated version
Rnds 15-22 - 1sc in each of the next 16-sts. [16sc in each rnd]
Round Twenty Three
Round 23 - [8 single crochets in this round.]
Abbreviated version
Rnd 23 - Close the ear by crocheting pressing the opening closed and treating both layers as one stitch. Make 1sc in each of the next 8-sts, cut yarn, leaving a 6-inch (15cm) yarn tail, and fasten off.

This completes one ear. Repeat rounds 1 - 23 to make the second ear.
Attach Ears To Head - Stitch one the ear to one side of the head between rounds 2 and 3 using the yarn tail threaded onto a yarn needle. Then repeat the above for the second ear.
Crochet Bunny Tail
Round One
Round 1 - Make 6sc into a magic ring, and pull the ring tight. [6 single crochet in this round]
Abbreviated version
Rnd 1 - 6sc in MR, pull ring tight. [6sc]
Round Two
Round 2 - Make 2 single crochet stitches in each of the next 6 stitches. [12 single crochets in this round.]
Abbreviated version
Rnd 2 - * 2sc in next st, rpt from * 6 times. [12sc]
Round Three
Round 3 - Make 1 single crochet in each of the next 12 stitches. [12 single crochets in each round.]
Abbreviated version
Rnd 3 - 1sc in each of the next 12-sts. [12sc in each rnd]
Round Four
Round 4 - *Invisible decrease, repeat from * 6 times, chain 1, cut yarn leaving a 6-inch (15cm) yarn tail, and fasten off. [You should now have 6 single crochets in this round.]
Abbreviated version
Rnd 4 - *Invdec, rpt from * 6 times, ch1, cut yarn leaving a 6-inch (15cm) yarn tail and fasten off. [6sc]
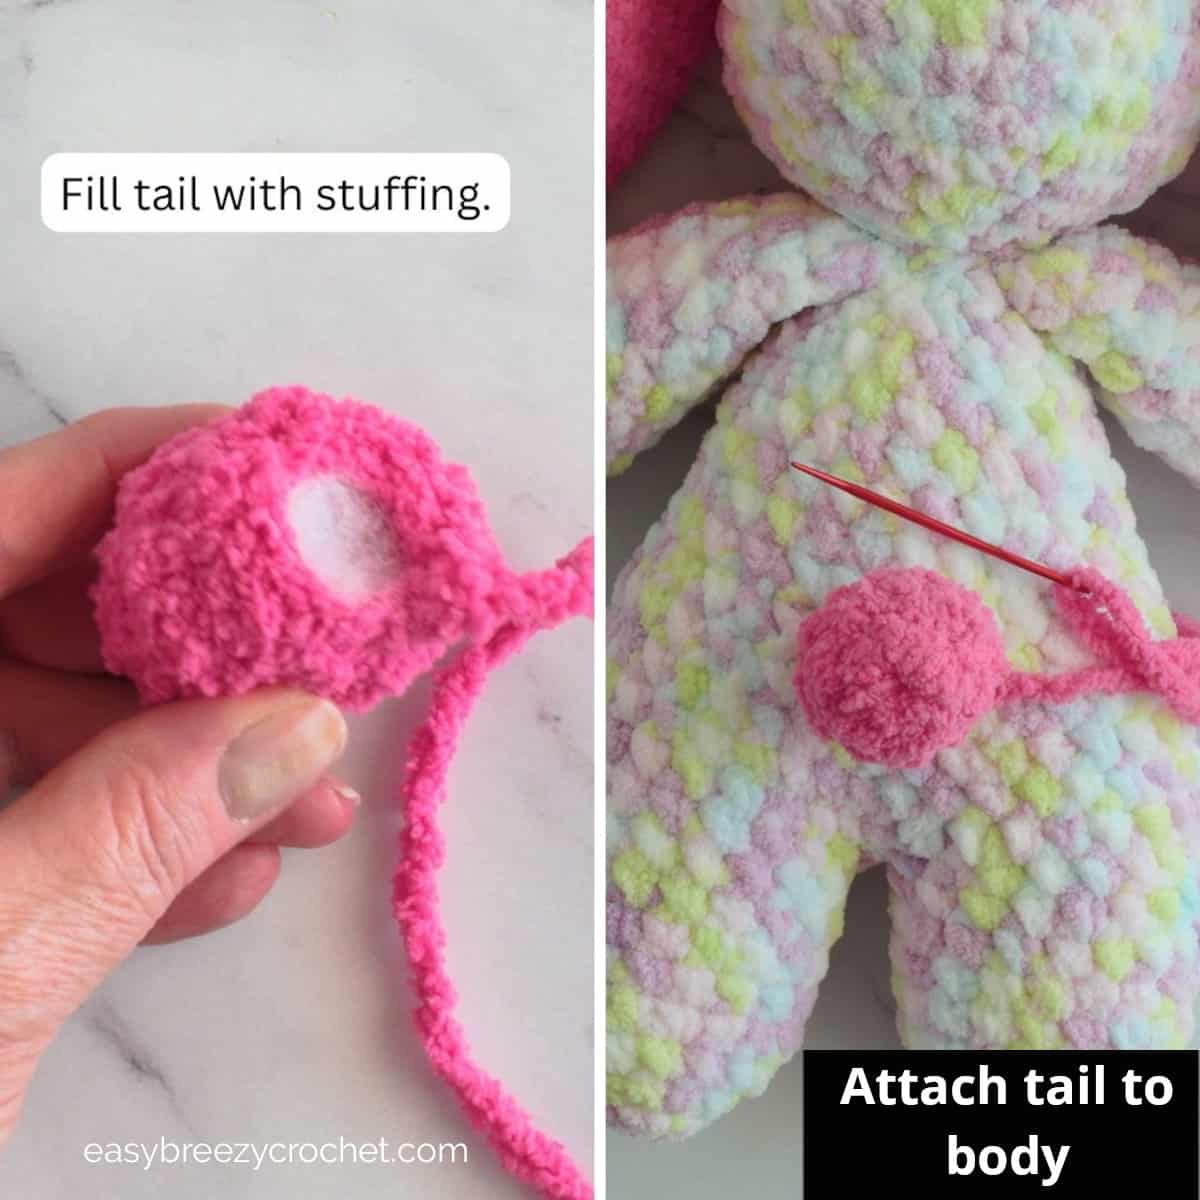
Finish the bunny tail - Lightly fill the tail with stuffing and stitch it into place on the bunny's bottom.
In closing, we hope try this free crochet bunny rabbit pattern and have fun making your for gifting or as an Easter bunny.
These cute bunnies can brighten up your Easter celebration as decorations or gifts.
Crocheting isn't just about the finished bunny-it is about the love and creativity you put into every stitch.
We would love to see your creations, so feel free to share them with us and your friends. Happy crocheting!
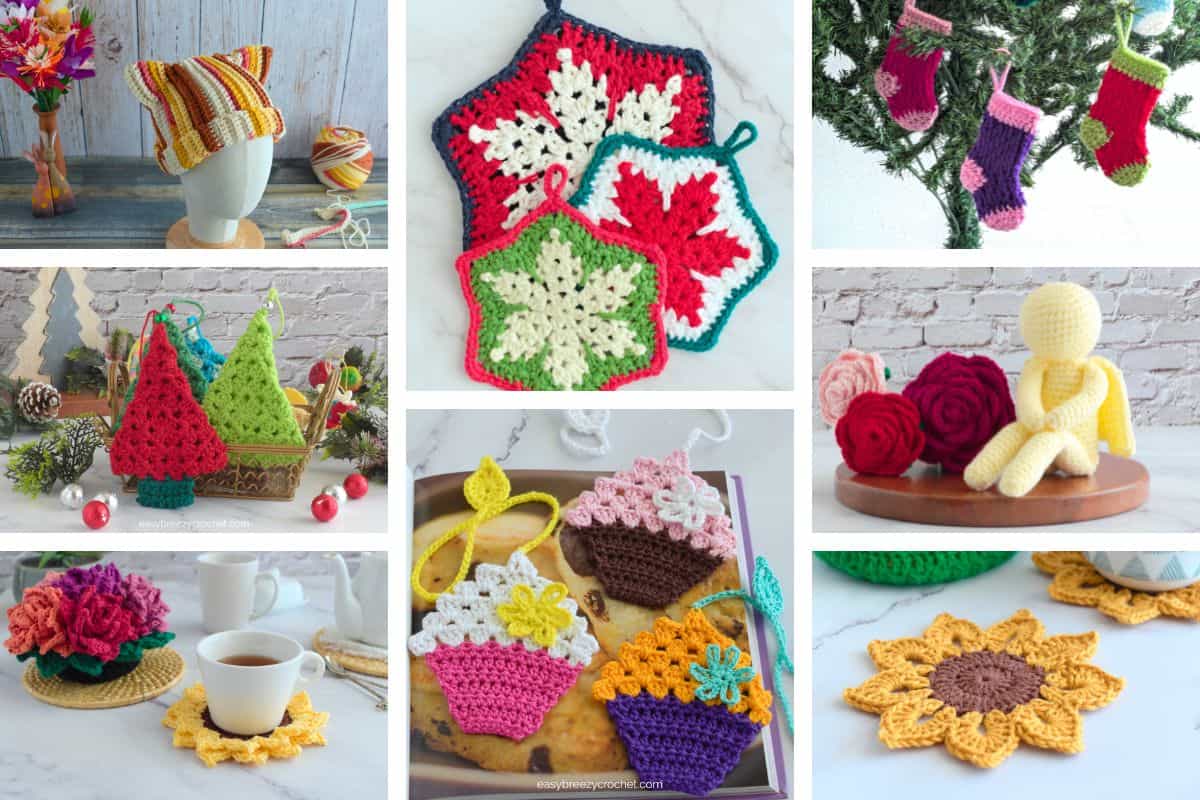
More Free Crochet Patterns
You might also like this easy crochet octopus pattern or this easy crochet bunny pattern (Wilbur) or these other free crochet patterns:
- Crochet strawberry keychain
- Small crochet drawstring pouch
- Fall crochet scarf
- Reusable crochet face scrubbies
- Crochet granny heart coaster
- 8 petal crochet flower coasters
- Small crochet basket pattern with handles
- Moss stitch crochet dishcloth
- Crochet flower bookmark
- Crochet basket with handles
- Free cat amigurumi pattern

Quick Crochet Reference Guide
Not sure which hook to pair with your yarn? This free yarn weight & hook size chart makes it easy, with clear guides for:
- Yarn weights and recommended hook sizes
- Conversions between US, UK, and metric sizes
- Quick references for common projects with each yarn weight
Download your free Yarn Weight & Hook Size Chart (printable PDF)
Print it, save it on your phone, or keep it right next to you while crocheting.
Amigurumi
- Crochet Bunny Pouch - Easy No Sew Pattern
- Crochet Halloween Bat - Cedric
- Crochet Mini Octopus Pattern
- Small Crochet Turtle Pattern - Zippy


Stay Connected
Pin this post - Pin now to and take your skills to the next level.
Leave a comment - We're excited to hear your thoughts! Leave a comment below and let us know what you think.
Share on Instagram or Facebook - Capture the beauty of your finished crochet projects and share it on Instagram or Facebook! Tag us @easybreezycrochet or #ebcrochetcreations so we can see your work!
Learn To Crochet
If you are new to crochet and would like to learn more. You might like these:
- Basic crochet stitches for beginners
- How to crochet for beginners
- Crochet terms and abbreviations
- How to read a crochet pattern for beginners
- How to read a yarn label
- How to hold yarn when crocheting
Copyright Notice - This pattern and its contents are protected by copyright law. It may not be copied, altered, redistributed, resold, translated, or used to produce video tutorials in any format, either in whole or in part.
You are permitted to sell finished items made using this pattern. However, the written pattern itself may not be sold, shared, or distributed in any form. When marketing or displaying your finished items, please photograph your own work and refrain from using any of my original images.
Sharing Guidelines For Roundups - Bloggers you are welcome to include this pattern in roundup posts, as long as you use one photo and link directly back to the original post. For full details, please refer to my Terms of Use page.


Comments
No Comments